Loading ...
Loading ...
Loading ...
33
CONTENTS
SETTING UP
SEWING
UTILITY
STITCHES
MY CUSTOM
STITCH
TM
(CREATE YOUR OWN
STITCH DESIGNS)
EMBROIDERING
MAINTENANCE
ERROR
MESSAGES
SEWING CHART
PATTERNS
(PROGRAMMED
IN MACHINE)
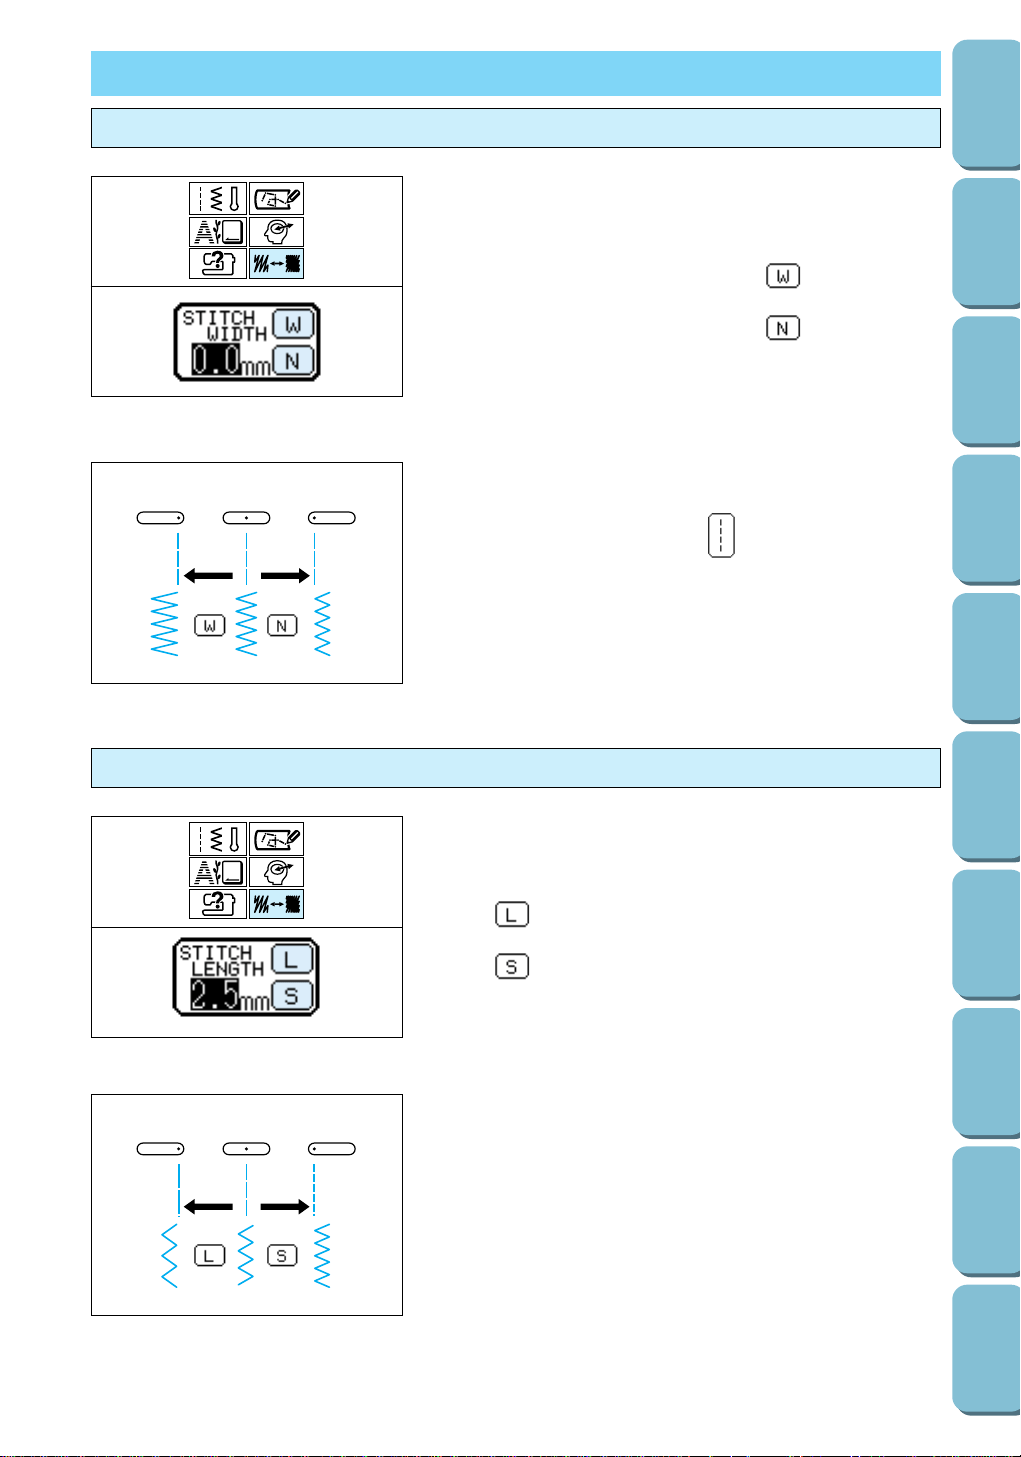
STITCH WIDTH & LENGTH
Adjusting the needle position (stitch width)
1. Select a stitch, and then press the STITCH ADJUST key.
2. Adjust the needle position (stitch width).
To move the needle toward the right (increase the stitch
width), press the STITCH WIDTH key (wider).
To move the needle toward the left (decrease the stitch
width), press the STITCH WIDTH key (narrower).
The stitch length setting changes each time one of these
keys is pressed.
3. After making the adjustment, press the END key.
123
Note
– The needle position cannot be changed for the straight
stitch (center needle position) ( ).
– The default stitch width setting for the selected stitch is
highlighted in black.
1 Needle moved toward the right (wider stitch)
2 Needle positioned in the center (standard stitch width)
3 Needle moved toward the left (narrower stitch)
Adjusting the stitch length
123
1. Select a stitch, and then press the STITCH ADJUST key.
2. Adjust the stitch length.
To increase the stitch length, press the STITCH LENGTH
key (longer).
To decrease the stitch length, press the STITCH LENGTH
key (shorter).
The stitch length setting changes each time one of these
keys is pressed.
3. After making the adjustment, press the END key.
Note
– When sewing straight stitches with 4.5 mm or 5.0 mm length
setting on fabric less than 5/128˝ (1.0 mm) thick, the stitch
length automatically adjusts to 5/32˝ (4.0 mm) at the start of
sewing in order to prevent gathering.
– The default stitch length setting for the selected stitch is
highlighted in black.
1 Longer stitch
2 Medium stitch length
3 Shorter stitch
Loading ...
Loading ...
Loading ...