Loading ...
Loading ...
Loading ...
5
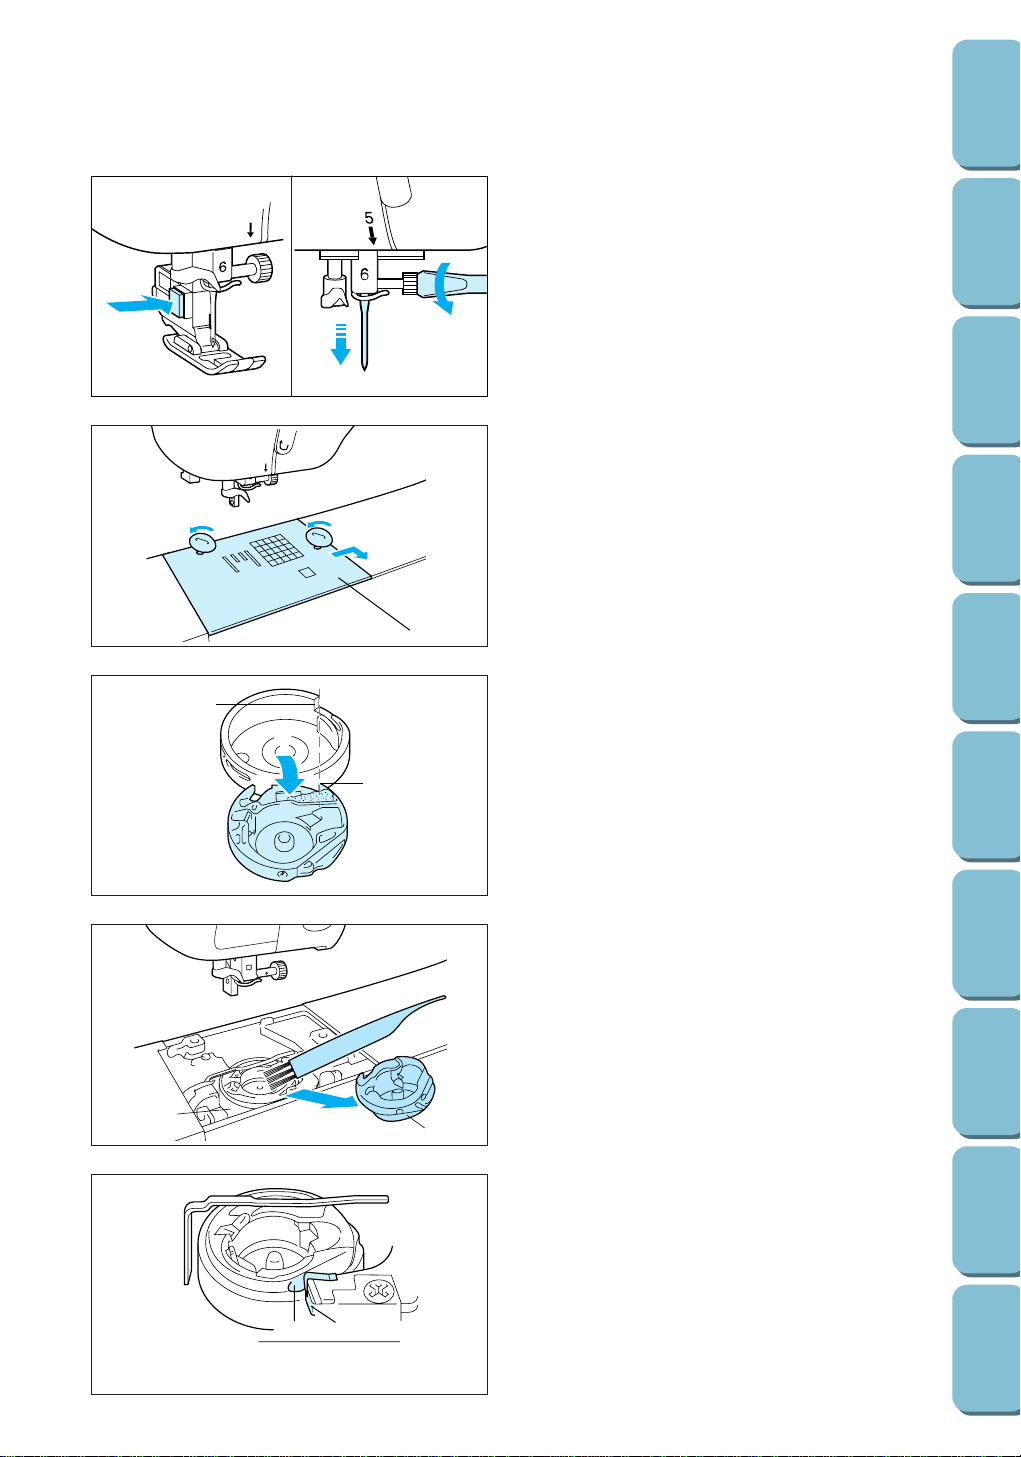
1. Set the main power switch to “ O ”, and then
remove the presser foot holder and the
needle.
5
3
1
2. Loosen the screws with the enclosed
screwdriver or disc-shaped screwdriver.
3. Remove the needle plate.
1 Needle plate
1
2
4. Turn the balance wheel towards you until the
edge of the notch in the shuttle aligns with the
edge of the race shelf, and then remove the
race.
1 Edge of notch in shuttle
2 Edge of race shelf
6
5
2
1
12
5. Take out the shuttle.
6. Remove accumulated lint and thread from the
inside of the shuttle and race with a brush or a
vacuum cleaner.
1 Race
2 Shuttle
7. Insert the shuttle by aligning the projection on
the shuttle with the spring on the stopper.
1 Projection
2 Spring
Note
Lint and dust accumulated in the race will
sometimes cause poor stitching or a malfunction
of the bobbin thread sensor.
123
CONTENTS
SETTING UP
SEWING
UTILITY
STITCHES
MY CUSTOM
STITCH
TM
(CREATE YOUR OWN
STITCH DESIGNS)
EMBROIDERING
MAINTENANCE
ERROR
MESSAGES
SEWING CHART
PATTERNS
(PROGRAMMED
IN MACHINE)
Loading ...
Loading ...
Loading ...