Loading ...
Loading ...
Loading ...
1
9
2
34 5 6 8
A07
B
One-point patterns
Character & frame patterns
3.
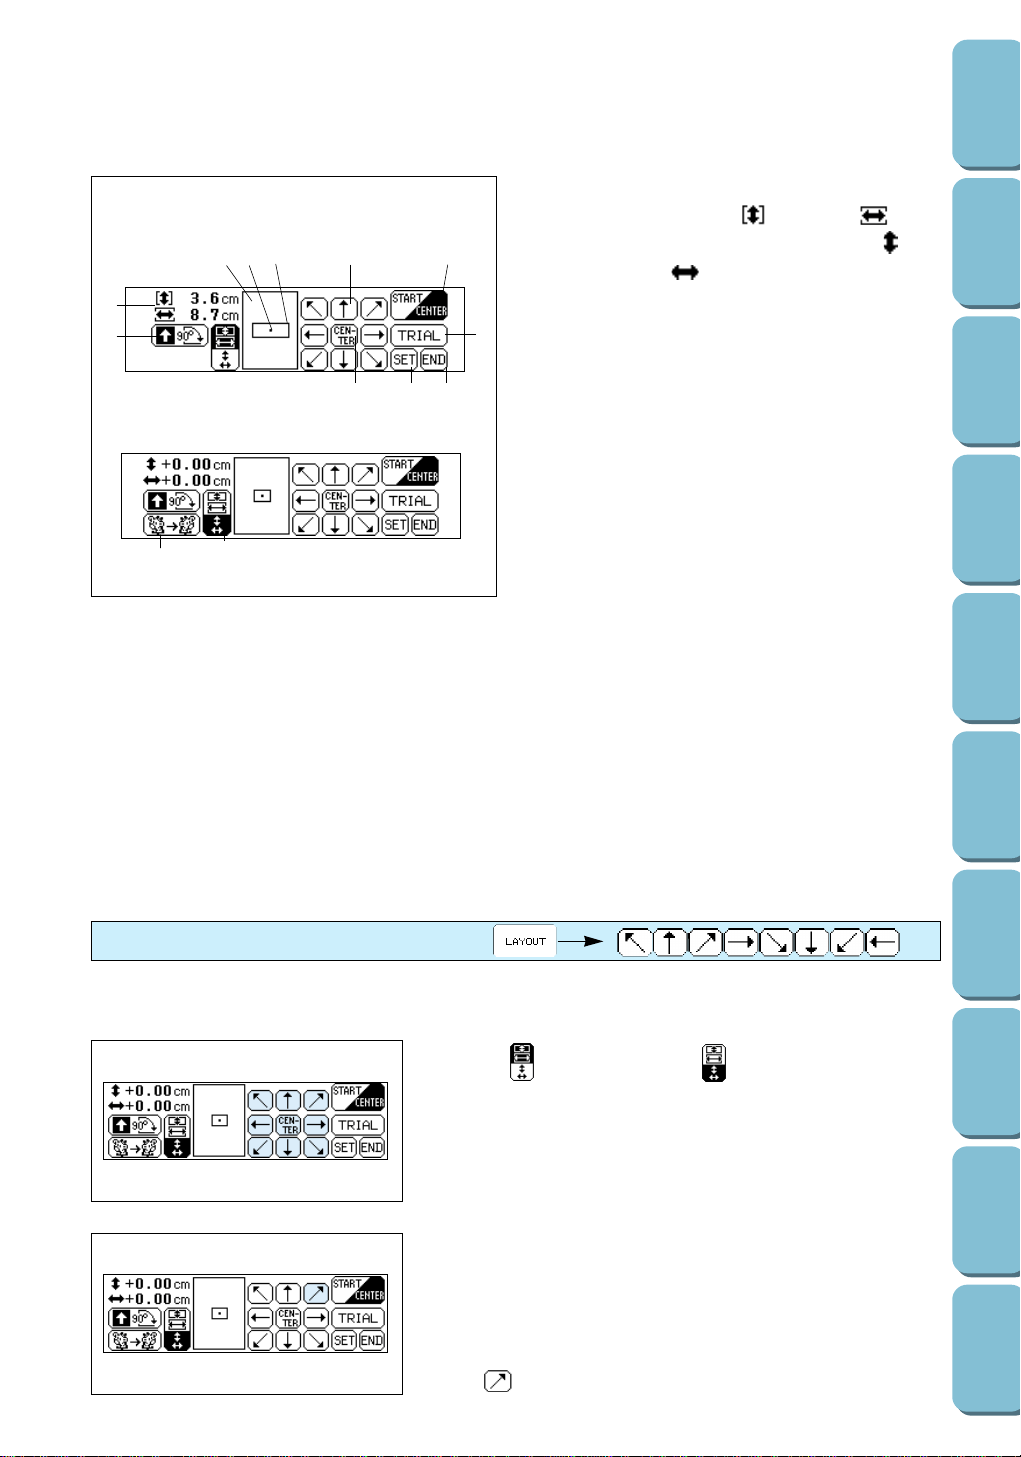
Change the position and sewing direction of the pattern.
1 Either the height( )and width( )of the
current pattern or its horizontal( )and
vertical( )embroidering position from
the center are displayed here.
Note
Characters and patterns may sometimes be
displayed slightly larger than in actual size.
2
Press this key to rotate the selected pattern
90° clockwise. (Refer to page 106.)
3 This indicates the entire area of the frame
where embroidery can be sewn.
4 This indicates the current position where
the needle will be dropped in relation to
the embroidery area of the pattern.
5 This indicates the embroidering position
and embroidery area for the current
pattern at the selected size.
6
Press these keys to move the embroidering
position of the pattern within the embroidery
area. (Refer to the section below.)
7 Press this key to return the embroidering position to the center of the embroidery area.
8 Press this key to move the needle position either to the middle of the pattern or to the sewing start
point. Use it when you would like to change the embroidering position. (Refer to page 107.)
9 Press this key to move the embroidery frame so that it traces the area required for the selected
design, allowing you to check the embroidering position.(Refer to page 107.)
0 Press this key to return to the screen that was previously displayed.
A Press this key to return to the pattern screen.
B Press this key to flip the pattern horizontally (change it to its mirror image). (Refer to page 106.)
Note
This function may not be available for use with some patterns.
C Press this key to switch the display between the size and the embroidering position.
4. After making the desired adjustments, press the END key.
Changing the embroidering position
1.
Press so that it appears as to display the position of the
embroidery pattern.
2.
Press the arrow key for the direction in which you would like
to move the pattern. If the arrow key is pressed once, the
pattern moves one step; if the key is pressed continuously,
the pattern moves continuously.
Note
– Press the CENTER key to return the embroidering position
to the center.
– Use the hole on embroidery foot Q as a guide.
– Never lower the needle while the embroidery frame is
moving.
Example: To move the embroidering position toward
the upper-right corner
Press .
C
CAUTION
After moving a pattern, check that it fits within the installed embroidery frame. (Refer to page 107 for more details.) If the
pattern does not fit correctly within the embroidery frame, the embroidery foot may touch the frame, possibly causing injuries.
105
CONTENTS
SETTING UP
SEWING
UTILITY
STITCHES
MY CUSTOM
STITCH
TM
(CREATE YOUR OWN
STITCH DESIGNS)
EMBROIDERING
MAINTENANCE
ERROR
MESSAGES
SEWING CHART
PATTERNS
(PROGRAMMED
IN MACHINE)
Loading ...
Loading ...
Loading ...