Loading ...
Loading ...
Loading ...
86
CONTENTS
SETTING UP
SEWING
UTILITY
STITCHES
MY CUSTOM
STITCH
TM
(CREATE YOUR OWN
STITCH DESIGNS)
EMBROIDERING
MAINTENANCE
ERROR
MESSAGES
SEWING CHART
PATTERNS
(PROGRAMMED
IN MACHINE)
SETUP
EMBROIDERING CHAPTER 5
CAUTION
Be sure to turn off the power before attaching embroidery foot Q. If the power is left on and the start/stop
button is accidentally pressed, the machine will start operating, which could result in serious injury.
Installing embroidery foot Q
5
1. Press the needle position button to raise the needle, and
then turn off the sewing machine.
2. Raise the presser foot lever.
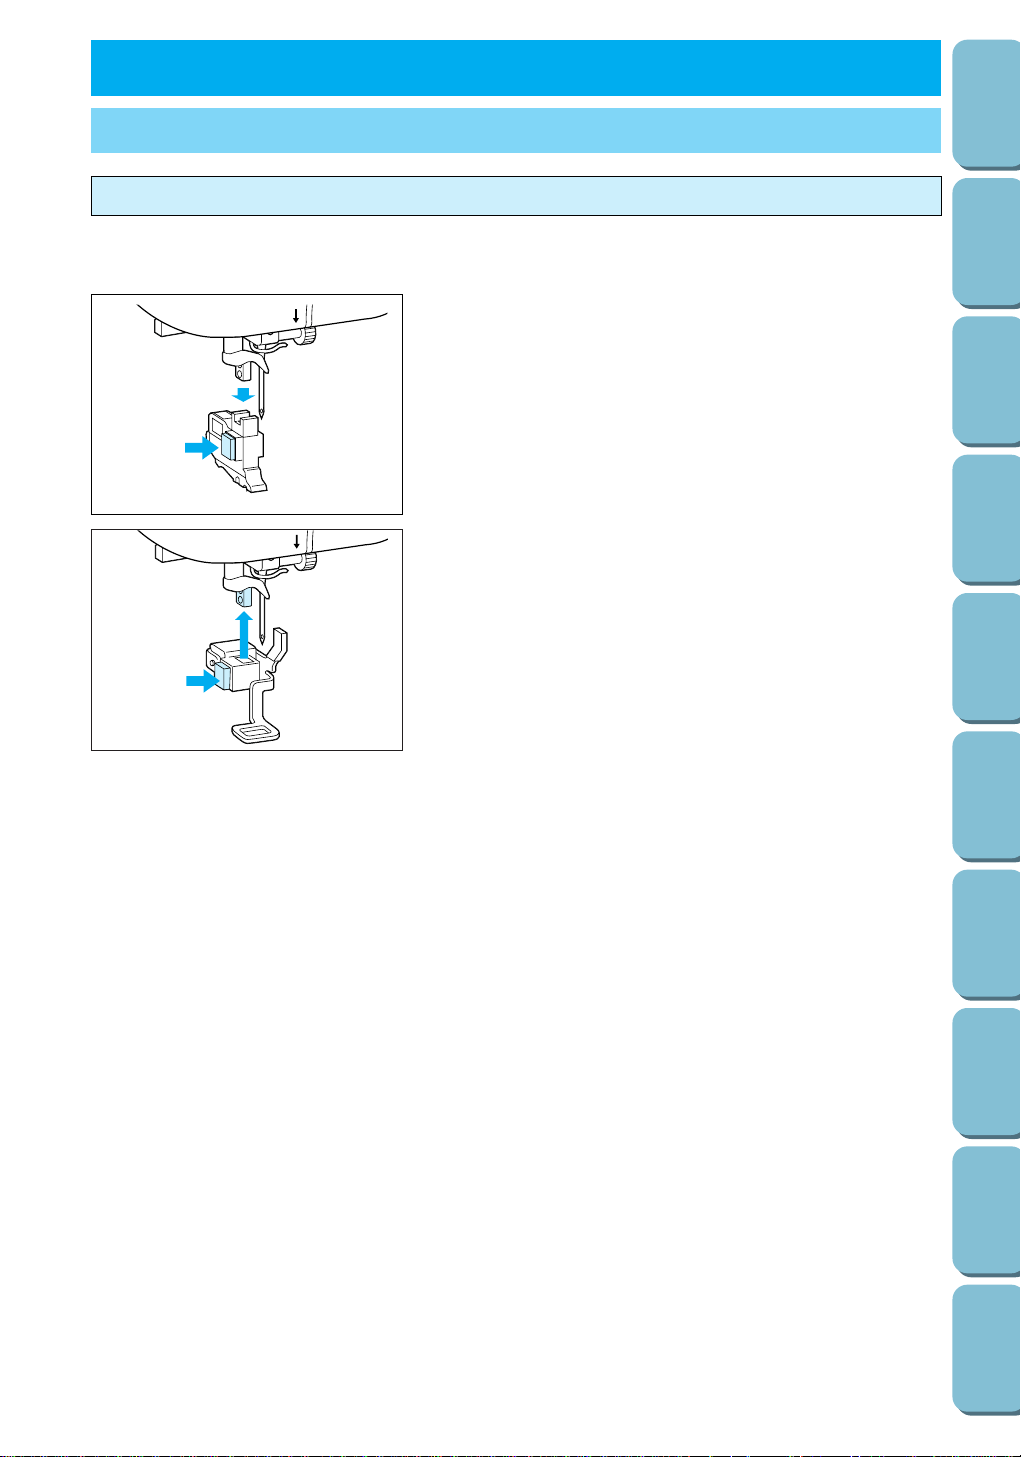
3. With the enclosed screwdriver or disc-shaped screwdriver,
loosen the screw on the presser foot holder, and then pull
the holder downward to remove it.
1 Presser foot holder
5
4. Slide the bracket on embroidery foot Q up onto the presser
foot bar, and then fasten it by firmly tightening the screw
with the enclosed screwdriver or disc-shaped screwdriver.
1 Embroidery foot Q
CAUTION
Be careful not to touch the tip of the needle, otherwise
injuries may occur.
Note
– Make sure that embroidery foot Q is tightly attached to the
presser foot bar.
– It is recommended that a 90/14-size needle be used when
embroidering thicker fabrics such as denim or when using
stabilizing products such as puffy foam. A 75/11-size needle
might bend or break, which could result in injuries.
Loading ...
Loading ...
Loading ...