Loading ...
Loading ...
Loading ...
77
CONTENTS
SETTING UP
SEWING
UTILITY
STITCHES
MY CUSTOM
STITCH
TM
(CREATE YOUR OWN
STITCH DESIGNS)
EMBROIDERING
MAINTENANCE
ERROR
MESSAGES
SEWING CHART
PATTERNS
(PROGRAMMED
IN MACHINE)
1
3
2
5
0
0 5 10 15 20 25 30 35 40 45 50 55
10
14
0
mm 5mm 10mm 15mm 20mm
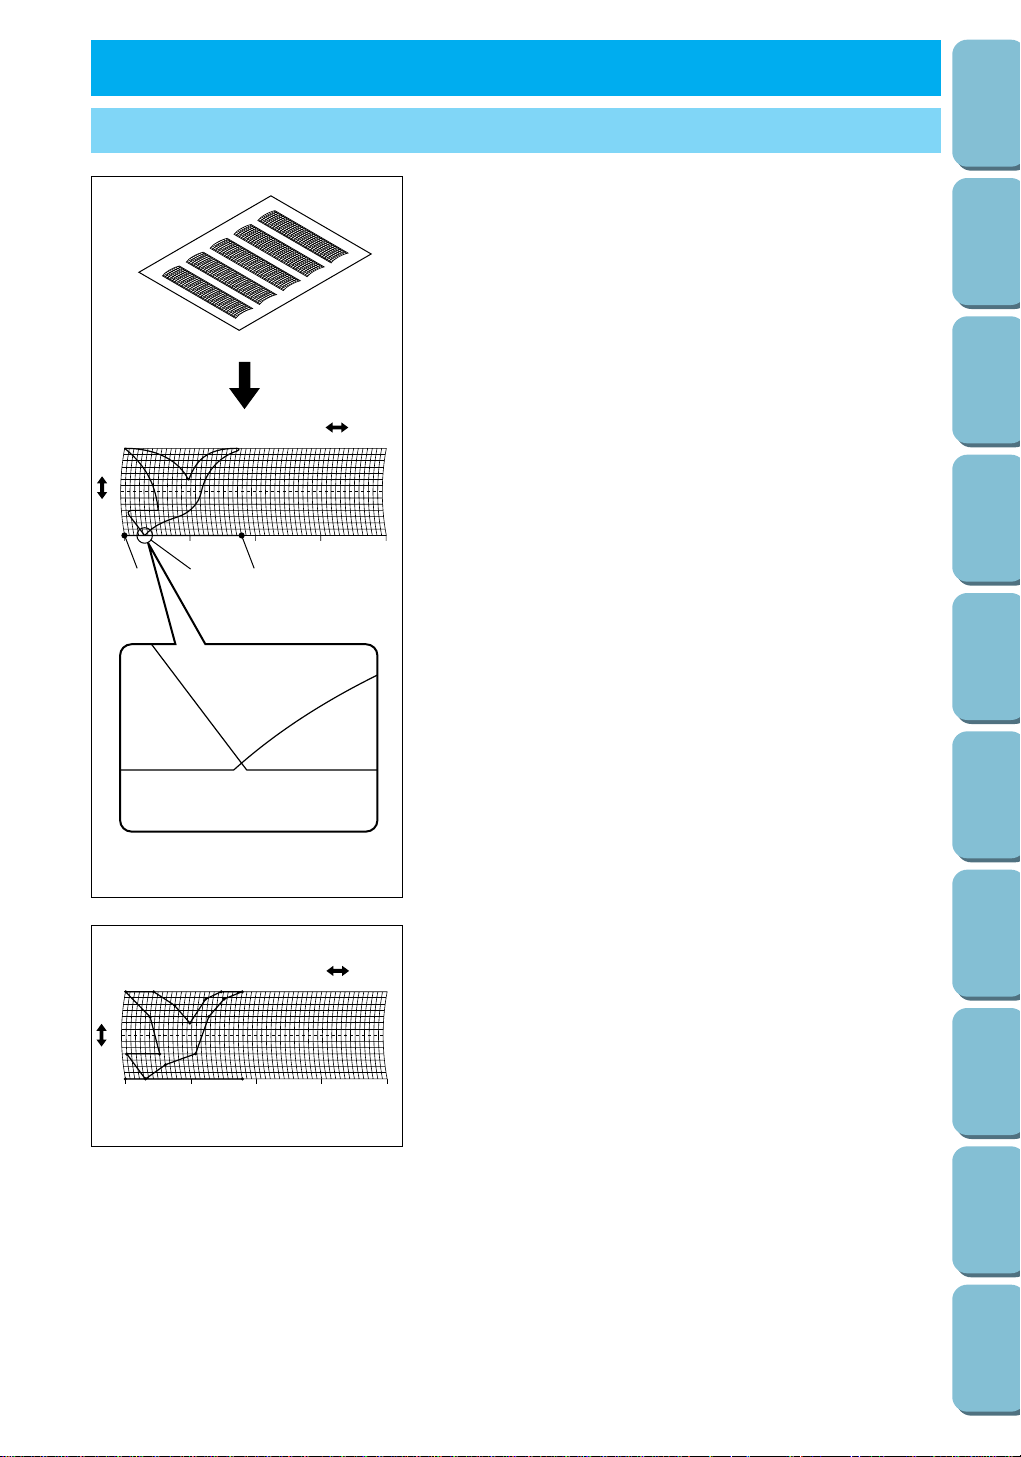
With the MY CUSTOM STITCHTM function, you can sew
designs that you create yourself.
Note
– Stitches that you create with MY CUSTOM STITCH
TM can
be a maximum of 9/32" (7 mm) wide and 1-1/3" (33 mm)
long.
– Stitches can be designed more easily with MY CUSTOM
STITCH
TM if you draw the stitch on the enclosed grid sheet
first.
1. Draw the stitch design on the grid sheet (part code SA500,
X80948-001).
1 Start point
2 End point
3 Intersection
Note
– Simplify the design so that it can be sewn as a continuous
line. For a more attractive stitch, close the design by
intersecting lines.
– If the design will be repeated and linked, the start point and
end point of the design should be at the same height.
Grid sheet
5
0
0 5 10 15 20 25 30 35 40 45 50 55
10
14
0
mm 5mm 10mm 15mm 20mm
2. Mark the points in the design where the direction of the
stitching changes.
3. Determine the x and y coordinates of each of the marked
points. This will determine the design of the stitching that will
be sewn.
DESIGNING THE STITCH
MY CUSTOM STITCHTM (CREATE YOUR OWN STITCH DESIGNS) CHAPTER 4
Loading ...
Loading ...
Loading ...