Loading ...
Loading ...
Loading ...
1. Turn on the sewing machine. The message shown at the left
appears on the screen.
Note
If the buttonhole lever, the needle or the presser foot lever are
lowered or if the bobbin winding shaft is moved to the right, an
error message appears indicating the current error condition.
After the error condition is corrected, the message shown at the
left appears.
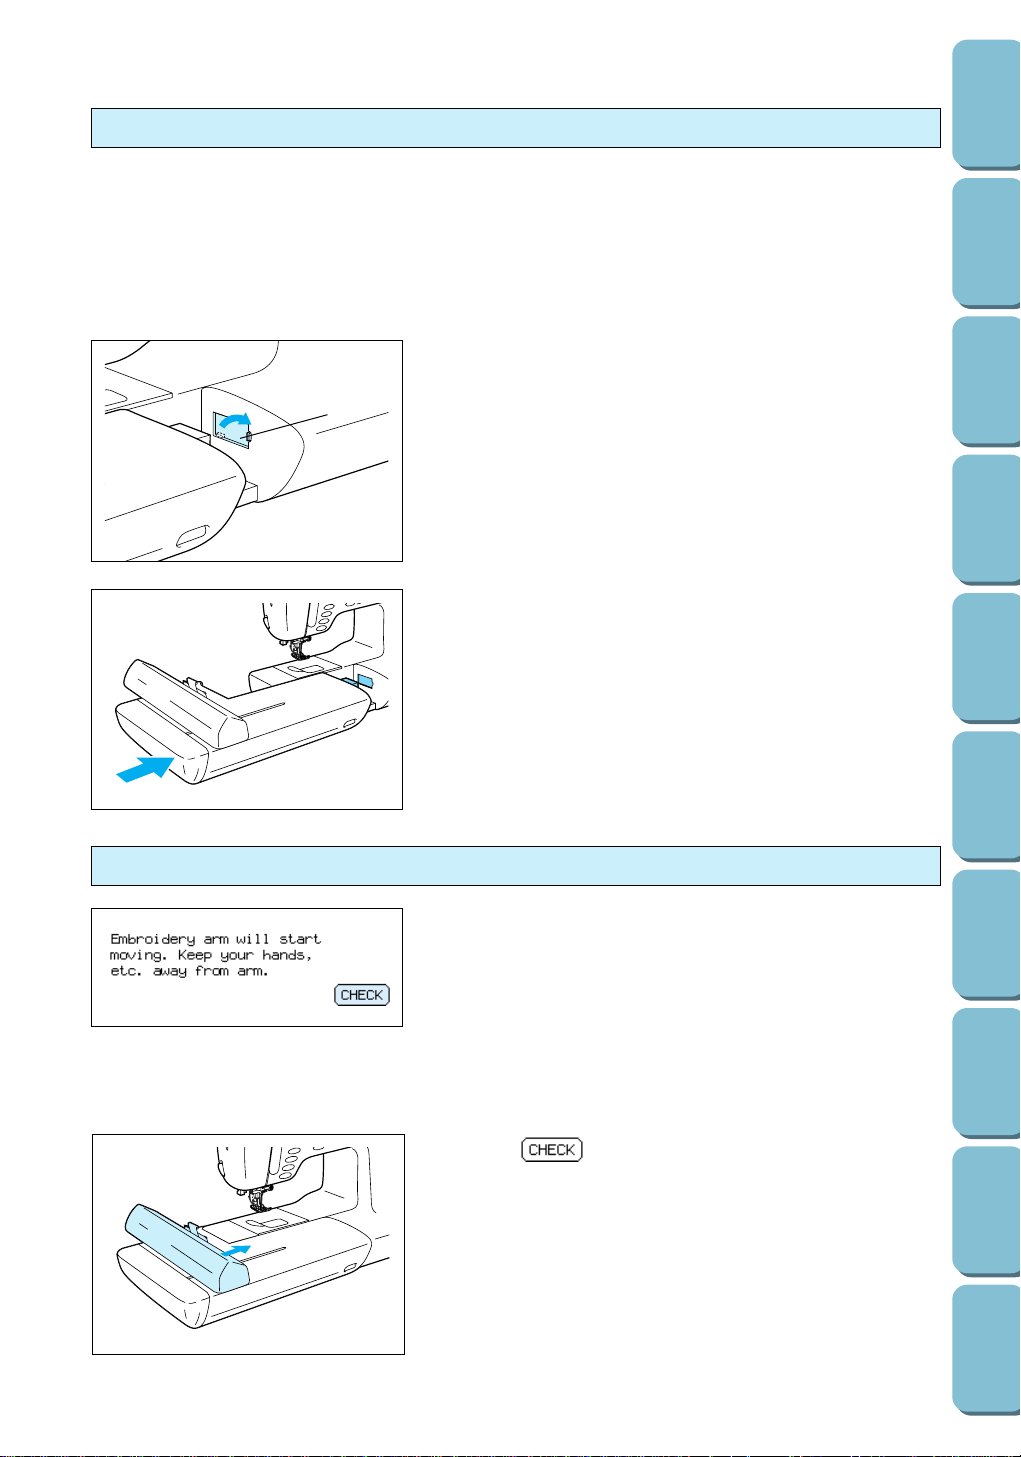
2. Press . The embroidery arm moves to its initial
position.
CAUTION
– Do not place your hands near the embroidery arm,
otherwise injuries may occur.
– Please note that the embroidery arm normally makes
noises while it moves to its initial position.
– If the embroidery unit could not be initialized normally,
a buzzer will sound. If this occurs, make sure that a
embroidery frame is not attached and try initializing the
embroidery unit again.
Initializing the embroidery unit
CAUTION
– Always turn off the main power switch before connecting or removing the embroidery unit.
– Do not touch the connector on the embroidery unit.
– The foot controller cannot be used when the embroidery unit is operational.
– When the embroidery unit is not being used, always store it in its box and packing materials.
– Do not carry the machine with the embroidery unit connected.
– Always set your machine on a flat, level surface.
1
1. Turn off the sewing machine.
2. Open the connecting slot by sliding the cover in the direction
indicated by the arrow.
1 Connecting slot cover
Note
When the embroidery unit is not being used, keep the
connecting slot cover closed.
3. Insert the connector on the embroidery unit firmly into the
connecting slot.
Note
With the sewing machine on a flat, level surface, slide the
embroidery unit towards the machine.
Installing the embroidery unit
87
CONTENTS
SETTING UP
SEWING
UTILITY
STITCHES
MY CUSTOM
STITCH
TM
(CREATE YOUR OWN
STITCH DESIGNS)
EMBROIDERING
MAINTENANCE
ERROR
MESSAGES
SEWING CHART
PATTERNS
(PROGRAMMED
IN MACHINE)
Loading ...
Loading ...
Loading ...