Loading ...
Loading ...
Loading ...
68
CONTENTS
SETTING UP
SEWING
UTILITY
STITCHES
MY CUSTOM
STITCH
TM
(CREATE YOUR OWN
STITCH DESIGNS)
EMBROIDERING
MAINTENANCE
ERROR
MESSAGES
SEWING CHART
PATTERNS
(PROGRAMMED
IN MACHINE)
APPLIQUÉ STITCHING
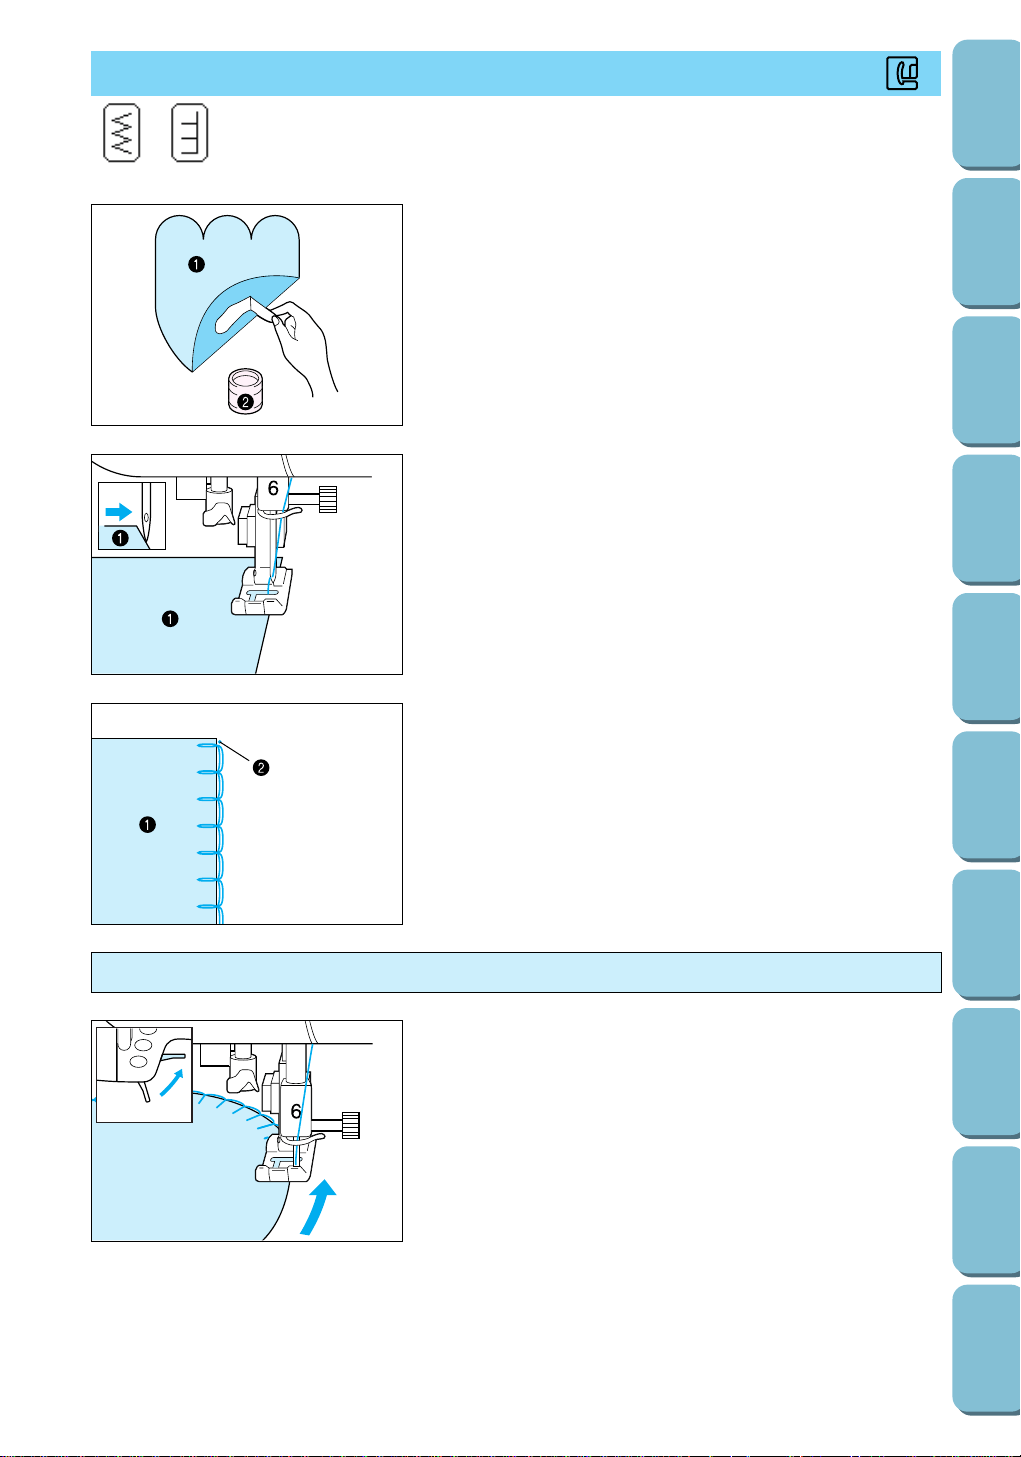
1. Use fabric glue or a basting stitch to attach the appliqué to
the fabric.
1 Appliqué
2 Fabric glue
Note
The appliqué should be attached with fabric glue or a basting
stitch so that it will not move during sewing.
2. Attach presser foot J, and check that the needle drops
slightly off the edge of the appliqué before starting to sew.
1 Appliqué
Note
If automatic thread cutting and automatic reverse/reinforcement
stitching are turned on before you start sewing, pressing just the
start/stop button automatically sews reinforcement stitches
before sewing. In addition, pressing the reverse/reinforcement
stitch button at the end of the stitching automatically sews
reinforcement stitches, trims the threads and stops the
machine.
3. Sew reinforcement stitches to finish sewing.
1 Appliqué
2 Needle drop point
J
Sewing around corners of the appliqué
1. Stop the machine with the needle positioned outside the
appliqué.
2. Raise the presser foot lever, and then turn the fabric as
needed to change the sewing direction.
1 Zigzag stitch
2 Appliqué
12
Loading ...
Loading ...
Loading ...