Loading ...
Loading ...
Loading ...
Emergencies
–
R
eplace the faulty bulb with a new identical
bulb.
–
Place the bulb holder in the headlight and
rotate to the right all the way.
–
Insert the connector
›››
Fig. 67
1
on the
bulb hol
der
2
. The connector must audibly
click int
o place.
–
Place the headlight into its position
›››
Fig. 67 (small arrows) and tilt it back-
wards.
–
Tighten the attachment screw
›››
Fig. 66
1
using the screwdriver.
–
Replace the cover on the bumper
›
››
Fig. 66.
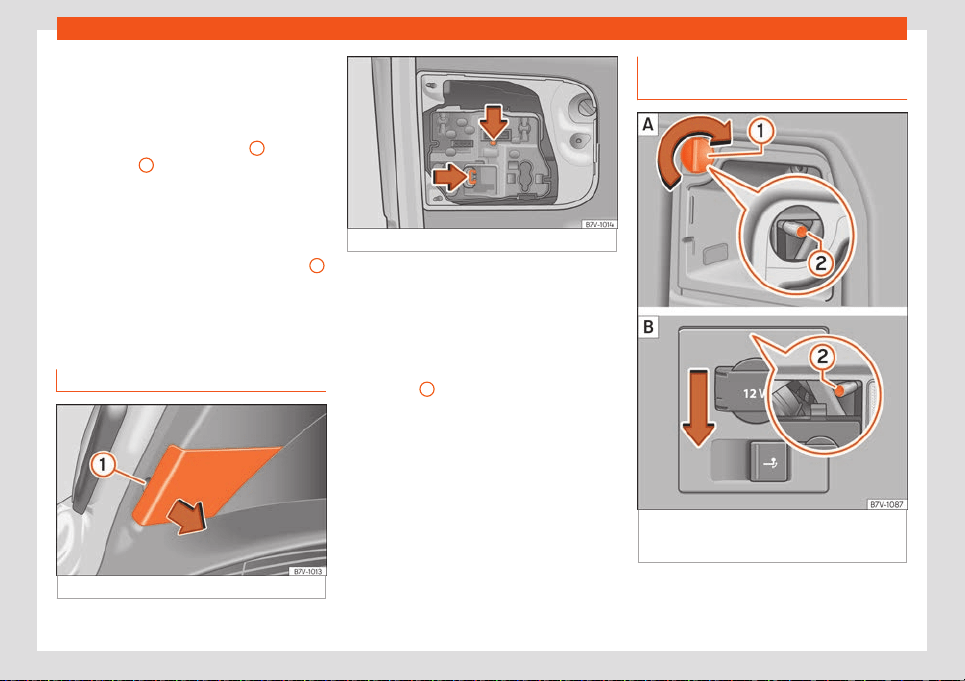
Replace the rear lid light bulbs
Fig. 68 On the rear lid: remove the cover.
Fig. 69 On the rear lid: remove the bulb holder.
Complete operations only in the sequence
giv
en:
–
Open the rear lid.
–
Extract the cover carefully using the flat
part of the screwdriver from the vehicle tool
kit as a lever (
›››
page 41) on the indent
›››
Fig. 68
1
.
–
Release the bulb holder connector by pull-
ing on the r
ed connector block.
–
Press on the attachment tabs in the direc-
tion of the arrow
›››
Fig. 69 and pull out the
bulb holder.
–
Replace the faulty bulb with a new identical
bulb.
–
Install the bulb holder. The attachment tabs
should audibly click into place.
–
Insert the cover. The cover should lock into
place.
Replacing the tail light bulbs in the
bodywork
Fig. 70 Side of the luggage compartment:
R
emoving the left tail light unit. Removing
the right tail light unit.
64
Loading ...
Loading ...
Loading ...