Loading ...
Loading ...
Loading ...
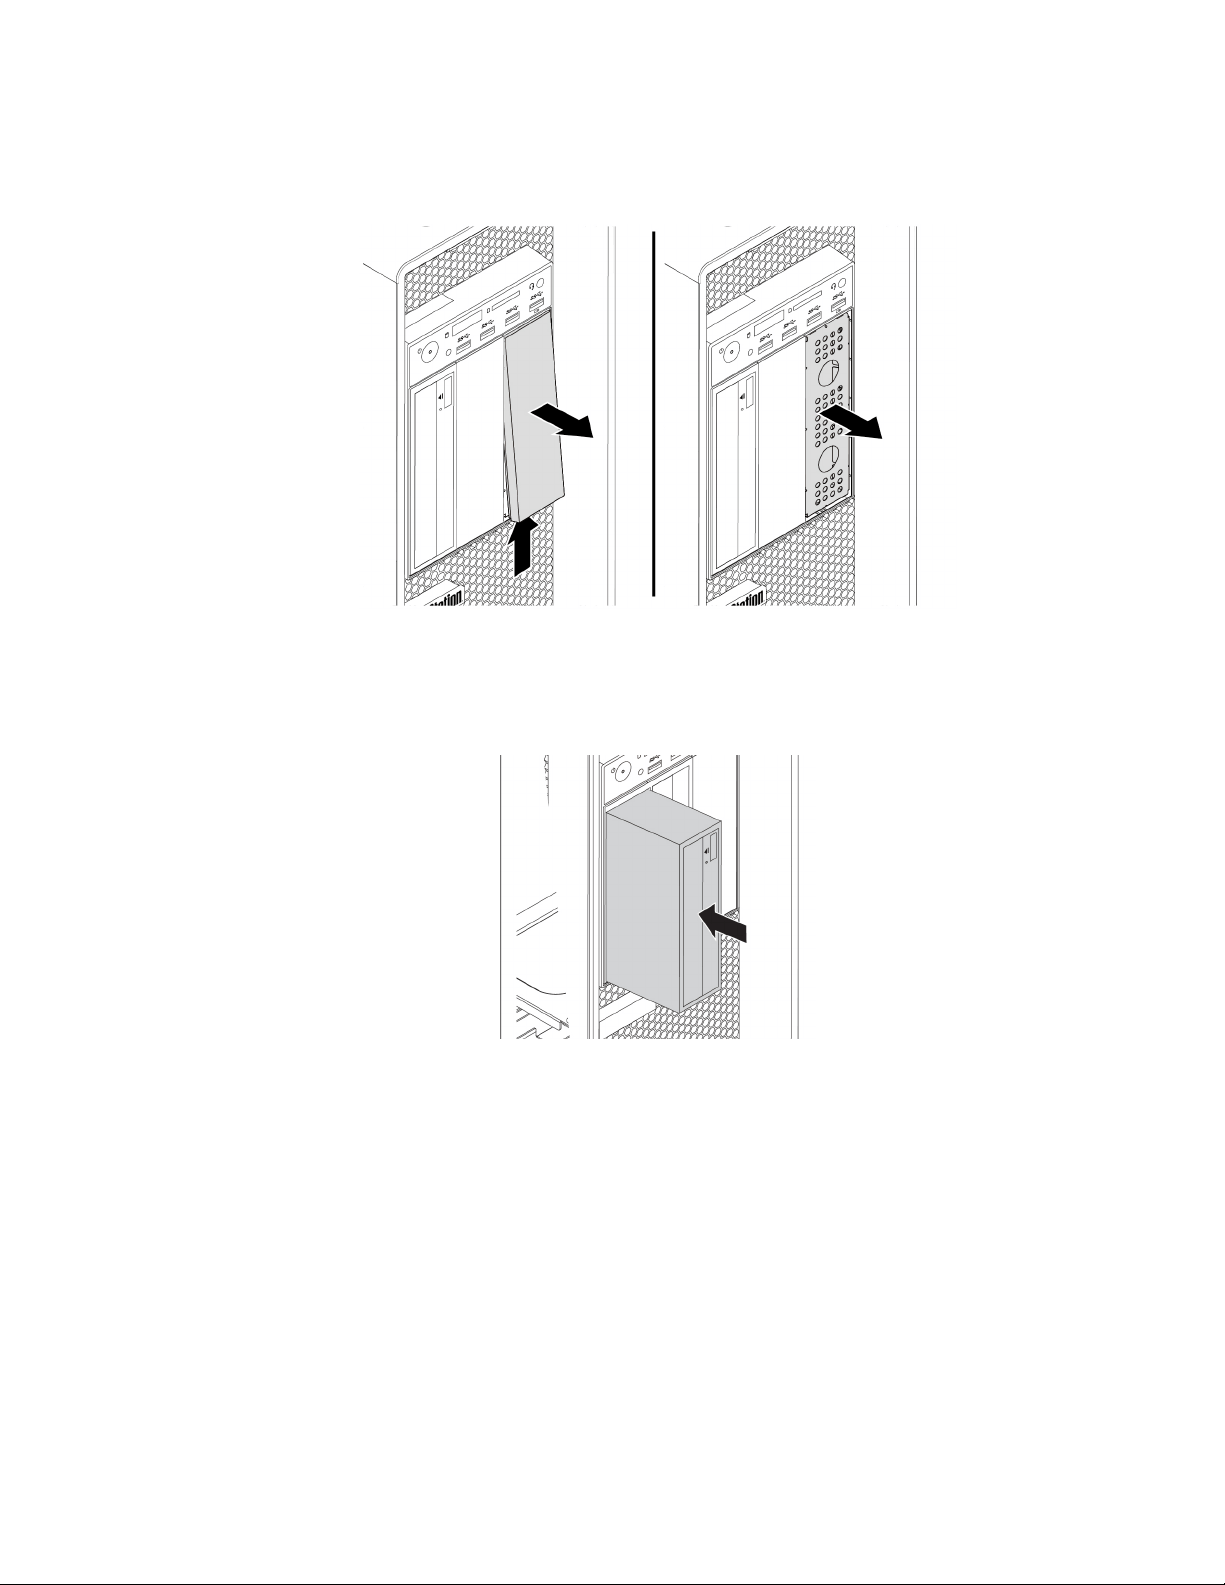
a. If necessary, press the clip underneath the plastic shield until the plastic shield is ejected out of the
bay. Remove the plastic shield from the bay. Then, grasp the metal shield inside the bay and pull it
out of the chassis.
Figure 17. Removing the shields from the flex bay
b. Note the orientation of the new optical drive. Then, slide the optical drive into the flex bay from the
front of the chassis until it snaps into position.
Figure 18. Installing the optical drive
c. Connect the cables to the new optical drive.
Note: If you are installing other supported devices, connect any additional cables. See “Parts on the
system board” on page 8.
6. Reinstall the direct cooling air baffle. See “Direct cooling air baffle” on page 63.
What to do next:
• To work with another piece of hardware, go to the appropriate section.
• To complete the installation or replacement, go to “Completing the parts replacement” on page 135.
Chapter 7. Hardware removal and installation 67
Loading ...
Loading ...
Loading ...