Loading ...
Loading ...
Loading ...
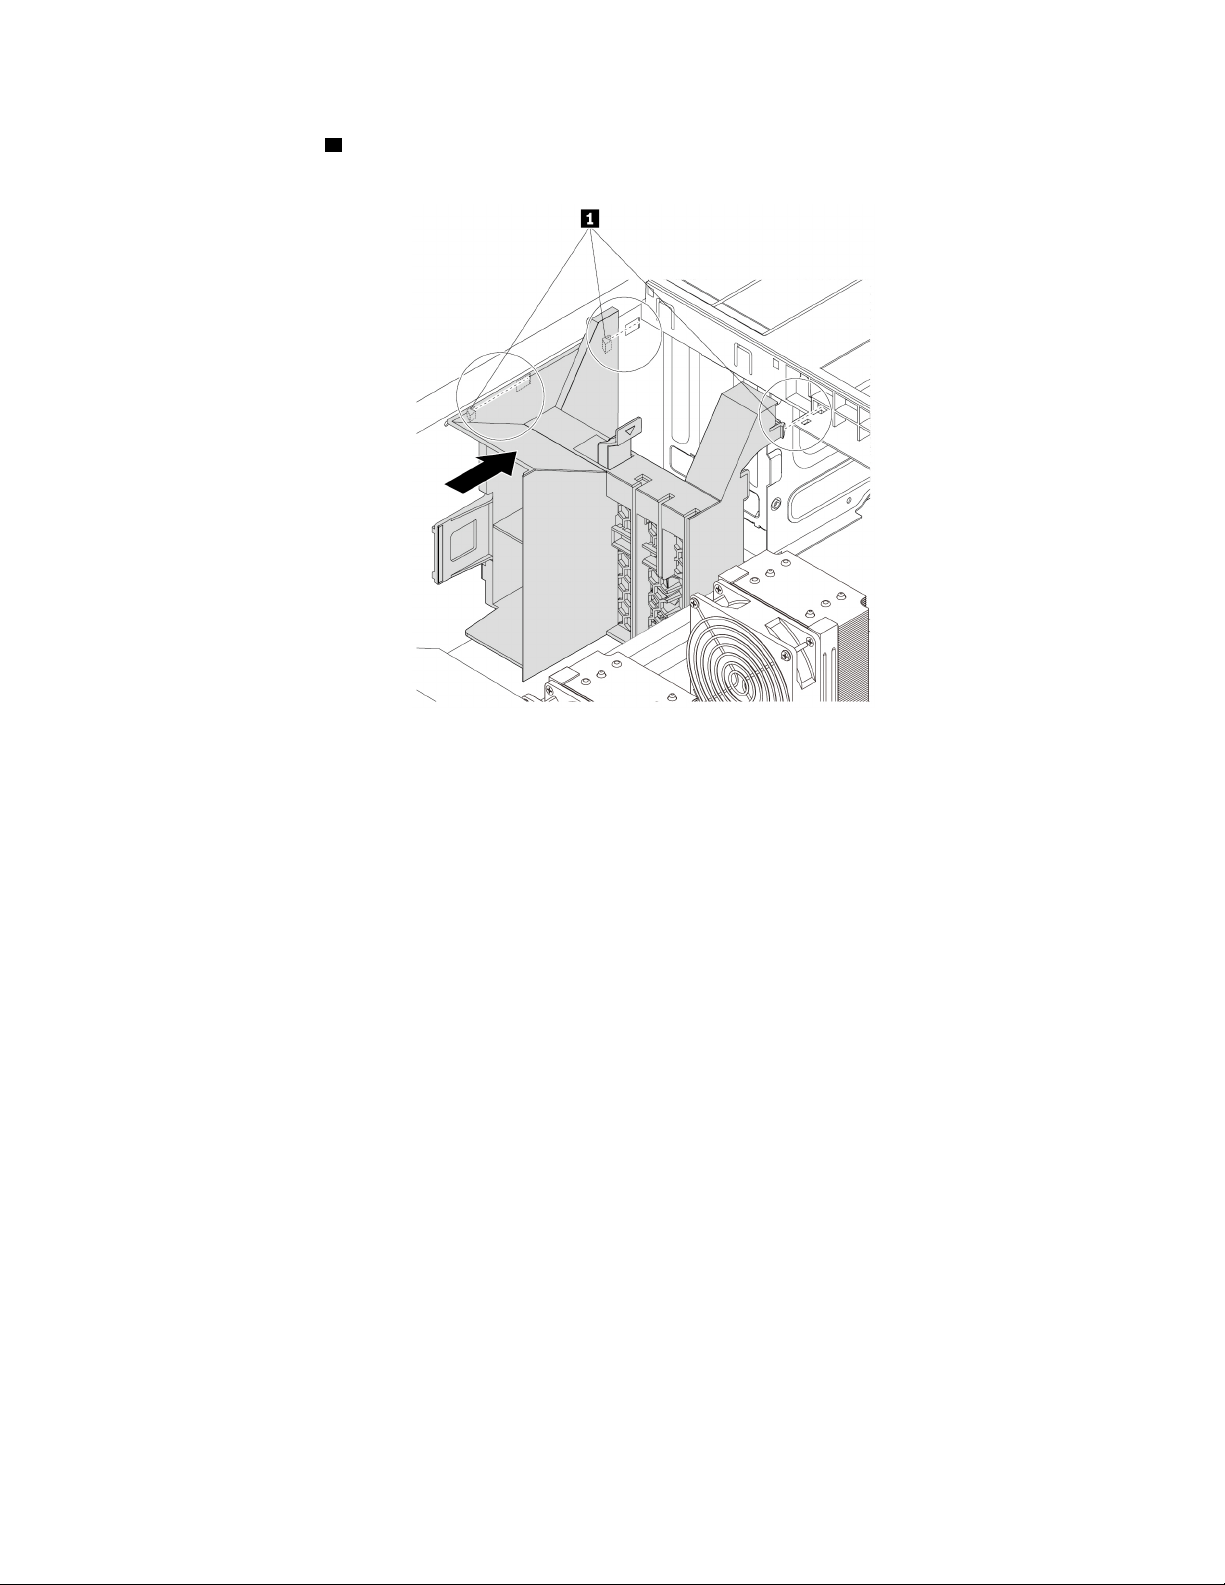
5. Align three tabs 1 on the bracket with the corresponding holes in the chassis. Then, insert the three tabs
into the corresponding holes until the bracket snaps into position.
Figure 120. Reinstalling the multi-function bracket
6. Reinstall the following parts if you have removed them:
• “M.2 solid-state drive holder” on page 90
• “PCIe card” on page 107
• “Super capacitor module” on page 122
• “Full-length PCIe card” on page 115
• “Front fan assembly” on page 87
• “Power supply assembly” on page 103
• “Direct cooling air baffle” on page 63
What to do next:
• To work with another piece of hardware, go to the appropriate section.
• To complete the installation or replacement, go to “Completing the parts replacement” on page 135.
Multi-function bracket in the bottom position
To remove and reinstall the multi-function bracket installed in the bottom position of the chassis, do the
following:
1. Prepare your computer. See “Preparing your computer and removing the computer cover” on page 59.
2. Locate the multi-function bracket in the bottom position of the chassis. See “Computer components” on
page 7.
3. Remove the following parts:
• “Direct cooling air baffle” on page 63 (if necessary)
• “Front fan assembly” on page 87
Chapter 7. Hardware removal and installation 127
Loading ...
Loading ...
Loading ...