Loading ...
Loading ...
Loading ...
12
BLENDER ASSEMBLY
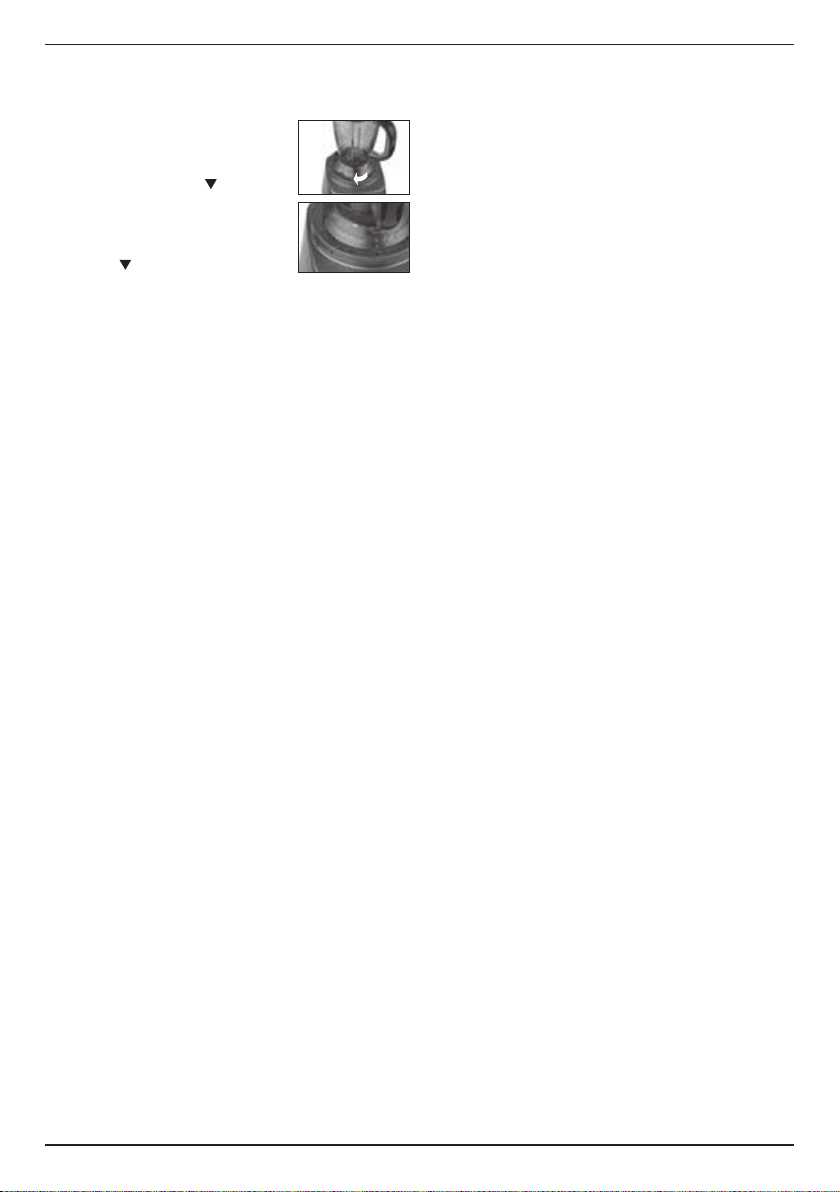
1. Place the motor housing base
on a at, sturdy surface that
is clean and dry. Put the
assembled blender jar on the
base, lining up the on skirt
of jar with the rib on the top of
motor housing. To lock jar in
place, turn it clockwise to line
up the with lock arrow on the
top of motor housing.
2 Plug the motor housing base
into an electrical outlet.
3. Put all ingredients into the blender jar and
secure cover by turning clockwise to lock into
place. You may add more ingredients by lifting
the measured pour lid insert and dropping
ingredients into the jar. Replace the lid insert
after adding ingredients. Do not put hands into
blender jar with blender plugged in.
NOTE: Add liquid ingredients rst to blender
jar, then follow with solid ingredients. This will
provide more consistent blending and prevent
unnecessary stress on the motor.
4. Start blending
: Turn dial to Low or High speed.
Blender will run until dial is turned to OFF.
Pulse mode: Turn dial to Pulse and alternately
“pulse and release” in short bursts until ingredi-
ents have reached desired consistency.
To stop blending process: Simply turn dial to
OFF.
When fi nished blending: Turn dial to OFF and
unplug the unit from the electrical outlet. Never
remove the blender jar from the motor housing
base until the blender is off. Turn assembled
blender jar counterclockwise and lift off base.
Do not put hands into blender jar with blender
plugged in.
NOTE: To remove blender jar cover, unlock by
twisting counterclockwise. Lifting measured
pour lid insert will not remove cover.
To dislodge food: Turn blender OFF. Use a
rubber or plastic spatula to help remove food
lodged around the blade assembly. Do not use
spatula until you have turned the blender OFF.
Replace the cover and lid insert and continue
blending, if necessary. Make sure spatula is not
inside the blender jar before resuming blending.
To reset the unit: This appliance features an
advanced resettable thermal fuse.
In the event of an overload, the unit will shut
down to protect the motor from overheating.
To reset the appliance when this happens,
unplug the unit and let it cool for 20 to 30
minutes. Then, reduce the contents of the
blender jar and/or clear any jams. Restart
the unit as noted in the operating directions.
NOTE: To remove blender jar cover, lift edge of
cover upward. Lifting measured pour lid will not
remove cover.
DISASSEMBLY
1. Turn the blender jar upside down and place it
on a at sturdy surface.
2. Turn the blade assembly clockwise and lift to
remove.
3. To reassemble the blender jar, turn the blade
assembly counter-clockwise and make sure it
is fastened.
NOTE: Blades are sharp; handle carefully.
HELPFUL REMINDERS
• Once the blender cover is in position, addition-
al ingredients can be added during blending
by simply lifting the measured pour lid insert,
adding ingredients, and replacing the lid insert.
• Cover should always be in place while the unit
is on.
• Warning: Do not place blender jar on base
while motor is running.
• Remove jar from motor housing base and
empty before removing blade assembly.
• Do not put hands into blender jar with blender
plugged in.
• Boiling liquids or solid frozen foods (with the
exception of ice cubes or ½-inch [1.3 cm]
pieces of frozen fruit) should never be put into
the blender jar.
• Do not put ice, frozen foods or very cold liquids
into a blender jar that has come directly from a
hot dishwasher.
• Do not put very hot liquids or foods into a
blender jar that has come directly from the
freezer. Boiling liquids should cool for 5
minutes before being poured into blender jar.
Remove measured pour lid insert.
• Follow Cleaning, Storage, and Maintenance
instructions on page 13, prior to your rst use.
Loading ...
Loading ...
Loading ...