Loading ...
Loading ...
Loading ...
XNX Universal Transmitter
Section 2 - Installation and Operation
70
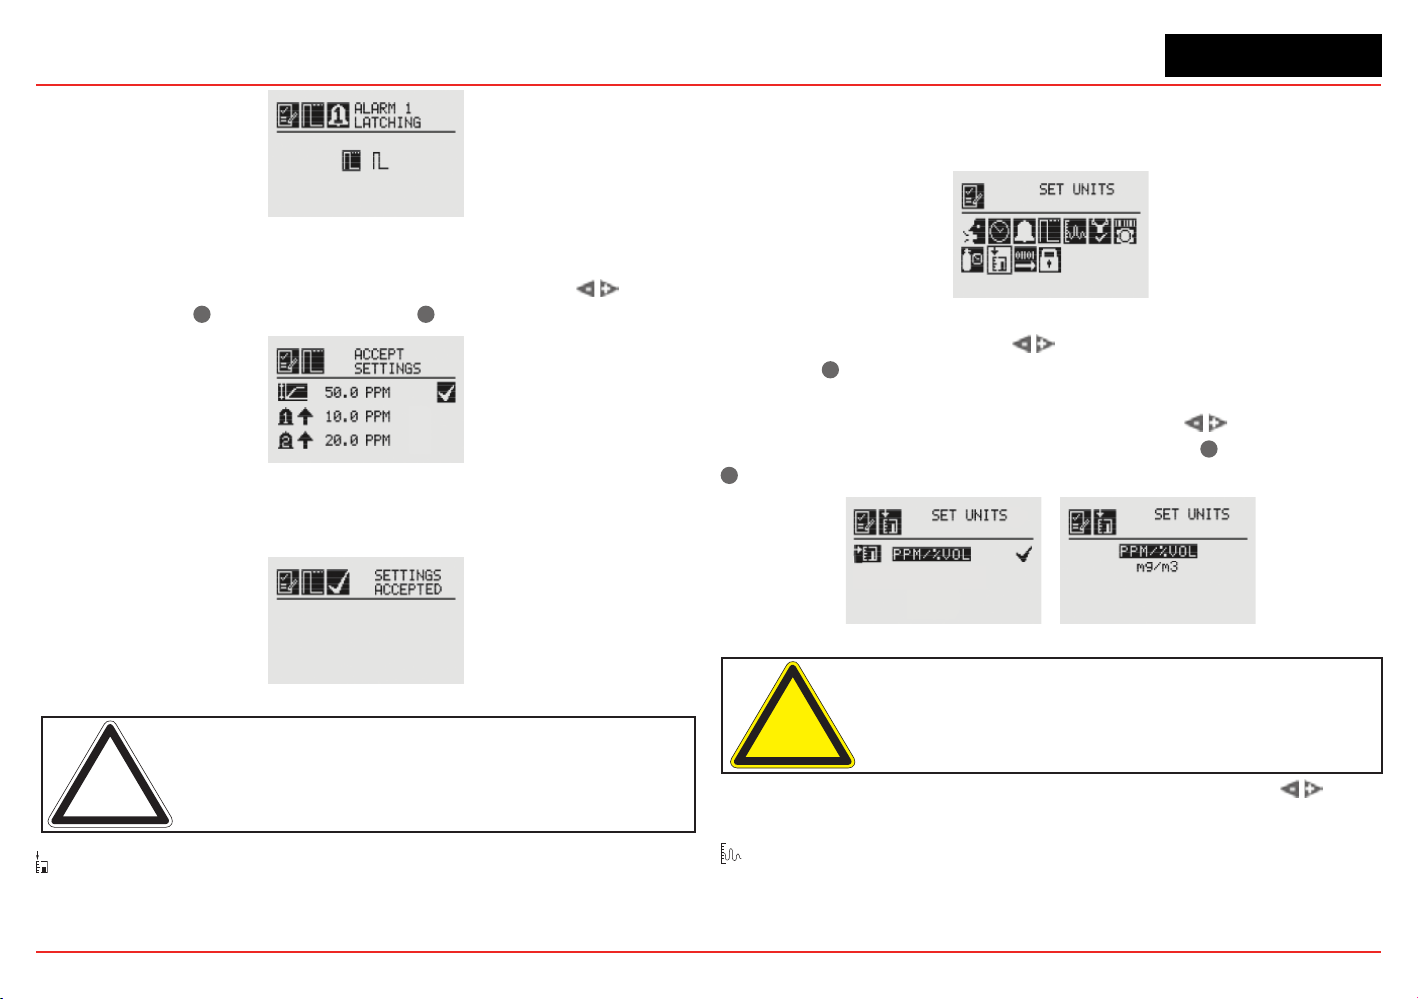
Figure 97. Setting Alarm Latching/Unlatching
Use the same procedure to set the desired values for Alarm
2 and Faults. When all settings have been made, use
to
navigate to the
✓
on the display. Use
✓
to accept settings.
Figure 98. Accept Settings
When the settings have been saved, the following screen is
displayed.
Figure 99. Settings Accepted Screen
Note: When non-latching is selected, external alarm latching is
recommended.
Set Units
The Set Units menu allows the units of measurement displayed
on the XNX main menu to be set. This option also sets the units
transmitted via HART, Modbus, or Foundation Fieldbus sensors
attached to the XNX transmitter, reporting concentrations in PPM
or %VOL (except oxygen).
Figure 100. Set Units Menu
To change the units, use the switches to highlight the units
icon. Use
✓
to select it. The transmitter’s display will change
to the Display Unit Selection screen which shows the available
choices for the sensor type installed. Use the switches to
highlight the desired unit of measurement. Use
✓
to select it or
✖
to discard the selection.
Figure 101. Display Unit Selection Screen
Caution: When changing units of measure, check alarm level
settings for the proper units and change as necessary.
Once the units of measurement have been set, use the
switches to navigate to the ‘ü’ to accept the values.
mA Levels
This option allows the user to select mA output levels for inhibit,
fault, and over range. Beam block and low signal apply to
Loading ...
Loading ...
Loading ...