Loading ...
Loading ...
Loading ...
XNX Universal Transmitter
Section 4 - Maintenance
105
4.2 XNX
®
EC Sensor Cartridge Replacement
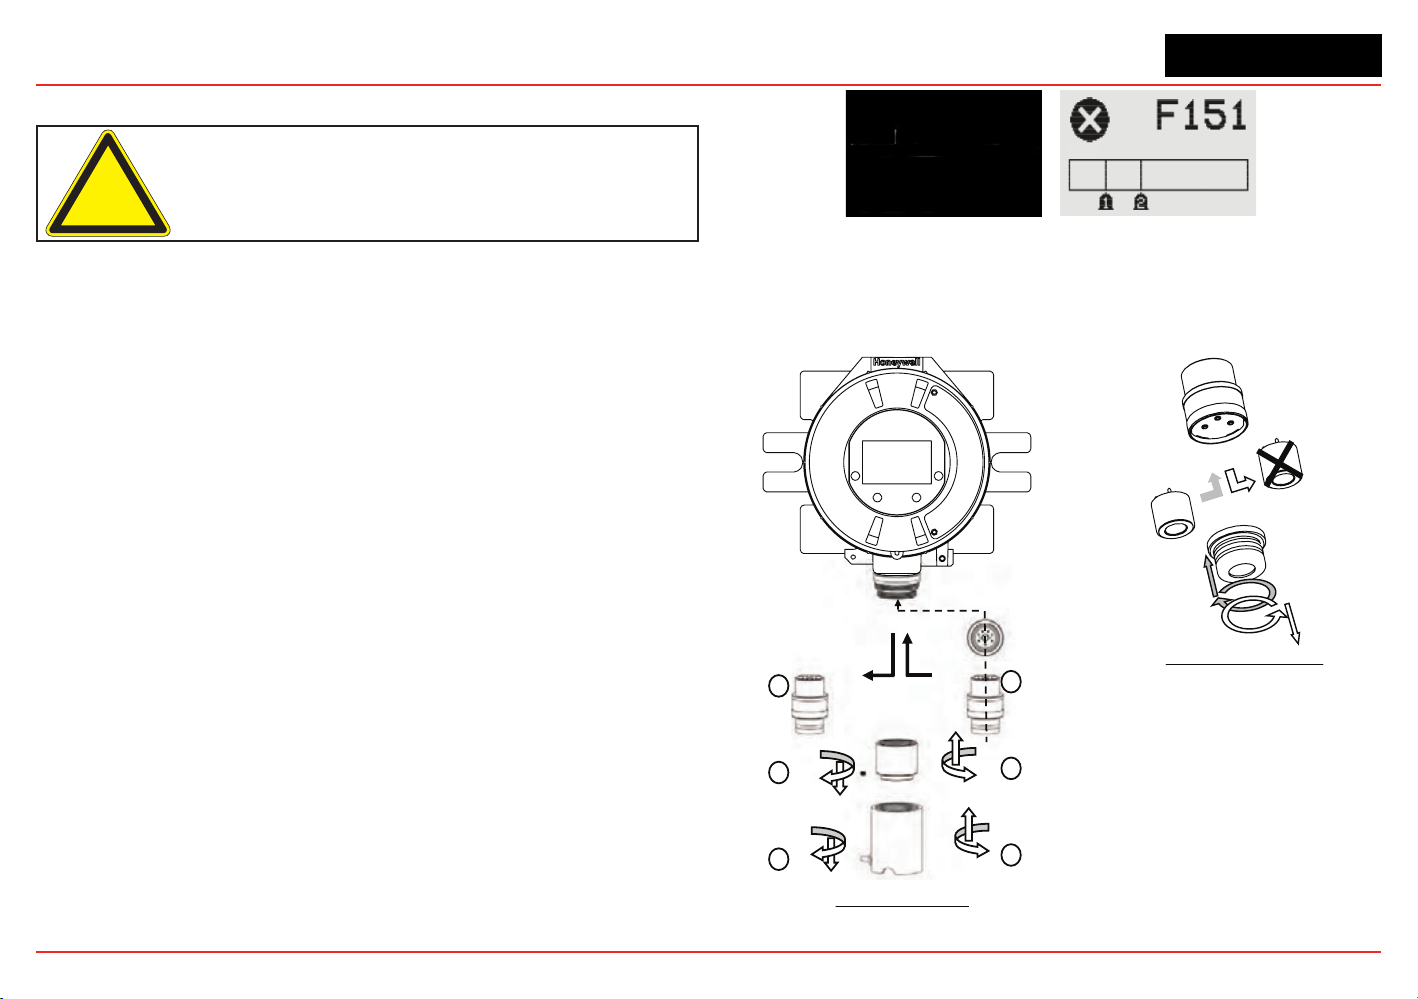
Caution: For toxic sensors, remove the shorting clip from the bottom of the
sensor prior to installation. No shorting clip is provided with oxygen sensors.
The serviceable sensor allows replacement of the cell inside
the sensor. The sensor cell can be replaced with a cell of the
same type or changed to detect a different target gas. Both
procedures follow.
When replacing oxygen (O
2
) sensor cells, the initial warm-up time
is between 10 and 15 minutes. This warm-up is required only
after sensor cell replacement.
4.2.1 Replacing with the Same Cartridge Type
To replace the cell follow this procedure:
1. Unscrew the weatherproof cover, loosen the sensor
retainer locking screw, and unscrew the sensor retainer.
2. Remove the old sensor by pulling without twisting.
3. Unscrew the sensor cap.
4. Remove the old cell by pulling without twisting.
5. Verify that the new cell is the same type as the old one.
6. Plug the new cell into the sensor, taking care to align the
sensor pins with the connector holes in the PCB.
7. Ret the sensor retainer, tighten the locking screw, and
ret the weatherproof cover.
8. Sensor warm-up will begin and the XNX display will
alternate between two screens: “Fault 151” and “WARM.”
Figure 227. Sensor screens during warmup
9. Follow the procedure to accept the new sensor in Accept
New Sensor Type.
10. Recalibrate the sensor following the procedures in Section 3.2.1.
Transmitter
Sensor Retainer &
Locking Screw
Old Sensor
3
2
1
4
5
6
New Sensor
EC Sensor Removal
Sensor Cap
Old cell
New cell
Sensor Cell Replacement
Figure 228. XNX EC Sensor Cell Replacement
Loading ...
Loading ...
Loading ...