Loading ...
Loading ...
Loading ...
XNX Universal Transmitter
Section 2 - Installation and Operation
41
6. Afterthesensorisinstalledandthegastypeisconrmed,
the range, alarm levels, and other important settings must
beset;seeSection 2.5.
7. Afterthetransmitterhasbeencongured,calibrate
the sensor following the procedures in Section 3 -
Calibrations.
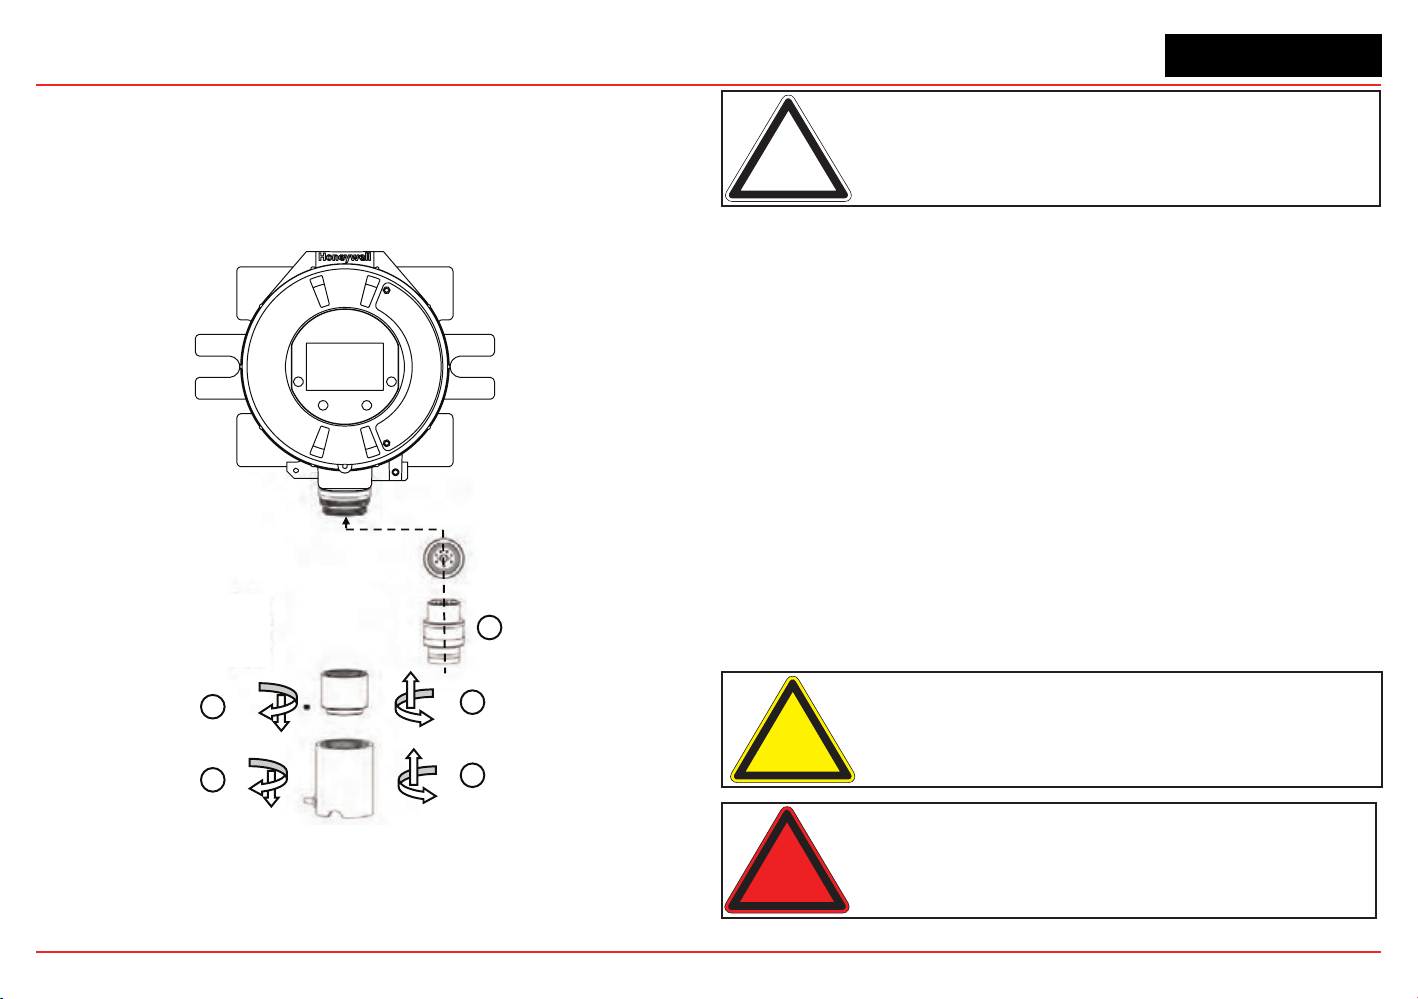
Transmitter
Sensor Retainer &
Locking Screw
2
1
3
4
5
New Sensor
Weatherproof Cap
Figure 43. Installing Plug In Sensor
Note: Reference Control Drawing 3000E3157 and 3000E3159 for
install requirements on EC cells and remote mounting.
XNX EC Sensor Remote Mounting Kit
The remote sensor mounting kit is used to mount the XNX EC
sensor up to 50 feet away from the transmitter. To mount the
sensor remotely, follow this procedure:
1. Unscrew the weatherproof cover, loosen the retainer
locking screw and unscrew the sensor retainer.
2. Remove the sensor by pulling without twisting.
3. Plug the remote sensor cable connector into the bottom of
the transmitter.
4. Route the cable to the location where the remote sensor is
to be mounted.
5. Optional: make a loop of cable at the junction box. This
will provide some slack for any future re-terminations.
6. If necessary, cut the cable to the required length.
Caution: Take care not to cut the cable too short. Once cut,
additional lengths of cable cannot be added as this would invalidate
the intrinsically safe certification.
Warning: Enclosures of remotely mounted sensors contain
aluminum. Be careful to avoid ignition hazards due to impact or
friction when installed in Zone 1 locations.
Loading ...
Loading ...
Loading ...