Loading ...
Loading ...
Loading ...
EM-248
[VK45DE]
CYLINDER BLOCK
Revision: 2004 November 2004 FX35/FX45
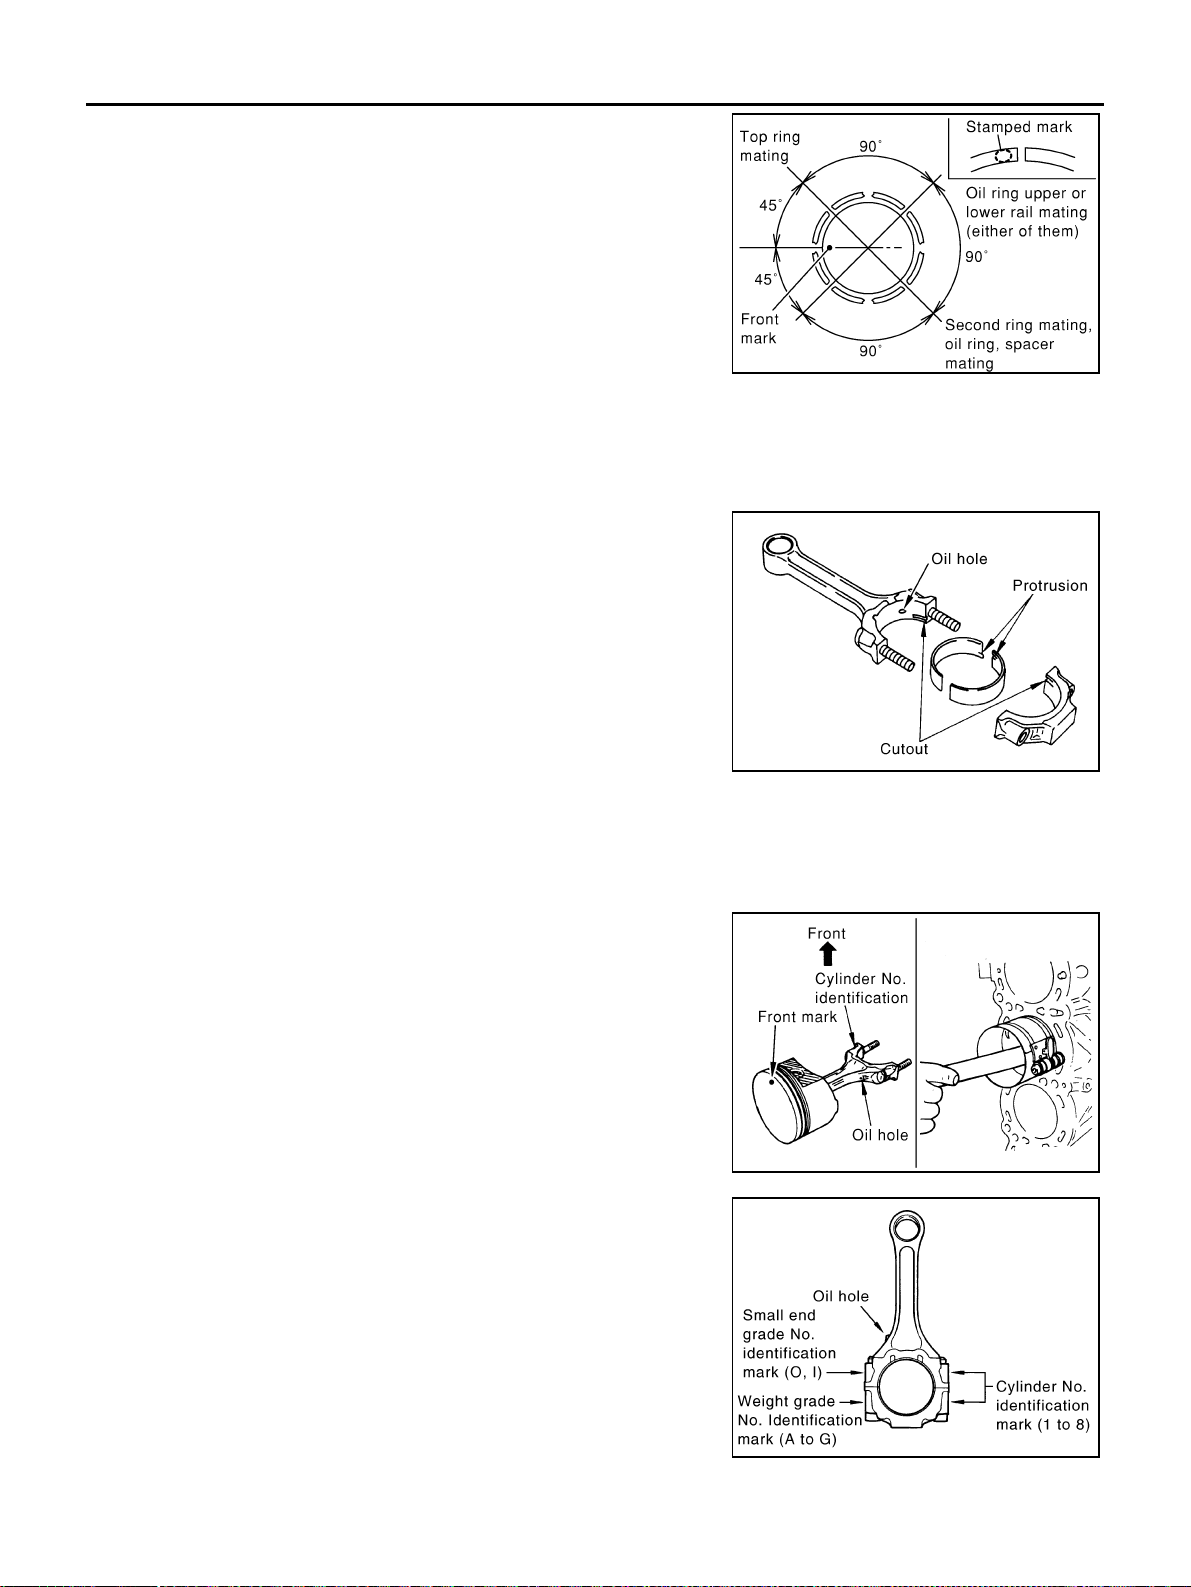
11. Using piston ring expander (commercial service tool), install pis-
ton rings.
CAUTION:
Be careful not to damage piston.
● Position each ring with the gap as shown in the figure, refer-
ring to the piston front mark.
● Install top ring and second ring with the stamped surface fac-
ing upward.
12. Install connecting rod bearings to connecting rod and connecting rod cap.
● Before installing connecting rod bearings, apply engine oil to the bearing surface (inside). Do not apply
engine oil to the back surface, but thoroughly clean it.
● When installing, align the connecting rod bearing stopper pro-
trusion with the cutout of connecting rod and connecting rod
cap to install.
● Ensure the oil holes on connecting rod and that on the corre-
sponding bearing are aligned.
13. Install piston and connecting rod assembly to crankshaft.
● Position the crankshaft pin corresponding to connecting rod to be installed onto the bottom dead center.
● Apply engine oil sufficiently to the cylinder bore, piston and crankshaft pin.
● Match the cylinder position with the cylinder No. on connecting rod to install.
● Be sure that front mark on piston head is facing front of
engine.
● Using piston ring compressor [SST: EM03470000 (J8037)],
install piston with the front mark on the piston head facing the
front of engine.
CAUTION:
Be careful not to damage cylinder wall and crankshaft pin,
resulting from an interference of the connecting rod big
end.
14. Install connecting rod cap.
● Match the stamped cylinder number marks on connecting rod
with those on cap to install.
Stamped mark
Top ring : R
Second ring : 2R
PBIC0100E
PBIC2370E
PBIC0102E
PBIC2164E
Loading ...
Loading ...
Loading ...