Loading ...
Loading ...
Loading ...
CYLINDER BLOCK
EM-129
[VQ35DE]
C
D
E
F
G
H
I
J
K
L
M
A
EM
Revision: 2004 November 2004 FX35/FX45
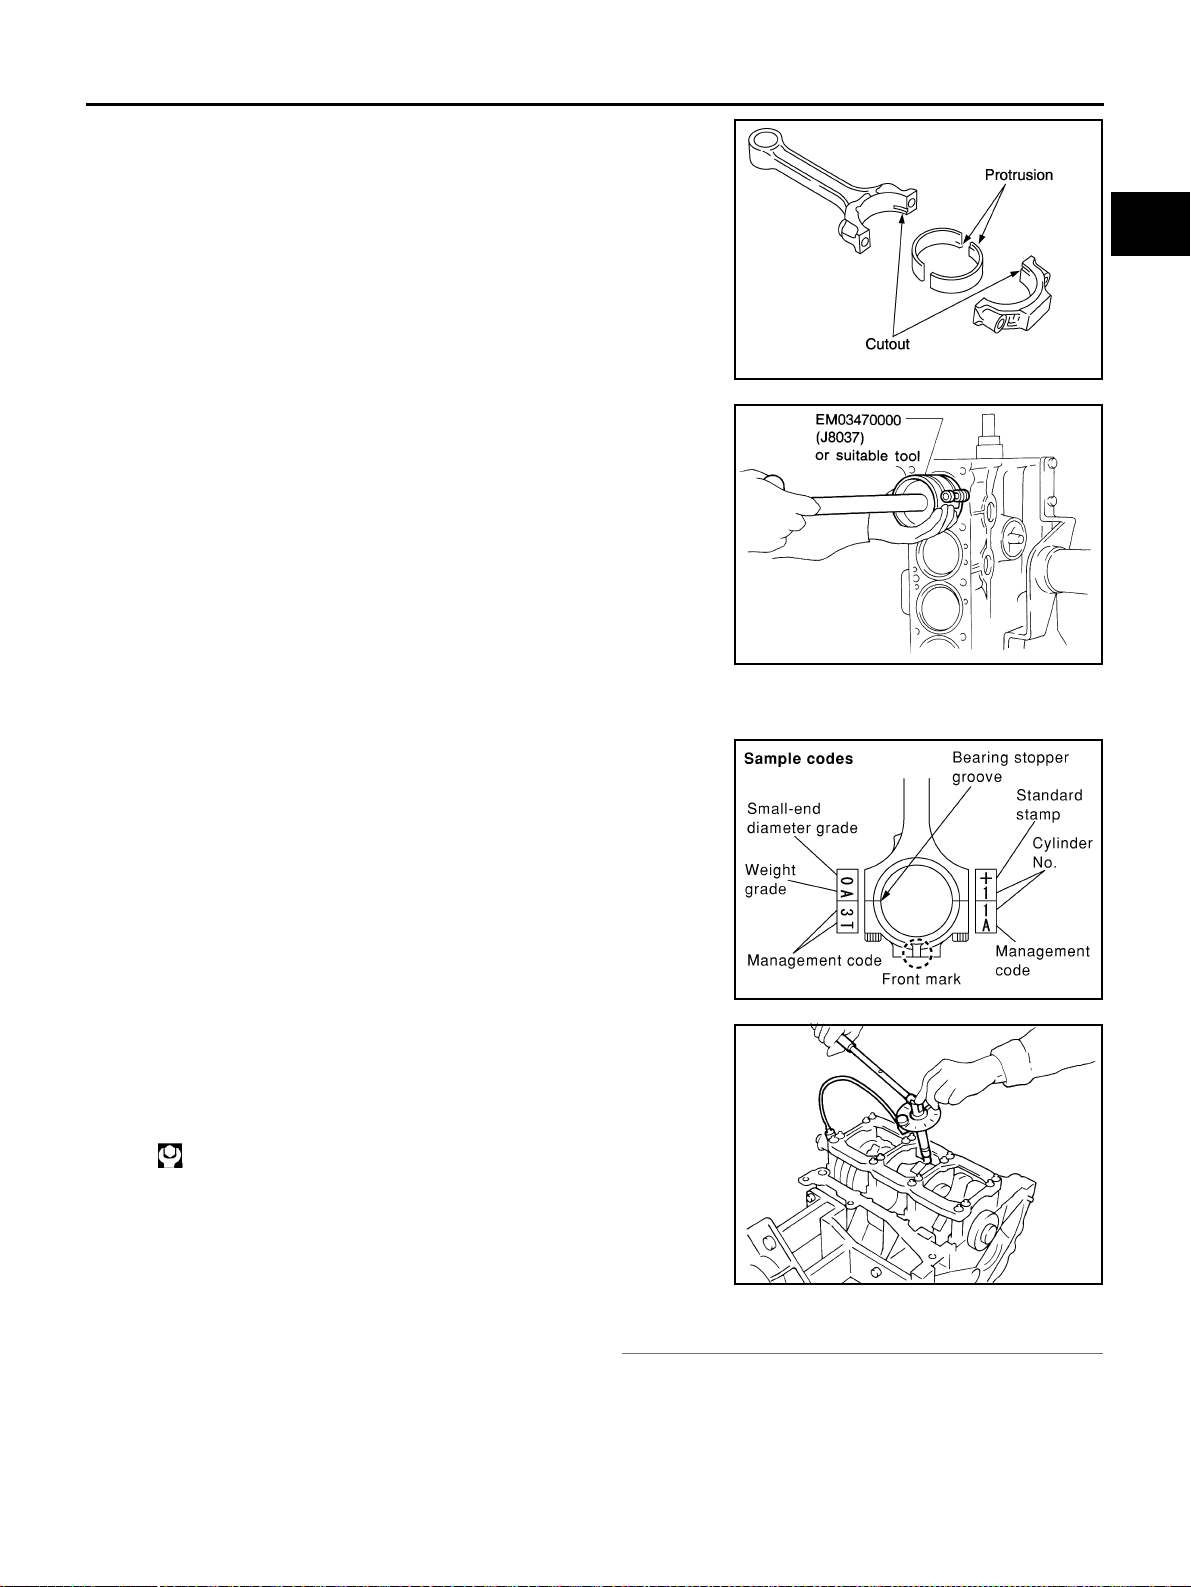
14. Install connecting rod bearings to connecting rod and connect-
ing rod cap.
● When installing connecting rod bearings, apply engine oil to
the bearing surface (inside). Do not apply engine oil to the
back surface, but thoroughly clean it.
● When installing, align connecting rod bearing stopper protru-
sion with the cutout of connecting rod to install.
● Check the oil hole on connecting rod and that on the corre-
sponding bearing are aligned.
15. Install piston and connecting rod assembly to crankshaft.
● Position crankshaft pin corresponding to connecting rod to be
installed onto the bottom dead center.
● Apply engine oil sufficiently to cylinder bore, piston and crank-
shaft pin.
● Match cylinder position with the cylinder number on connect-
ing rod to install.
● Using a piston ring compressor (SST) or suitable tool, install
piston with the front mark on the piston crown facing the front
of engine.
CAUTION:
Be careful not to damage cylinder wall and crankshaft pin, resulting from an interference of con-
necting rod big end.
16. Install connecting rod cap.
● Match the stamped cylinder number marks on connecting rod
with those on cap to install.
● Be sure that front mark on connecting rod cap is facing front
of engine.
17. Tighten connecting rod bolt as follows.
a. Apply engine oil to the threads and seats of connecting rod
bolts.
b. Tighten bolts.
c. Then tighten all bolts “90” degrees clockwise (Angle tightening).
CAUTION:
Always use an angle wrench [SST: KV10112100 (BT8653-
A)]. Avoid tightening based on visual check alone.
● After tightening bolt, make sure that the crankshaft rotates
smoothly.
● Check the connecting rod side clearance. Refer to EM-136, "CONNECTING ROD SIDE CLEARANCE"
18. Install baffle plate to main bearing beam.
PBIC0266E
SEM620
PBIC0809E
: 19.6 N·m (2.0 kg-m, 14 ft-lb)
SEM953E
Loading ...
Loading ...
Loading ...