Loading ...
Loading ...
Loading ...
129
Sequencer
Record mode: Step Record page
Reference
Tie
Touch this button to tie the note to be inserted to the previous
one. A note with the same pitch, and the specified length, will be
created, and tied to the previous one.
Back
Goes to the previous step, erasing the inserted event.
Next M. (Next Measure)
Goes to the next measure, and fills the remaining space with
rests.
Done
Exits the Step Record mode.
Step Record procedure
Here is the general procedure to follow for the Step Recording.
1. Press the SEQUENCER button to enter Sequencer mode.
2. Press the RECORD button, and select the “Multitrack
Sequencer” option to enter the Multitrack Record mode.
From the page menu, select the “Overdub Step Recording”
or “Overwrite Step Recording” mode. At this point, the
Step Record window will appear in the display.
3. The next event will be entered at the position shown by the
Pos indicator in the upper right corner of the display.
• If you don’t want to insert a note at this position, insert a
rest instead, as shown in step 5.
• To jump to the next measure, filling the remaining beats
with rests, touch the Next M. button in the display.
4. To change the step value, use the Step Time parameters.
5. Insert a note, rest or chord at the current position.
• To insert a single note, just play it on the keyboard. The
inserted note length will match the step length. You may
change the velocity and relative duration of the note, by
editing the Velocity and Duration parameters. See “Veloc-
ity” and “Duration” on page 128.
• To insert a rest, just touch the Rest button in the display.
Its length will match the step value.
• To tie the note to be inserted to the previous one, touch
the Tie button in the display. A note will be inserted, tied to
the previous one, with exactly the same pitch. You don’t
need to play it on the keyboard again.
• To insert a chord or a second voice, see “Chords and sec-
ond voices in Step Record mode” on page 129.
6. After inserting a new event, you may go back by touching
the Back button in the display. This will delete the previ-
ously inserted event, and set the step in edit again.
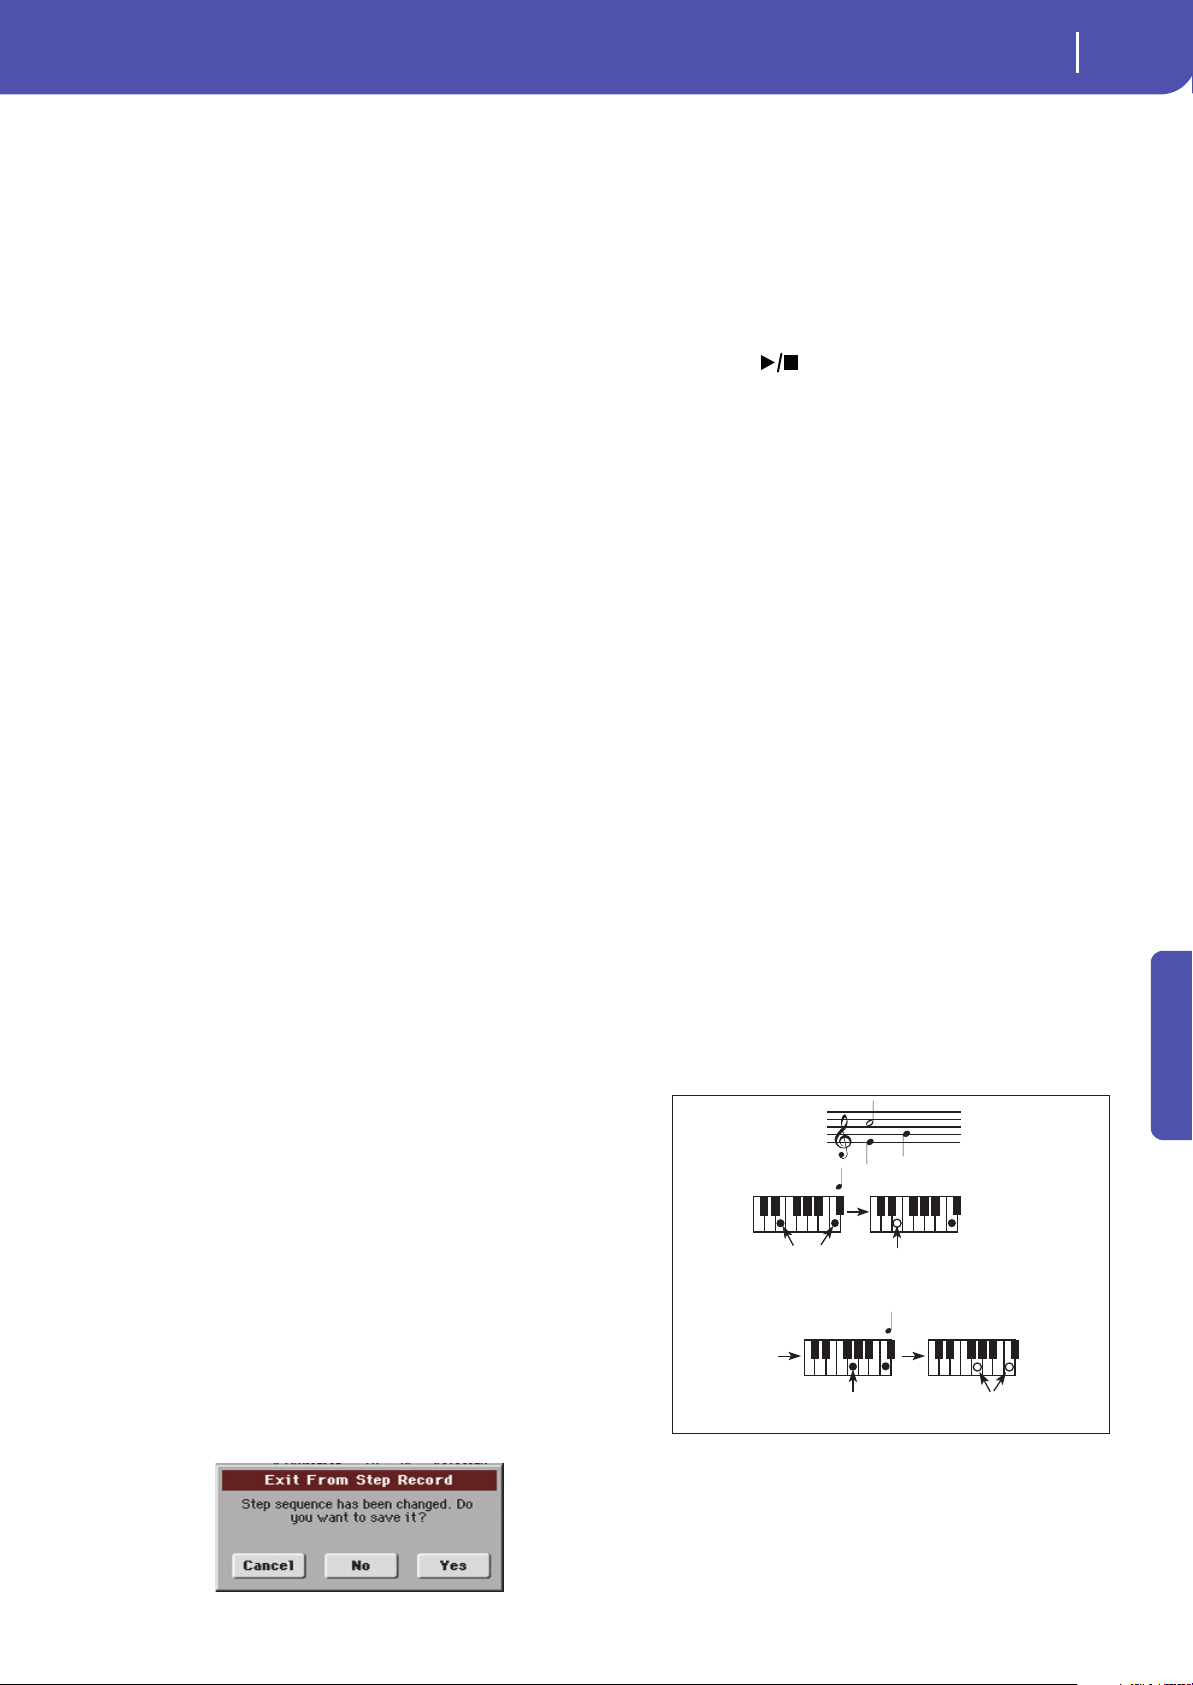
7. When finished recording, touch the Done button in the
display. A dialog box appears, asking you to either cancel,
discard or save the changes.
If you touch Cancel, exit is canceled, and you can continue
editing. If you choose No, changes are not saved, and the
Step Record window is closed. If you choose Yes, changes
are saved, and the Step Record window is closed.
8. From the main page of the Multitrack Recording mode,
either select the “Exit from Record” command from the
page menu, or press the RECORD button to exit the Record
mode.
9. While in the main page of the Sequencer mode, you may
press the (START/STOP) button in the PLAYER sec-
tion to listen to the Song, or select the Save Song command
from the page menu to save the Song to a storage device
(see “Save Song window” on page 145).
Chords and second voices in Step Record
mode
You are not obliged to insert single notes in a track. There are
several ways to insert chords and double voices. Lets look at
some.
Entering a chord. Simply play a chord instead of a single note.
The event name will be the first note of the chord you pressed,
followed by the “…” abbreviation.
Entering a chord made of notes with different velocity values.
You can make the upper or lower note of a chord, for example,
louder than the remaining ones, to let the most important stand
out from the chord. Here is how to insert a three-note chord:
1. Edit the first note’s Velocity value.
2. Press the first note and keep it pressed.
3. Edit the second note’s Velocity value.
4. Press the second note and keep it pressed.
5. Edit the third note’s Velocity value.
6. Press the third note, then release all notes.
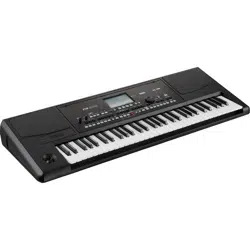
Entering a second voice. You can insert passages where one
note is kept pressed, while another voice moves freely.
Ex. 1:
Step Time =
Step Time =
On
Press E and C
On
Press G
Off
Off
Release G and C
Release E (continue holding C)
Loading ...
Loading ...
Loading ...