
Loading ...
Loading ...
Loading ...
CONFIRMING THE PATTERN POSITION
266
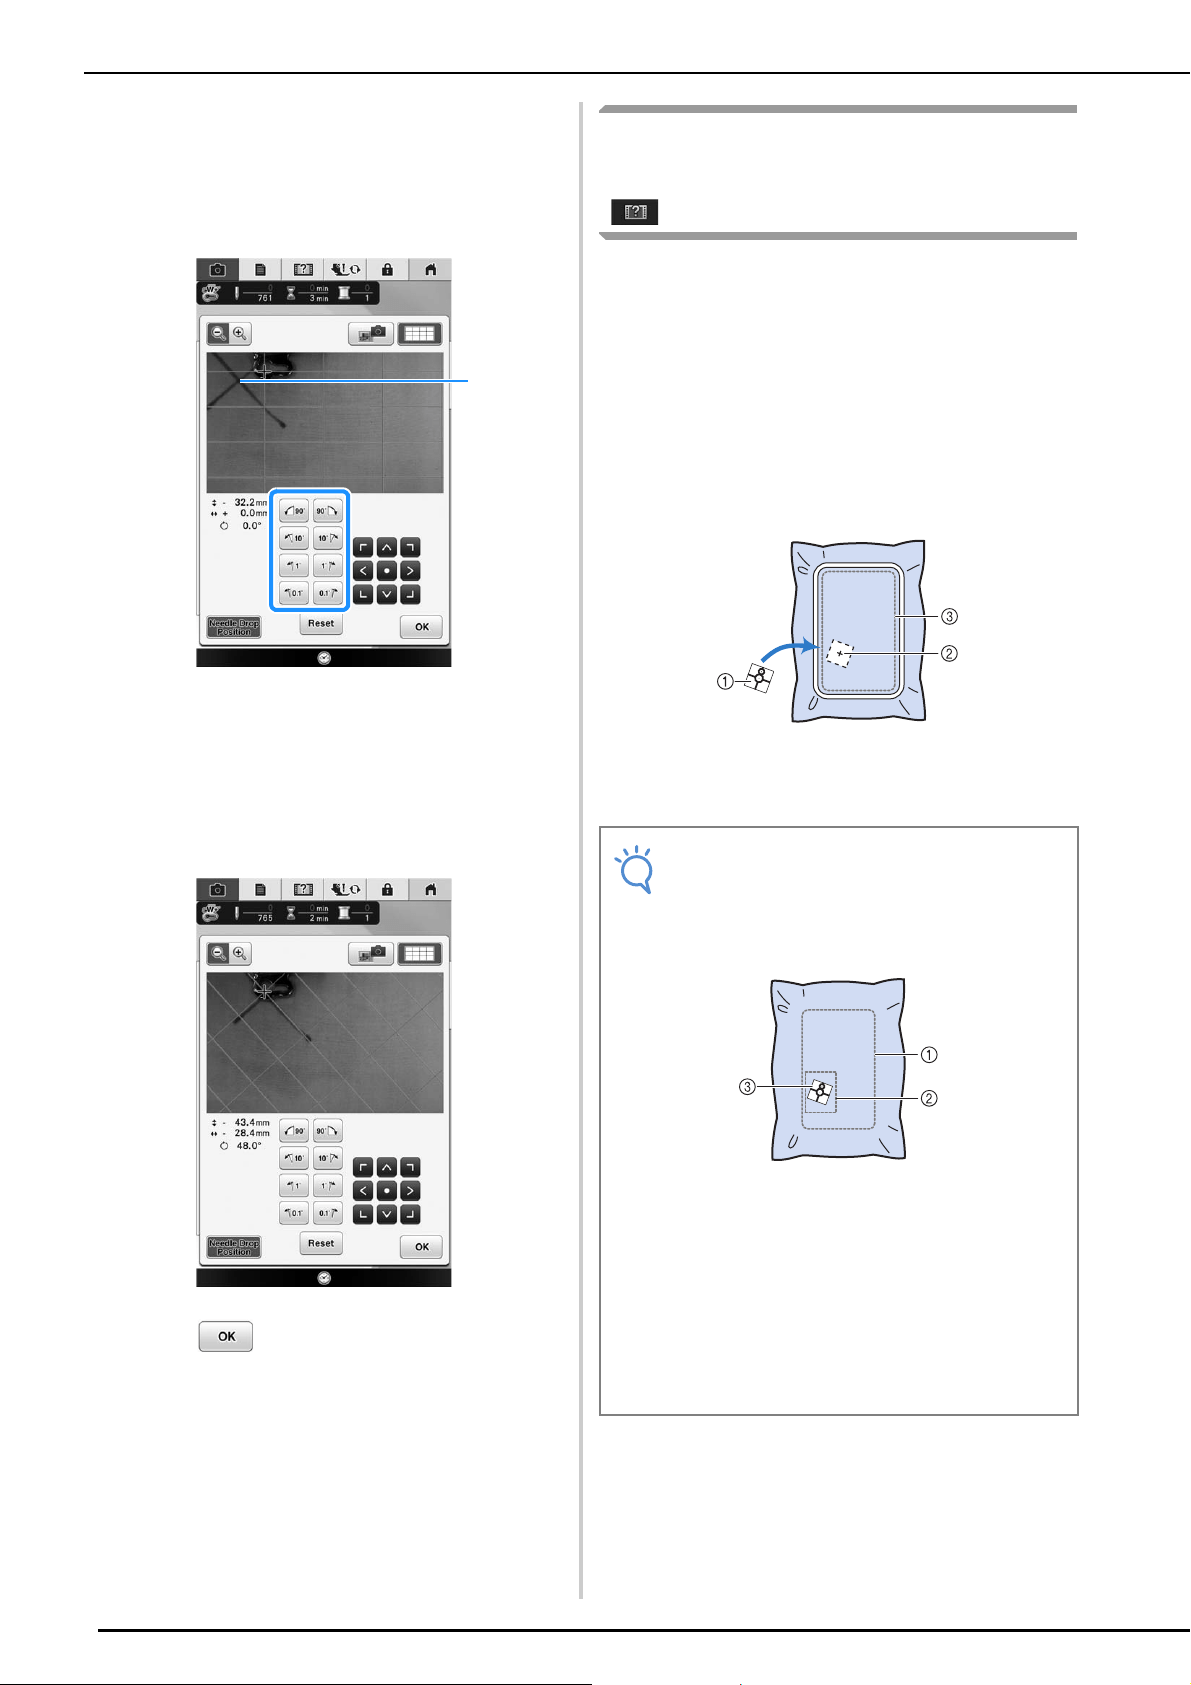
k
Adjust the orientation of the pattern by
pressing the orientation keys until the grid
lines are parallel with the chalk mark drawn
on the fabric. (Refer to “Rotating the
Pattern” on page 227.)
a Center point of the pattern
l
Press the positioning keys to move the
embroidery frame until the center point of
the pattern in the camera view window is
aligned with the chalk mark drawn on the
fabric.
m
Press to return to the previous
screen.
n
Press the “Start/Stop” button to begin
embroidering.
* See “Embroidering Patterns” on page 274.
Using the Built-In Camera to
Align the Embroidering Position
The embroidering position can easily be aligned
using the machine’s built-in camera and the
included embroidery positioning sticker.
a
Affix the embroidery positioning sticker to
the location in the fabric to be
embroidered. Place the embroidery
positioning sticker so that the center of the
larger circle is at the center or edge of the
embroidery pattern.
a Embroidery positioning sticker
b Center or edge of the embroidery pattern
c Embroidery field
a
Note
• When inserting the fabric in the embroidery
frame, check that the embroidery pattern
fits within the embroidery field for the frame
that is used.
a Embroidery field
b Embroidery pattern
c Embroidery positioning sticker
• Depending on the type of fabric that is
used, a part of the embroidery positioning
sticker may remain attached when it is
peeled off. Before using the embroidery
positioning sticker, check that it can be
cleanly removed from a scrap piece of the
fabric to be used.
Loading ...
Loading ...
Loading ...