Loading ...
Loading ...
Loading ...
EDITING STITCH PATTERNS
Character/Decorative Stitches
179
4
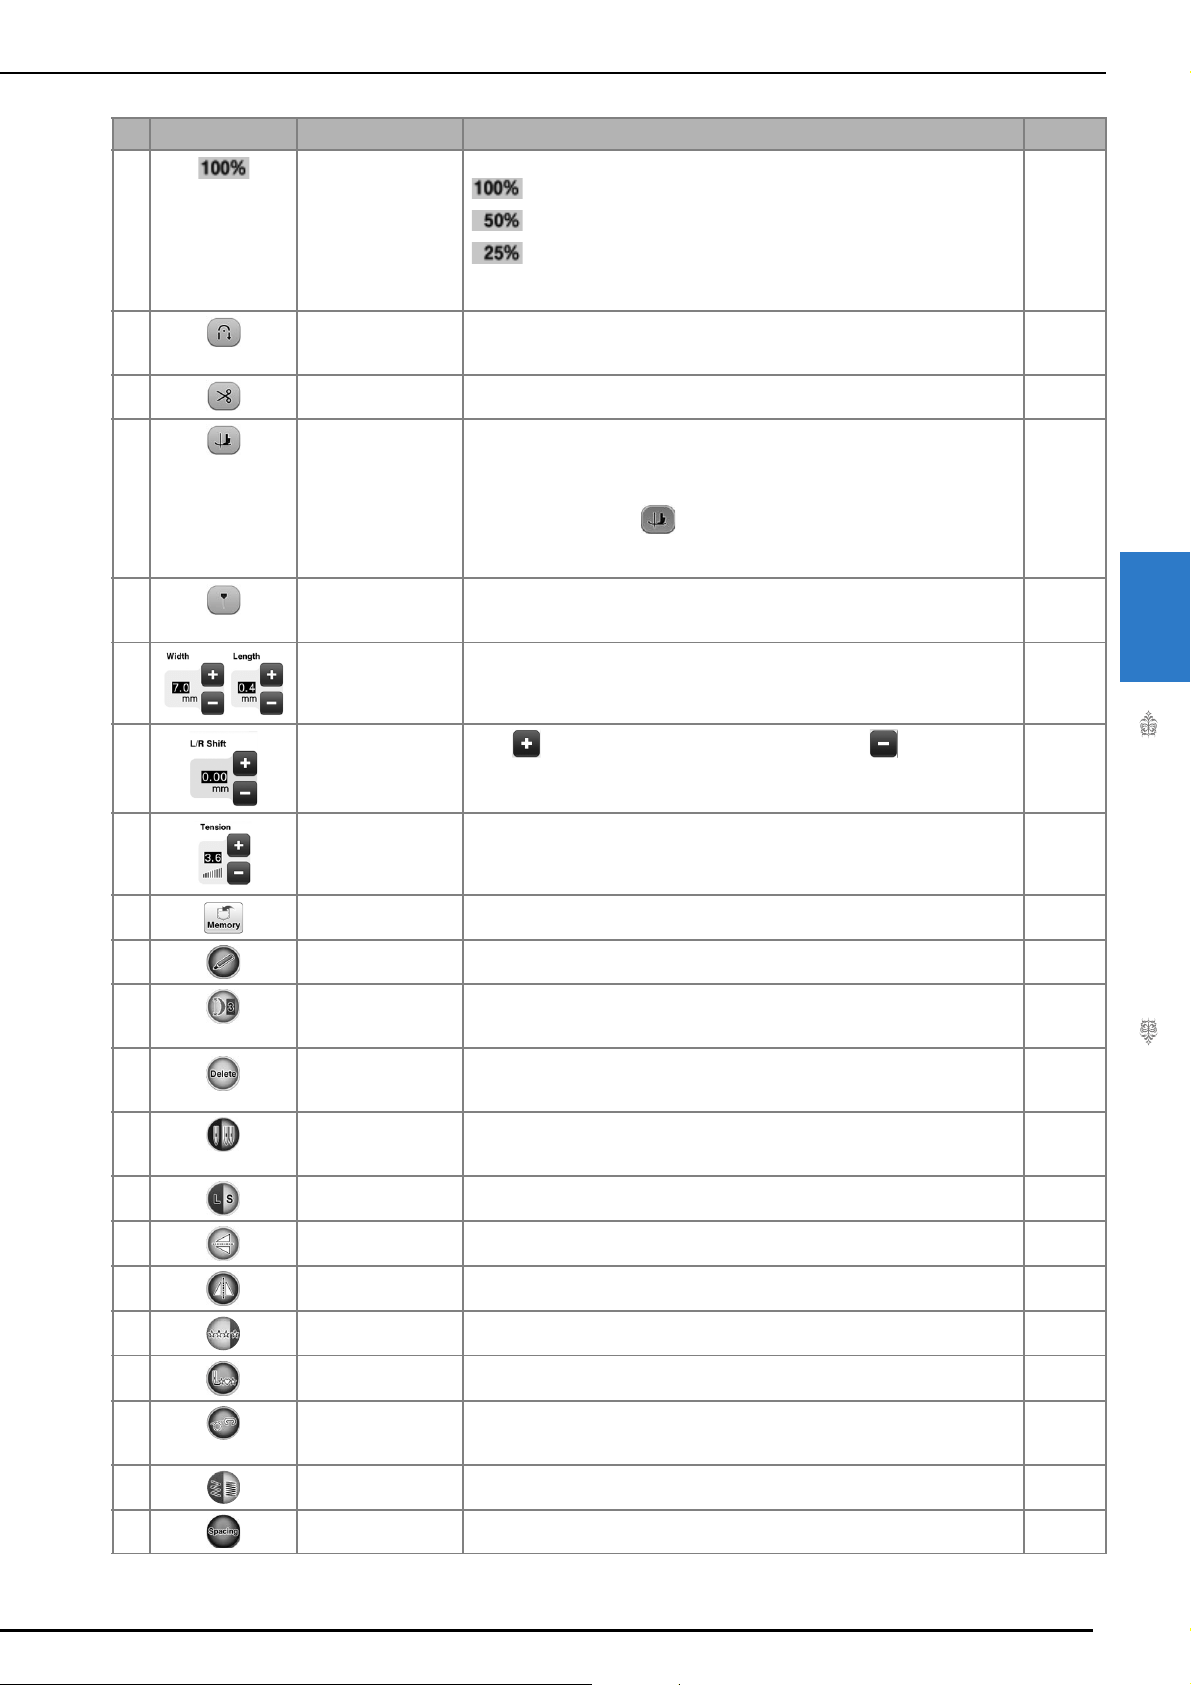
No. Display Key Name Explanation Page
a Pattern display size Show the approximate size of the pattern selected.
: Nearly the same size as the sewn pattern
: 1/2 the size of the sewn pattern
: 1/4 the size of the sewn pattern
* The actual size of the sewn pattern may differ depending on the type of
fabric and thread that is used.
113
b Automatic
reinforcement stitch
key
Press this key to turn on the automatic reinforcement stitching mode. 85
c Automatic thread
cutting key
Press this key to turn on the automatic thread cutting mode. 93
d Pivot key Press this key to select the pivot function. When the pivot function is selected,
stopping the machine lowers the needle and slightly raises the presser foot
automatically. In addition, when sewing is restarted, the presser foot is
automatically lowered.
• If this key appears as , the pivot function cannot be used.
• Be sure the needle position on page 4 of Machine Settings is set to the
down position.
95
e Guideline marker key Press this key to display the guideline marker along the sewing line. The
guideline marker makes it easier to align stitches with the fabric edge or other
marker on the fabric.
94
f Stitch width and
stitch length key
Shows the stitch width and stitch length of the selected stitch pattern. The
machine default settings are highlighted.
90-92
g “L/R Shift” key
Press to shift the stitch pattern to the right or press to shift the
pattern to the left. This feature is not available on all patterns. Only those
applicable will be shifted. The machine default setting is highlighted.
91
h Thread tension key Shows the thread tension setting for the selected stitch pattern. The machine
default settings are highlighted
92
i Memory key Use this key to save stitch pattern combinations. 190
j Sensor function key Press this key to use the sensor function. 100
k Elongation key When 7mm satin stitch patterns are selected, press this key to choose from 5
automatic length settings, without changing the stitch zigzag width or stitch
length settings.
180
l Delete key When you make a mistake selecting a stitch pattern, use this key to delete the
mistake. When you make a mistake in combining stitch patterns, use this key
to delete stitch patterns.
172, 173
m Needle mode
selection key
(Single/Double)
Press this key to choose single needle sewing or twin needle sewing. 65
n Size selection key Use this key to select the size of the stitch pattern (large, small). 180
o Vertical mirror image
key
After selecting the stitch pattern, use this key to create a vertical mirror image
of the stitch pattern.
180
p Horizontal mirror
image key
After selecting the stitch pattern, use this key to create a horizontal mirror
image of the stitch pattern.
180
q Single/Repeat sewing
key
Press this key to choose single stitches or continuous stitches. 180
r Back to beginning key When sewing is stopped, press this key to return to the beginning of the
pattern.
181
s Free motion mode
key
Press this key to enter free motion sewing mode.
The feed dog is lowered and presser foot is raised to a height appropriate for
free motion quilting.
133
t Thread density key After selecting the stitch pattern, use this key to change the thread density of
the pattern.
181
u
Character spacing
key
Press this key to change the spacing of character patterns. 173
Loading ...
Loading ...
Loading ...