Loading ...
Loading ...
Loading ...
4
Contents
Before Using Getting Started
Design Center
Layout & Editing
File Utility
Programmable
Stich Creator
Quick Reference
Alphabetic Index
8
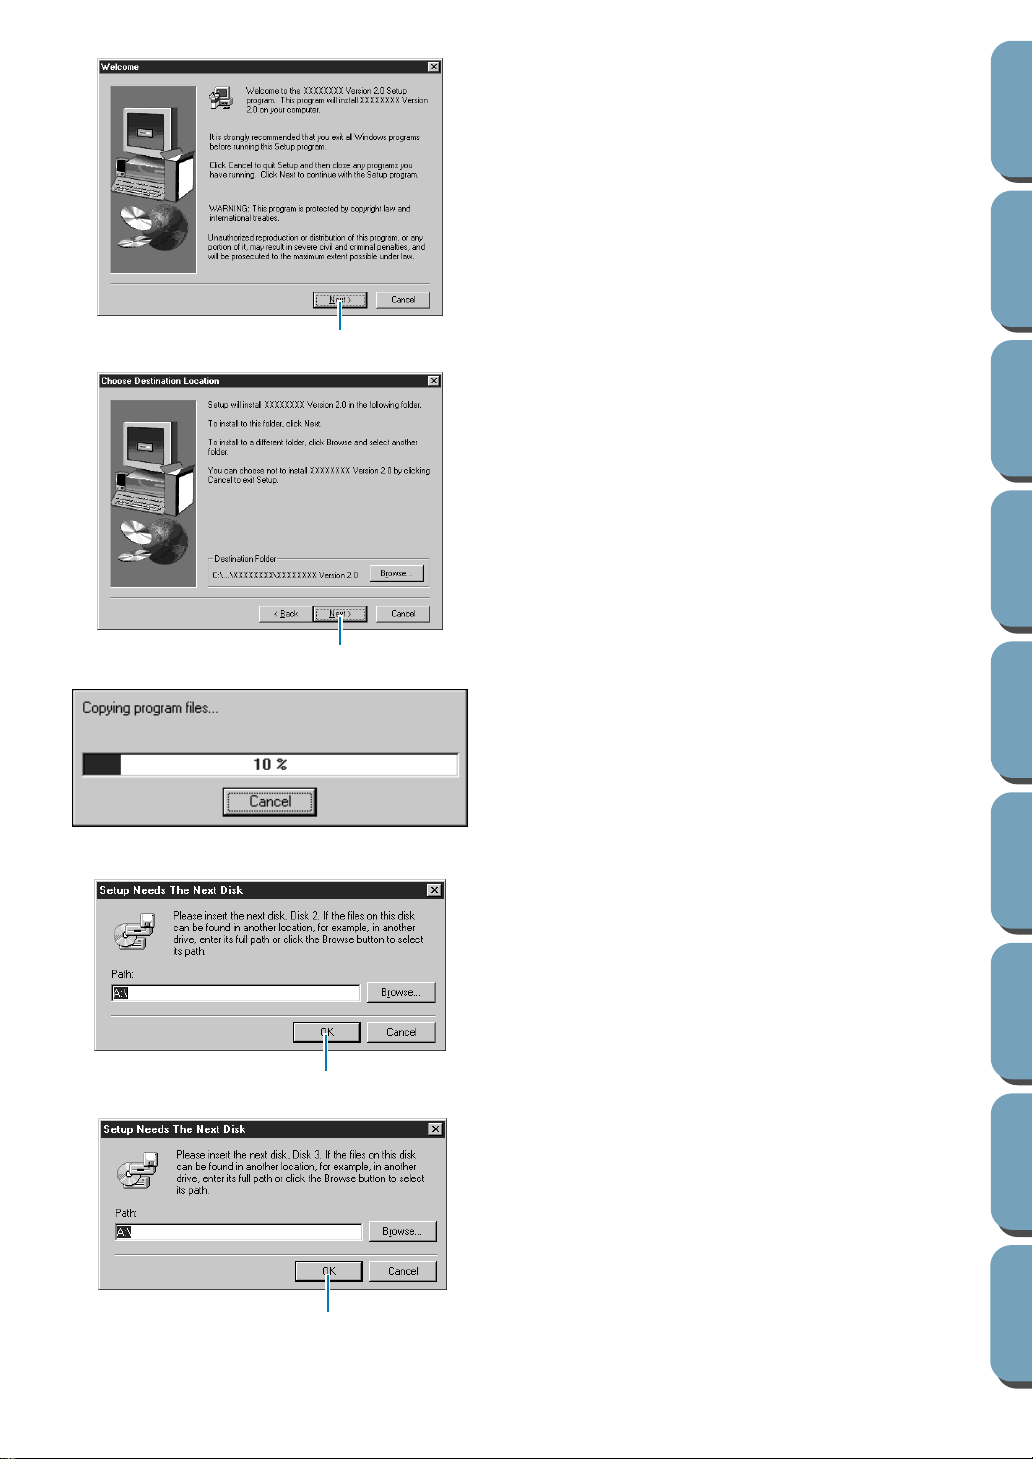
Click
Next
to proceed with the installation.
•
If you have other Windows applications running,
click
Cancel
to exit, close all the other applications
and start again.
9
Click
Next
to install in the default folder.
•
If you want to install into another folder, click
Browse
. Select a drive and a folder (if necessary,
type the name of a new folder). When the desired
folder is selected, click
OK
. The
Choose Destina-
tion Location
shows the selected folder. Click
Next
to install in that folder.
•
Click
Back
to move back to the previous step.
•
Click
Cancel
to exit.
When you click
Next
on the
Choose Destination Loca-
tion
dialog, installation starts.
0
Wait until this panel is replaced with the next dia-
log.
•
Click
Cancel
to exit.
After the data on Disk1 is copied, you will be
prompted to insert the disk marked Disk2:
A
Insert Disk2 and click
OK
.
•
Click
Cancel
to exit.
After the data on disk 2 is copied, you will be
prompted to insert the disk marked Disk3:
B
Insert Disk3 and click
OK
.
•
Click
Cancel
to exit.
8
9
A
B
Loading ...
Loading ...
Loading ...