Loading ...
Loading ...
Loading ...
3
Contents
Before Using Getting Started
Design Center
Layout & Editing
File Utility
Programmable
Stich Creator
Quick Reference
Alphabetic Index
System Requirements
Before you start installing the software on your PC, check that your system meets the following require-
ments. If it does not, consult your dealer.
Installing
1
Start Windows (refer to the Windows manual).
•
If you have other Windows applications running,
click
Cancel
to exit, close all the other applications
and start again.
2
Insert the disk marked Disk1 into your floppy disk
drive.
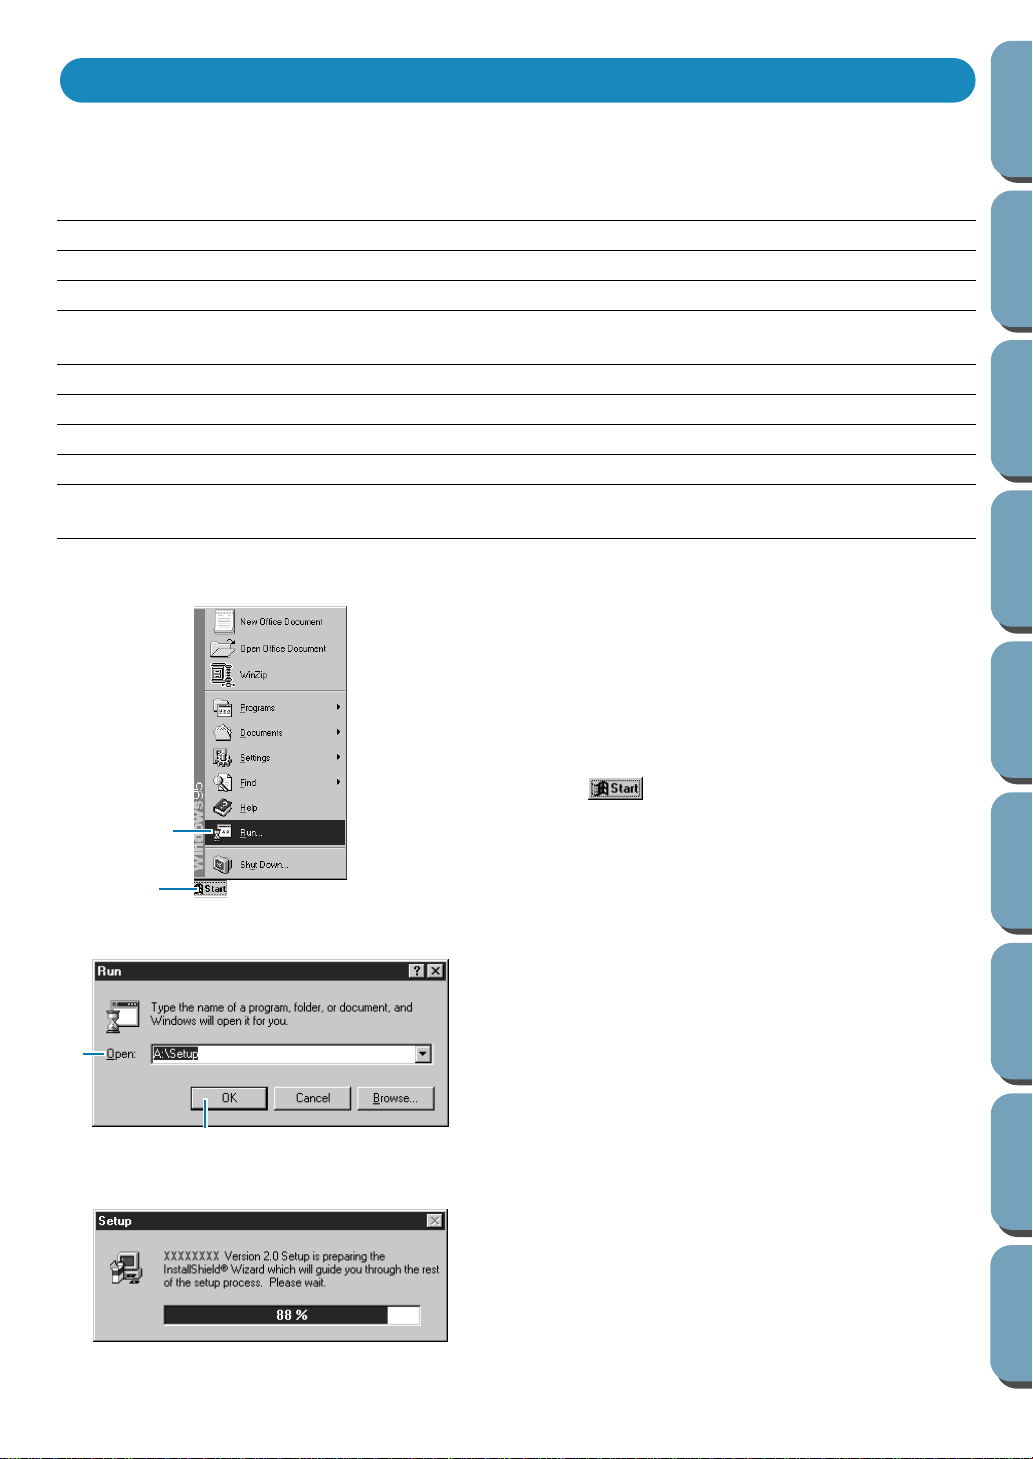
3
Click .
4
Click
Run
on the menu. The
Run
dialog appears.
NOTE:
In the case of Windows version 3.1, starts from
File-Run in the Program Manager Menu.
5
Type the full path of the installation program.
Example:
A:\Setup
if the disk is in drive A, or
B:\Setup
if the disk is in drive B.
6
Click
OK
to start the installation program.
7
Wait until the panel shown here is replaced with
the
Welcome
dialog shown next.
PC
IBM-PC or compatible
CPU
80486 or more
Windows
Windows 3.1 or Windows 95
Memory
12M or more (we recommend 16M or more because 12M might not be
enough for some computers)
Hard disk free space
6M or more
Display
VGA or more (we recommend a minimum of 256 colors SVGA)
Serial port
An RS-232C port that is not used with other peripherals
Mouse
A mouse that is supported by your version of Windows.
Printer
A graphic printer that is supported by your system (if you wish to print
your images)
Installing the Software
3
4
5
6
Loading ...
Loading ...
Loading ...