Loading ...
Loading ...
Loading ...

AXIS Camera Station
How to...
Create a Split View
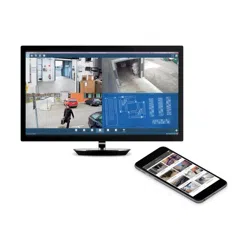
A split view displays multiple views in the same window. You can use camera views, sequences, web pages, maps and other split
views in the split view. One frame can be set as a hotspot that automatically loads the view from another frame when clicking in
that frame. Hotspots are particularly useful for asymmetric split views with one large and several small frames. The largest frame
is typically dened as the hotspot.
To add a new split view:
1. In the Live View or Recordings workspace, click
.
2. Select New Split View.
3. Enter a name for the split view
4. Select a layout from the drop-down list:
- Standard — optimized for standard resolution cameras (4:3 format)
- Wide — optimized for HDTV and megapixel cameras (16:9 format)
- Corridor — optimized for cameras using Axis’ Corridor Format (16:9 format, 90 degree rotation)
5. Double-click views in the tabs Cameras and Views to add them in the split view. It is also possible to drag views from the
tabs Cameras and Views and drop them in the empty cells in the split view.
6. Optional: To set a hotspot, select a frame in the split view and click Set Hotspot.
7. When satised, click OK to create the split view.
Note
Split views and multiple servers: When connected to more than one AXIS Camera Station Server, cameras from other servers
can be used in the split view. The split view is saved on the server selected in the main window. To add a camera from
another server, select the server from the server drop-down list under Camera.
Create a Sequence
A sequence view automatically switches between included views. The dwell time, that is, the number of seconds to show a view,
before switching to the next, can be set individually for each view. For cameras with PTZ capabilities, PTZ presets can be included in
the sequence.
To create a sequence, follow these steps:
1. In the Live View or Recordings workspace, click
.
2. Select New Sequence.
3. Enter a name for the sequence.
4. Double-click desired views in the tabs Cameras and Views to add them to Sequence views. It is also possible to drag
views from the tabs Cameras and Views and drop them in Sequence views.
5. Optional: To set a dwell time, select a view in the sequence and click Set Properties. Enter the desired dwell time.
6. Optional: To include a PTZ preset, select a view in the sequence and click Set Properties. Select a PTZ preset from
the drop-down list.
7. When satised, click OK to create the sequence.
Note
PTZ presets must rst be added. See Add a PTZ Preset Position on page 43.
41
Loading ...
Loading ...
Loading ...
