Loading ...
Loading ...
Loading ...
NOTE: The report can also be requested from the Embedded Web Server.
It takes about two minutes to print the Print Quality Diagnostic Report.
Corrective actions
If you have an issue with the diagnostic page, there are steps you can take, depending on the problem.
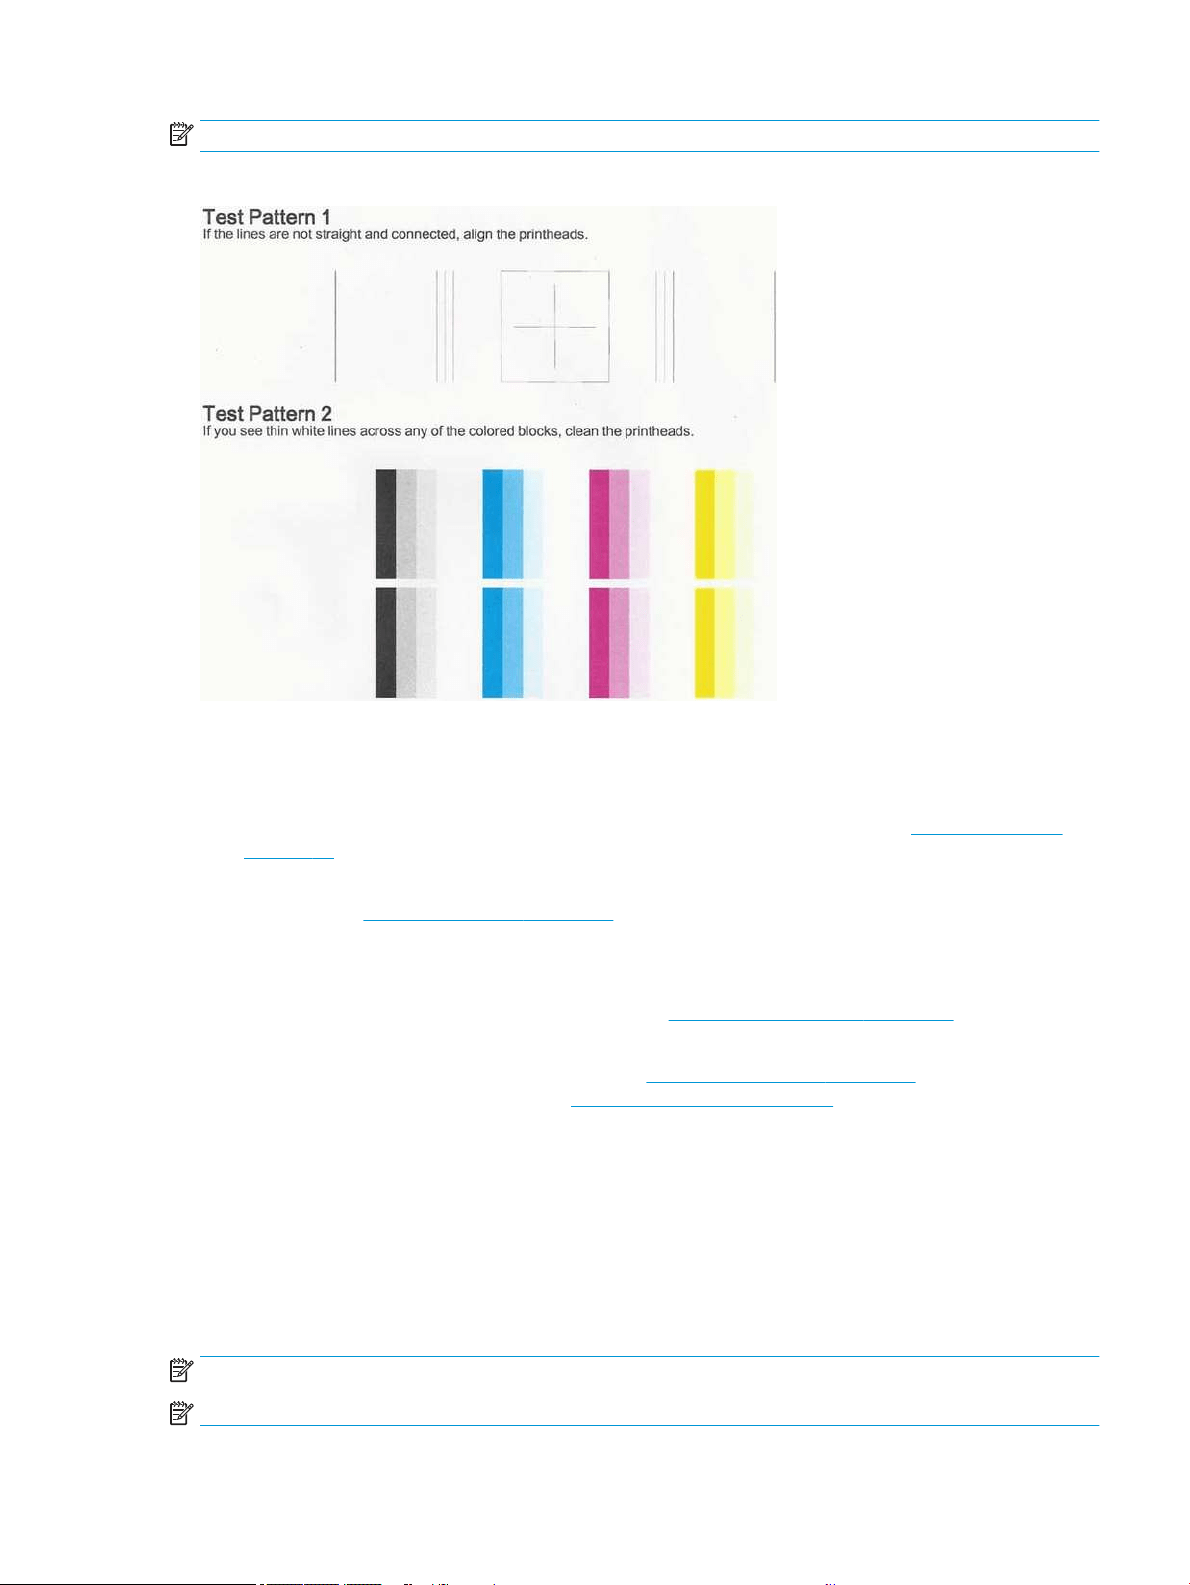
1. If the lines in Test Pattern 1 are not straight and connected, align the printhead (see Align the printhead
on page 60).
2. If any of the colored blocks in Test Pattern 2 show white lines, are faded or completely missing, clean the
printhead (see Clean the printhead on page 59). Follow the front-panel prompts and perform all three
levels of cleaning if necessary.
3. If the problem remains, clean the printhead again.
4. If the problem remains, replace the ink cartridge (see Replace an ink cartridge on page 55) corresponding to
the streaked, faded, or missing color block in Test Pattern 2.
5. If the problem remains, replace the printhead (see Replace the printhead on page 61). If the printhead is
still in warranty, contact HP Support (see Contact HP Support on page 101).
Clean the printhead
If your print is streaked or has incorrect or missing colors, the printhead may need to be cleaned.
There are three stages of cleaning. Each stage lasts about two minutes, uses one sheet of paper, and uses an
increasing amount of ink. After each stage, review the quality of the printed page. You should initiate the next
phase of cleaning only if the print quality is poor.
If print quality still seems poor after you complete all stages of cleaning, try aligning the printhead.
NOTE: Cleaning uses ink, so clean the printhead only when necessary.
NOTE: Failing to turn o the printer correctly can cause print-quality problems.
ENWW Clean the printhead 59
Loading ...
Loading ...
Loading ...