Loading ...
Loading ...
Loading ...
93
5
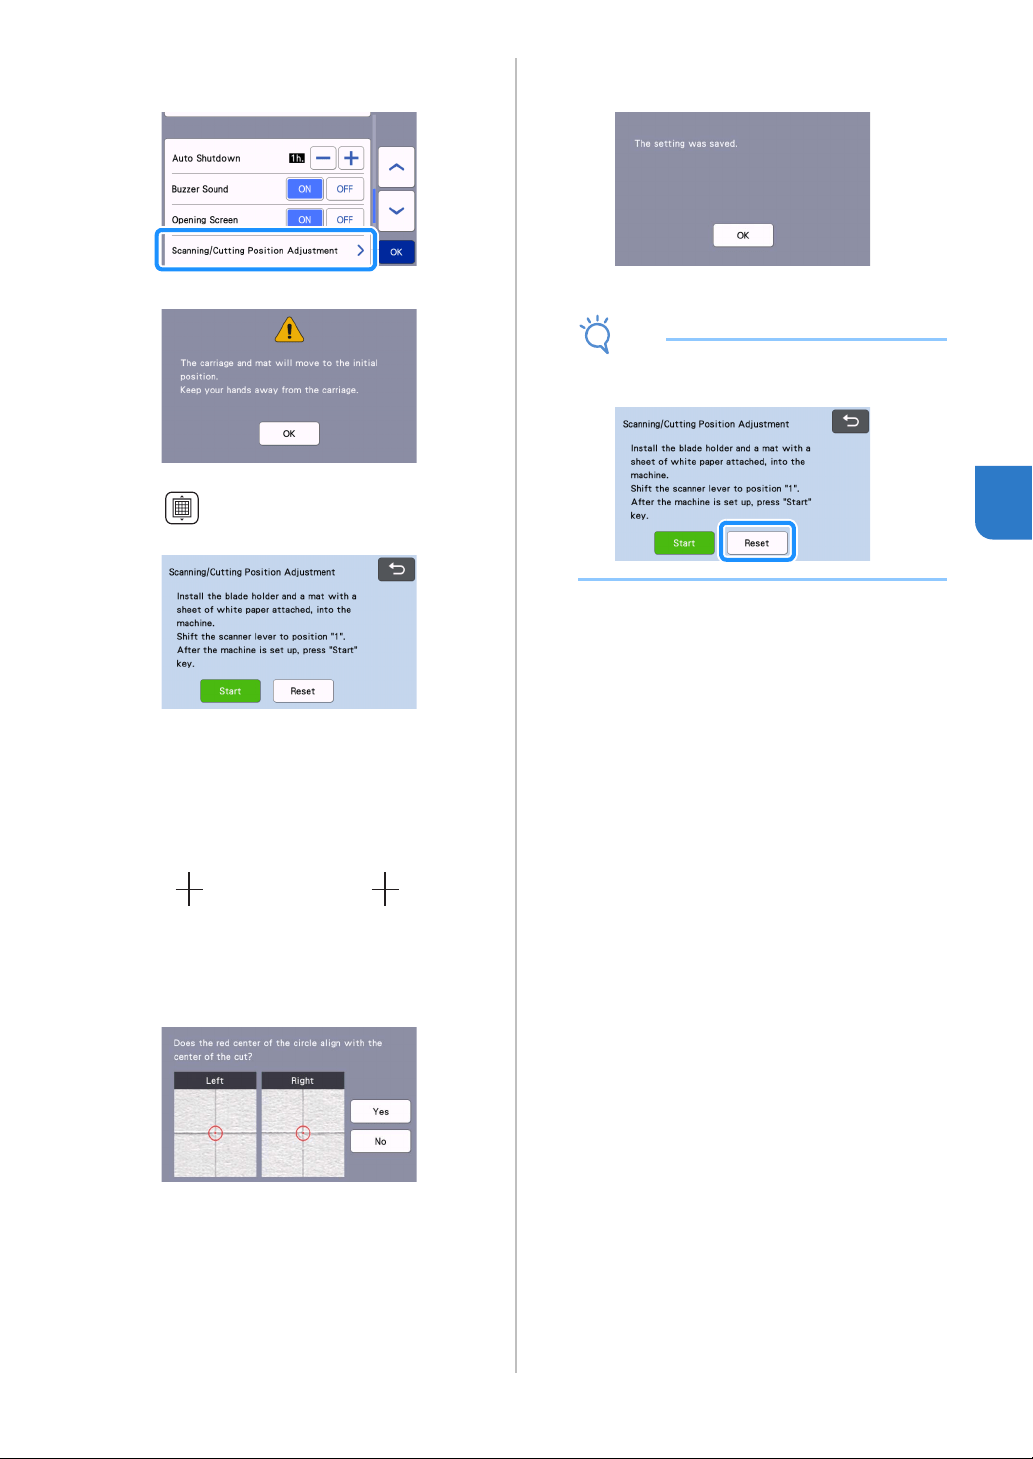
c Touch the “Scanning/Cutting Position
Adjustment” button in the settings screen.
The following message appears.
• Touch the “OK” key.
d Press to feed in the mat.
• For details, see “Loading the Mat” on page 26.
e After making sure that the scanner lever (on the
left side of the machine) is lowered to “1”,
touch the “Start” key to start cutting.
See “Cutting” on page 26.
Position adjustment cuts are cut, and then the
cuts are scanned.
• Using the intersecting cuts on the left and right
sides, the scanning position is automatically
adjusted.
f The adjustment results screen appears.
• If the center of the cut aligns with the center of the
red circle, the position is properly adjusted.
Touch the “Yes” key, and then continue with step
g.
• If the center of the cut does not align with the
center of the red circle, the position is improperly
adjusted. Touch the “No” key, replace the paper
attached to the mat, and then repeat steps
d
through
f to readjust the position.
g When the following message appears, touch the
“OK” key.
The adjustment is finished.
Note
• To return the settings to their defaults, touch
the “Reset” key in the screen shown below.
hUse “Direct Cut” mode to check the
adjustment results.
• For details on the “Direct Cut” mode, see
“SCANNING FOR CUTTING (Direct Cut)” on
page 69.
Loading ...
Loading ...
Loading ...