Loading ...
Loading ...
Loading ...
30
■ Selecting and Editing the Second
Pattern
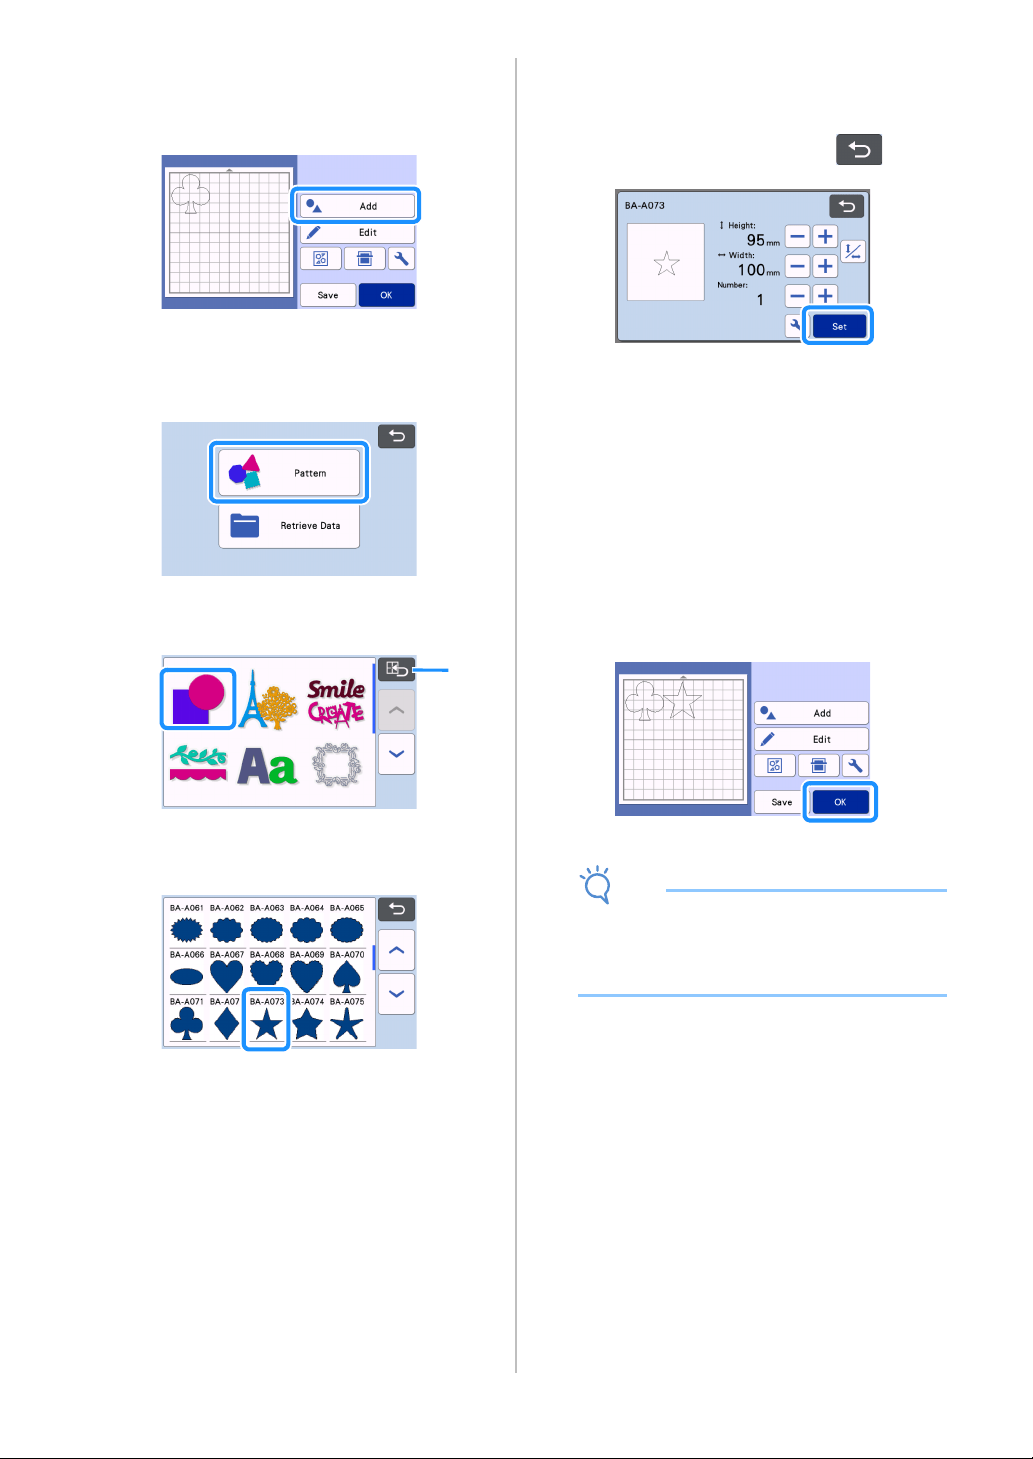
a Touch the “Add” key in the mat layout screen.
b Select the location of the pattern to be added.
• For this example, touch the “Pattern” key to add a
built-in pattern. For details on recalling pattern
data, see step
c in “Retrieve Data” on page 54.
c Select the category for the pattern to be cut
out.
a Touch to return to the previous screen.
d Select the second pattern to be used.
e Edit the pattern.
After editing is finished, touch the “Set” key.
• For details on the editing functions, see “Pattern
Editing Functions” on page 40.
• To select a different pattern, touch , cancel
the selection, and then select a pattern again.
f Check the pattern arrangement.
The two patterns that will be cut out appear in the mat
layout screen. After checking the arrangement, touch
the “OK” key.
• From this screen, an individual pattern can be
edited, moved or deleted. For details on the
functions that can be used in the mat layout
screen, see “Layout Editing Functions” on
page 42.
• By using the auto layout function, the
arrangement of the patterns can easily be
adjusted. For details, see “Auto Layout
Functions” on page 49.
• Select the “Cut Area” setting appropriate for the
mat being used. (See page 10.)
The preview screen appears.
Note
• Depending on the pattern type and material to
be cut, the patterns may not be cleanly cut if
their spacing is too small. In that case,
rearrange the patterns to separate them.
a
Loading ...
Loading ...
Loading ...