Loading ...
Loading ...
Loading ...
71
4
e Attach the original that will be scanned to the
mat.
Memo
• In “Direct Cut” mode, the scanning mat cannot
be used.
• Depending on the machine model, the sizes of
mats that can be used will differ. Check the
“Maximum Scanning Area” under “Machine
Information” of the settings screen.
• Before attaching the material to the mat, use a
corner of the adhesive side of the mat to test
attaching it.
f While holding the mat level and lightly
inserting it under the feed rollers on the left and
right sides of the feed slot, press in the
operation panel.
• For details, see “Loading the Mat” on page 26.
g Touch the "Start" key to start scanning.
Note
• When the scanner lever is raised, the following
message appears.
Scanning with the lever raised may result in
blurry scans.
■ Creating Cutting Data
The procedure for creating cutting data differs
depending on the mode.
Grayscale recognition mode
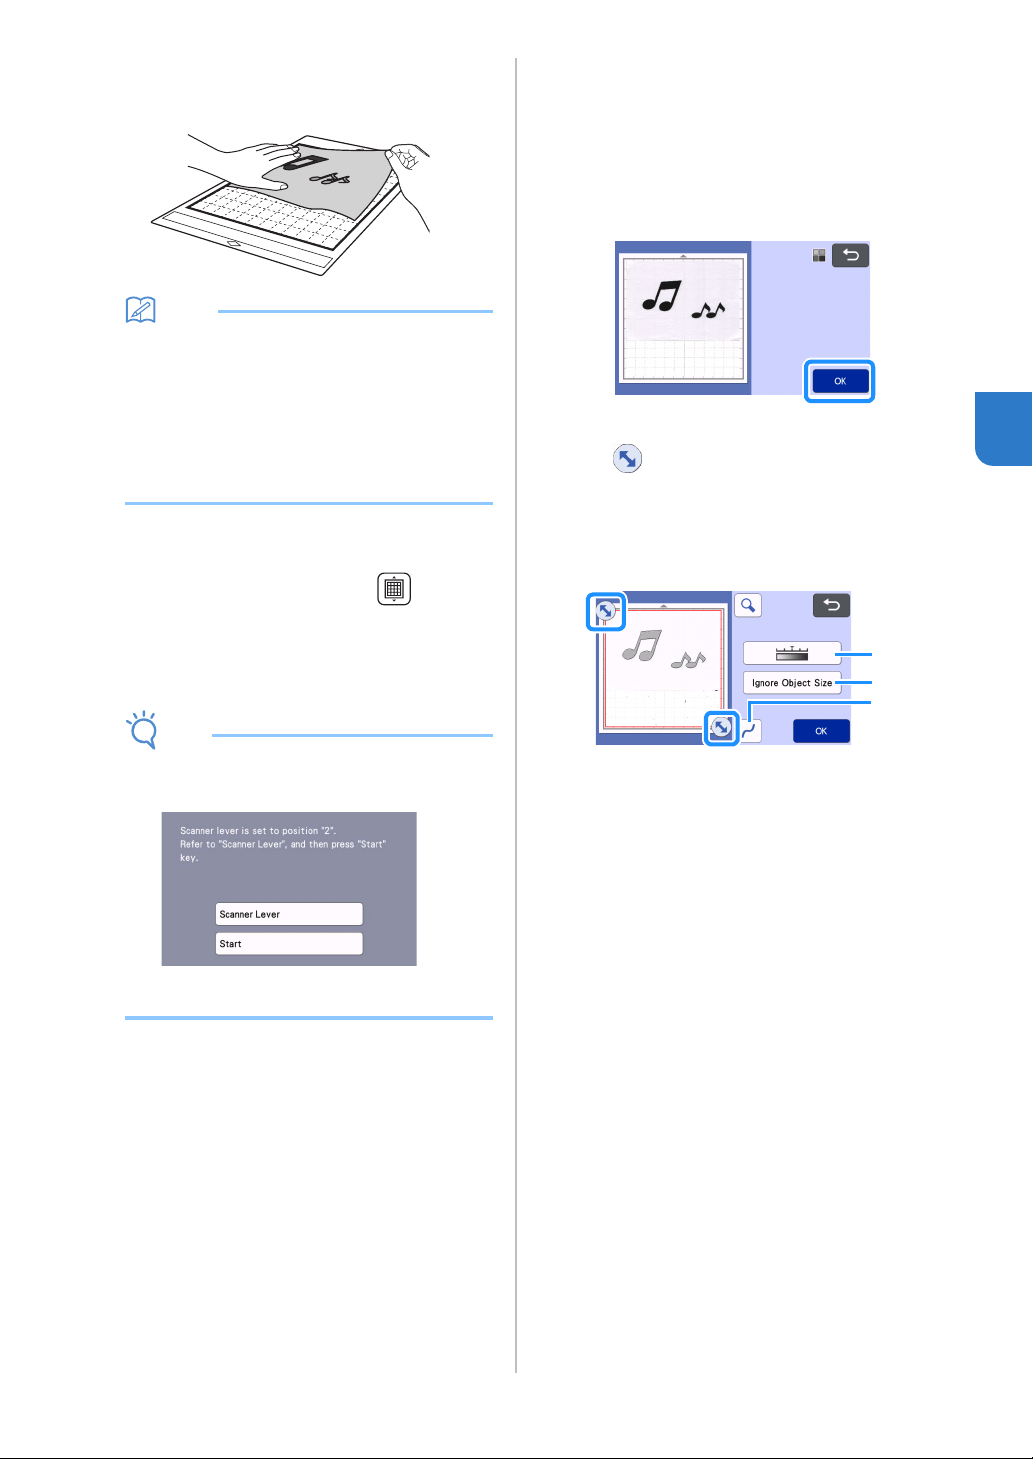
a Check the scanned image, and then touch the
“OK” key.
b In the image trim screen, use the touch pen to
drag to trim the image to the size to be
imported.
• When trimming is performed, the “OK” key
changes to the “Preview” key.
If cutting lines are created, the outline of the
scanned illustration will be black.
a Image Detection Level Key
Adjust the image detection level.
b Ignore Object Size Key
Small unnecessary patterns (dotted lines, etc.)
can be excluded from cutting data. For details,
see “Specifying “Ignore Object Size”” on
page 81.
c Smoothing Setting Key
Specify the level of smoothing applied to the
image outline. For details, see “Adjusting Image
Detection Levels” on page 81.
a
b
c
Loading ...
Loading ...
Loading ...