Loading ...
Loading ...
Loading ...
36
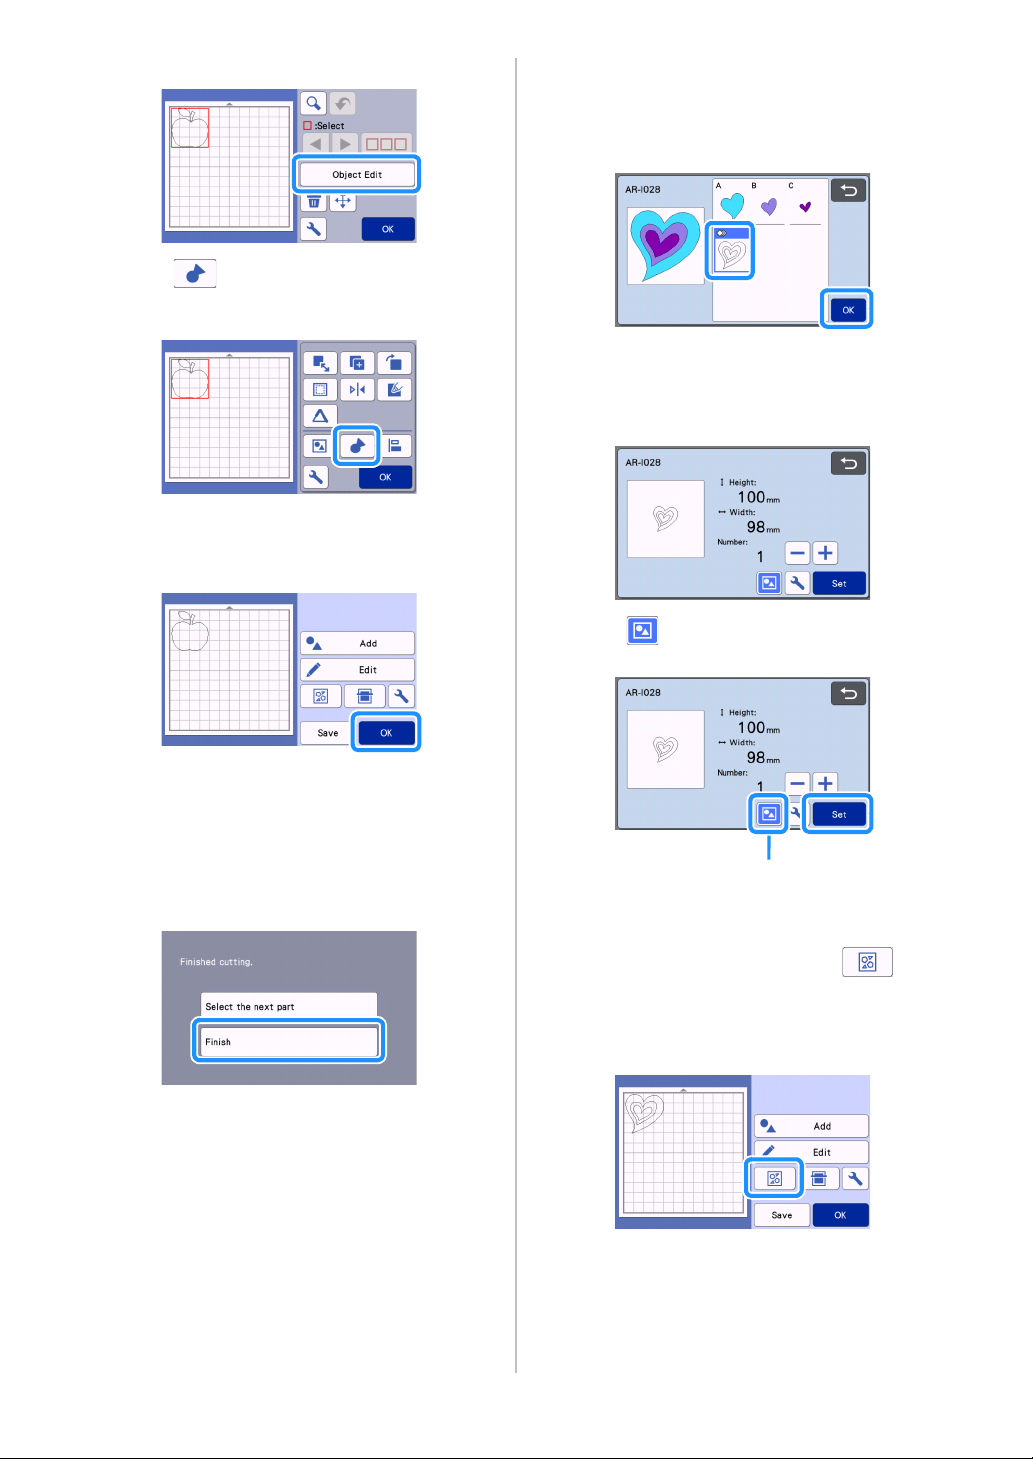
e Touch the “Object Edit” key.
f Touch to weld the pattern.
• For details on the welding, see “Welding (Merging
the Outlines of Multiple Patterns)” on page 46.
Touch the “OK” key in the editing screen to
return to the mat layout screen.
g Touch the “OK” key.
hFollow the procedures described in “Loading
the Mat” (page 26) and “Cutting” (page 26) to
load the material to be cut.
When cutting is finished, a message appears.
i After all pattern pieces have been cut out,
touch the “Finish” key.
Cutting all the pattern piece within the
same mat
a Select and edit the all pattern pieces, and then
touch the “OK” key.
b Edit the pattern piece using the pattern piece
editing screen.
• For details on the editing functions, see “Editing the
Pattern Piece” on page 41.
c Touch to ungroup the pattern pieces.
After editing is finished, touch the “Set” key.
a Grouping/Ungrouping Key
d Check the pattern piece arrangement using the
mat layout screen and then touch to
arrange all the pattern pieces layout
automatically.
• For details on the auto layout function, see “Auto
Layout Functions” on page 49.
Touch the “OK” key in the editing screen to
return to the mat layout screen.
a
Loading ...
Loading ...
Loading ...