Loading ...
Loading ...
Loading ...
27
2
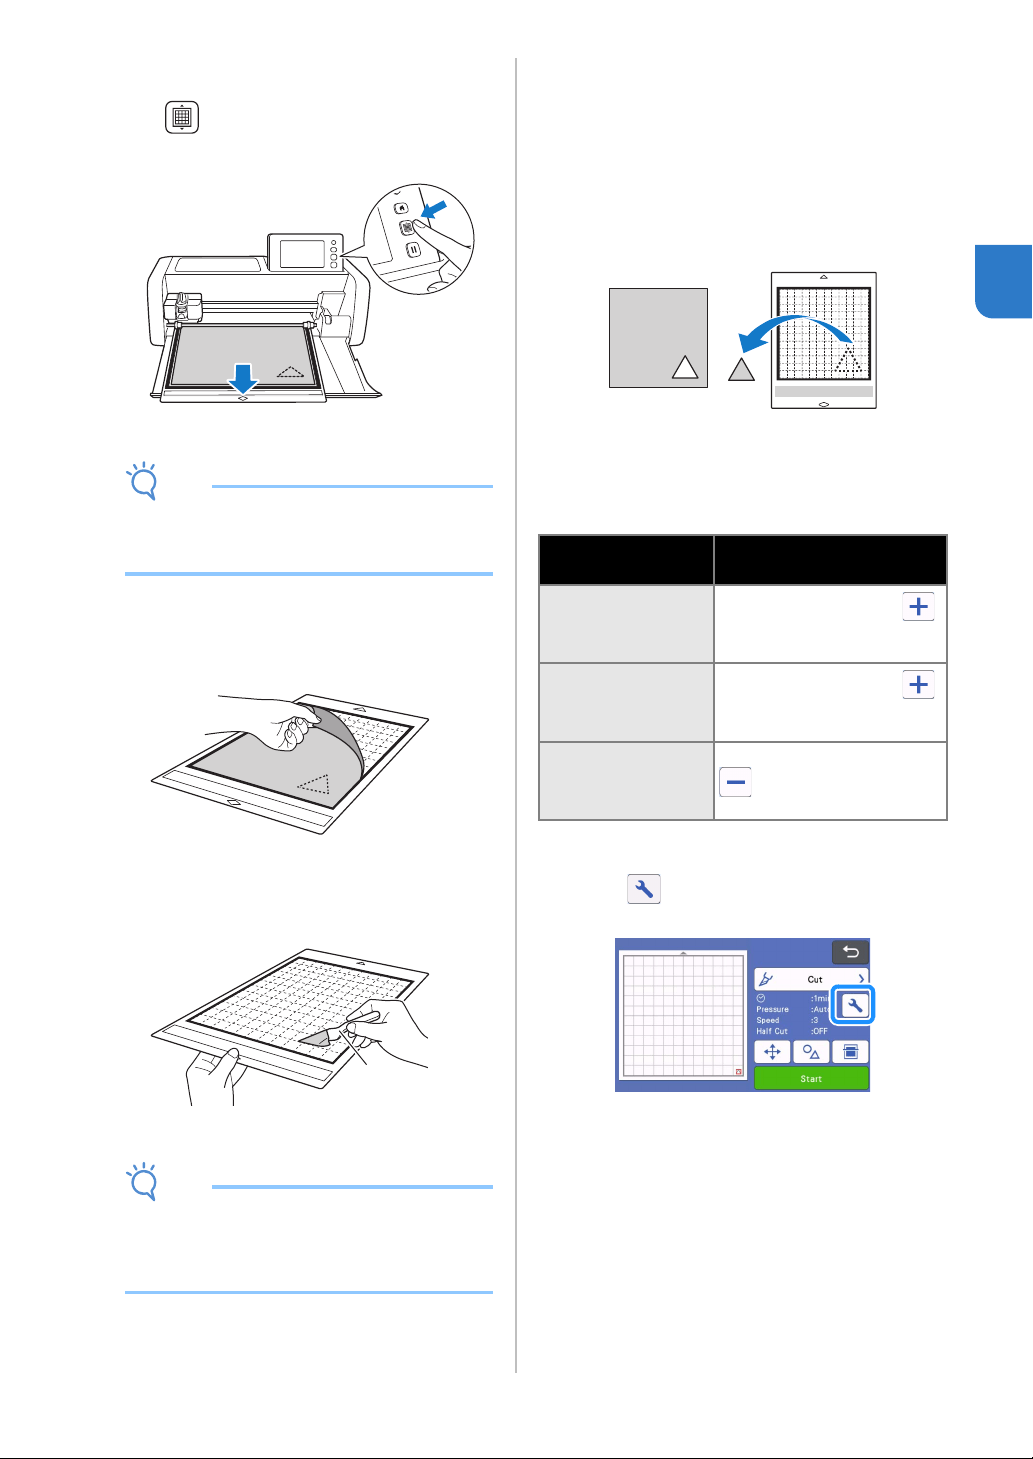
■ Unloading the Mat
a Press in the operation panel to feed out
the mat.
Note
• Do not forcefully pull the mat while it is being
fed out. Otherwise, damage, for example, to the
feed rollers, may result.
b Peel off the material from an area that is easily
removable, such as a corner, and then slowly
peel while maintaining an even pressure.
c Holding the mat with your hand, use the
included spatula to carefully peel off the cut-
out patterns.
a Spatula
Note
• When peeling off the material, insert the spatula
as level as possible into the space between the
material and mat. Strongly rubbing the adhesive
side of the mat may damage it.
■ Checking the Test/Trial Cut Results
Adjust the cutting pressure according to the test/trial cut
results.
Repeatedly perform test/trial cut and adjust the cutting
pressure until the material is cut cleanly.
With an Appropriate Cutting Pressure
When the material is peeled off, a faint trace of
the cut remains on the mat surface.
■ Changing the Auto Cutting Pressure
If the material could not be cut cleanly, refer to the
following table, and adjust the setting for the cutting
pressure.
Changing the Cut Pressure Setting
a Touch in the test screen to display the
settings screen.
a
Test/Trial Cut
results
Tips for adjustment
Part of the pattern is
not cut.
Pressure too light: Touch
in the settings screen once to
increase the pressure.
The entire pattern is
not cut.
Pressure too light: Touch
in the settings screen once to
increase the pressure.
There are deep cuts
completely through
the mat.
Pressure too strong: Touch
in the settings screen
once to decrease the pressure.
Loading ...
Loading ...
Loading ...