Loading ...
Loading ...
Loading ...
84
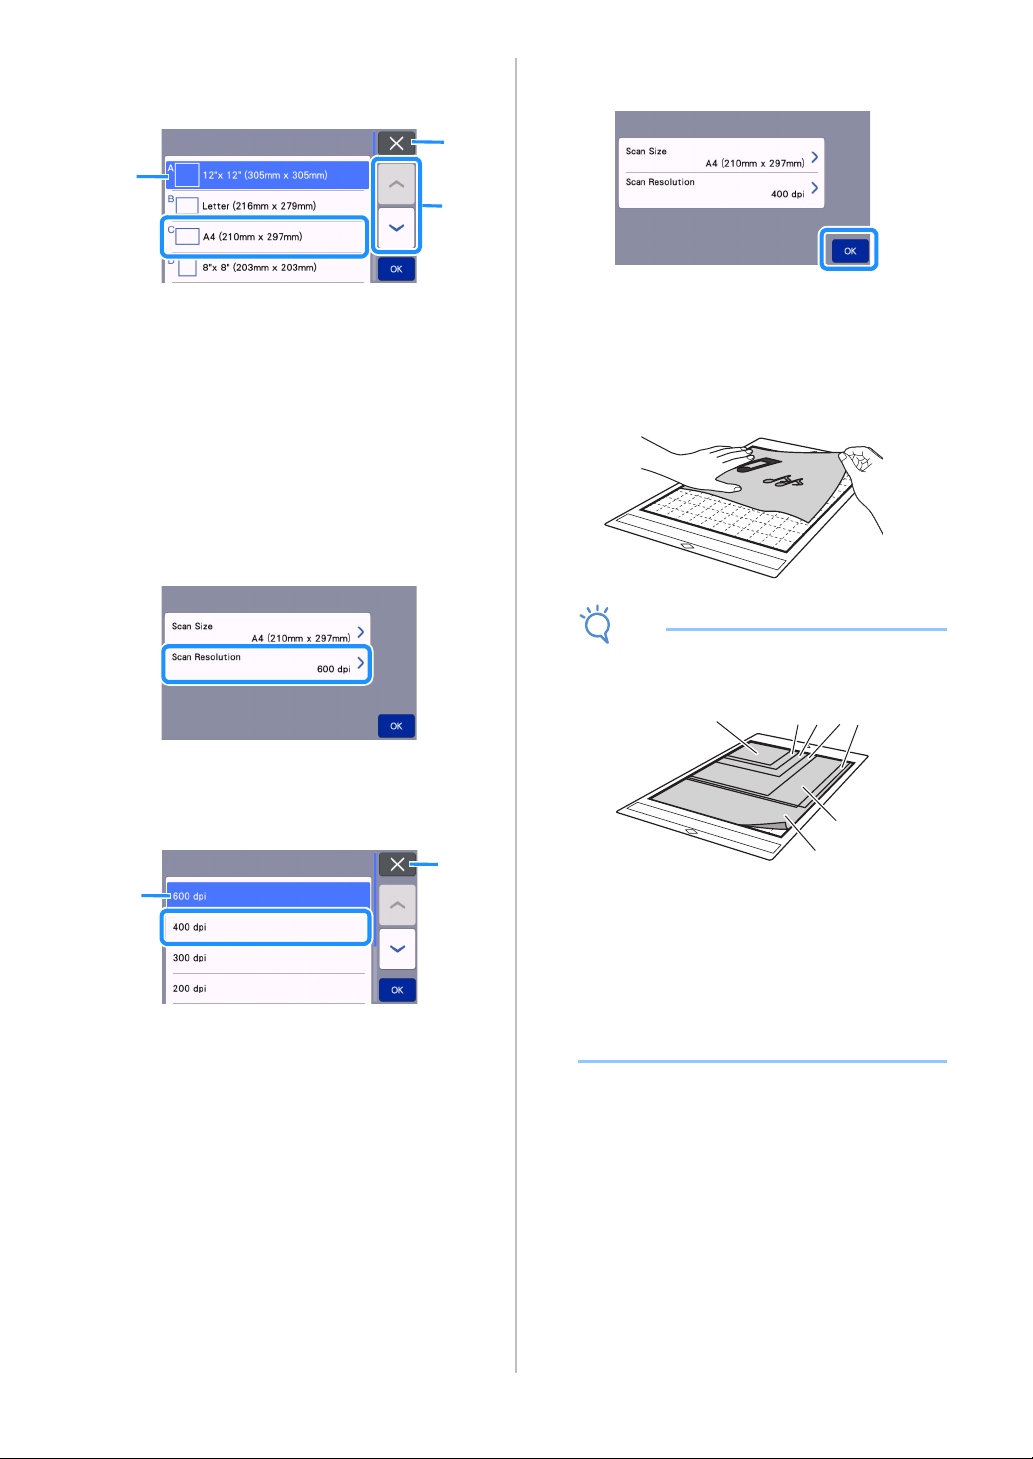
f Select the size of the scanning area.
From the list, touch the key for the size of the original
to be scanned. For this example, select the A4 size.
a Size selection keys
b Touch to cancel the setting and return to the
previous screen.
c Touch to scroll through the list.
After the selected key is highlighted, touch the
“OK” key to finish specifying settings.
• Select “Custom”, and then touch the “OK” key to
specify the desired scanning area. For details, see
“Selecting the Area to be Saved” on page 85.
g Touch the “Scan Resolution” button to display
the scanning resolution settings screen.
hSelect the scanning resolution.
From the list, touch the key for the scanning
resolution. For this example, select 400 dpi.
a Resolution selection keys
b Touch to cancel the setting and return to the
previous screen.
After the selected key is highlighted, touch the
“OK” key to finish specifying settings.
i Check the settings, and then touch the “OK”
key.
A message appears.
■ Scanning and Saving
a Attach the original that will be scanned to the
mat.
Note
• Place the original to be scanned so that it is in
the landscape orientation.
a 12" × 12" (305 mm × 305 mm)
b Letter (216 mm × 279 mm)
c A4 (210 mm × 297 mm)
d 8" × 8" (203 mm × 203 mm)
e 5" × 7" (127 mm × 178 mm)
f 4" × 6" (102 mm × 152 mm)
g 3.5" × 5" (89 mm × 127 mm)
b Load the mat into the feed slot.
For details on loading the mat, see “Loading the Mat”
on page 26.
c Touch the "Start" key to start scanning.
• When the scanner lever is raised, a confirmation
message appears. For details, see step
g in
“Scanning” of “Tutorial 3 - Scanning and Cutting”
on page 69.
The data is saved at the same time that the
original is being scanned.
When scanning and saving is finished, the
completion message appears.
b
a
c
a
b
a
b
c
d
e
f
g
Loading ...
Loading ...
Loading ...