Loading ...
Loading ...
Loading ...
49
3
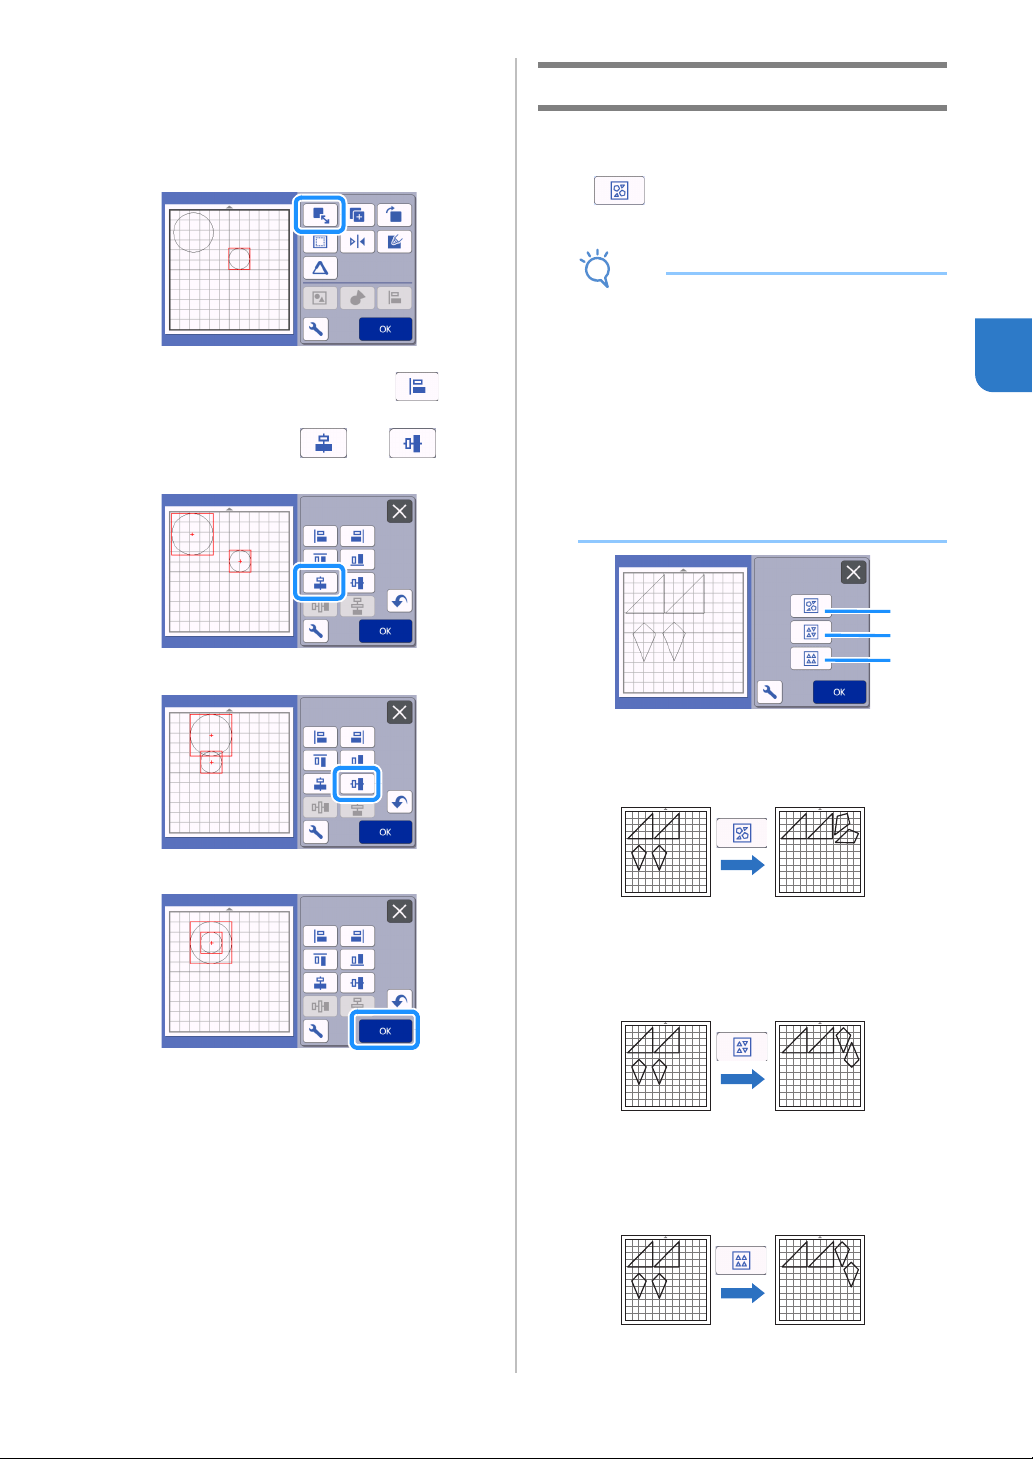
■ Centering Two or More Patterns
a Add two circle patterns, and then change the
size of one.
• For details on resizing patterns, see “Object Editing
Screen” on page 43.
b After selecting two patterns, touch in the
object editing screen to display the following
screen. After touching and to
align the patterns, touch the “OK” key.
The patterns are arranged.
Auto Layout Functions
The auto layout function is useful when you do not
wish to waste the material attached to the mat.
Touch in the mat layout screen (page 41) to
perform the auto layout function.
Note
• Depending on the pattern and material to be
cut, the patterns may not be cleanly cut if their
spacing is too small. In that case, rearrange the
patterns to slightly separate them.
• The spacing between arranged patterns can be
specified in the settings screen (see “Pattern
Interval” on page 10). Perform the auto layout
function after every time you adjust the spacing
between patterns so the changes are applied.
• Set the number to “3” or higher in the “Pattern
Interval” setting when lightweight fabric is
attached to the mat with a high tack adhesive
fabric support sheet.
a Rearranging By Rotating Patterns to Any Angle
This is useful when arranging a large number of
patterns in a limited space.
b Rearranging By Rotating Patterns 0° or 180°
This is useful when arranging the printed design
(vertical patterns) on paper or fabric as the material for
cutting/drawing or when using the vertical grain.
c Rearranging Without Rotating Patterns
This is useful when arranging the printed design on
paper or fabric as the material for cutting/drawing or
when using the grain.
a
b
c
Loading ...
Loading ...
Loading ...