Loading ...
Loading ...
Loading ...
78
b Use the touch pen (stylus) to touch and
drag it around the screen to trim the cutting
lines.
• When trimming is performed, the “OK” key
changes to the “Preview” key. Touch the “Preview”
key to confirm the trimmed area.
a Image Detection Level Key
Adjust the image detection level.
b Ignore Object Size Key
Small unnecessary patterns (dotted lines, etc.)
can be excluded from cutting data. For details,
see “Specifying “Ignore Object Size”” on
page 81.
c Smoothing Setting Key
Specify the level of smoothing applied to the
image outline. For details, see “Adjusting Image
Detection Levels” on page 81.
Color recognition mode
a In the image trim screen, use the touch pen to
drag to trim the image to the size to be
imported.
Memo
• Trimming the image to the desired size can
reduce the amount of time required to convert it
to cutting data.
b Touch the “OK” key to confirm the trimmed
area.
c Select the detection standard in the image
editing screen.
The image shape is detected and cutting lines are
created based on one of two standards. For this
example, touch to create cutting lines using
region detection.
For details on the detection standards, see step
a in
“Grayscale recognition mode”.
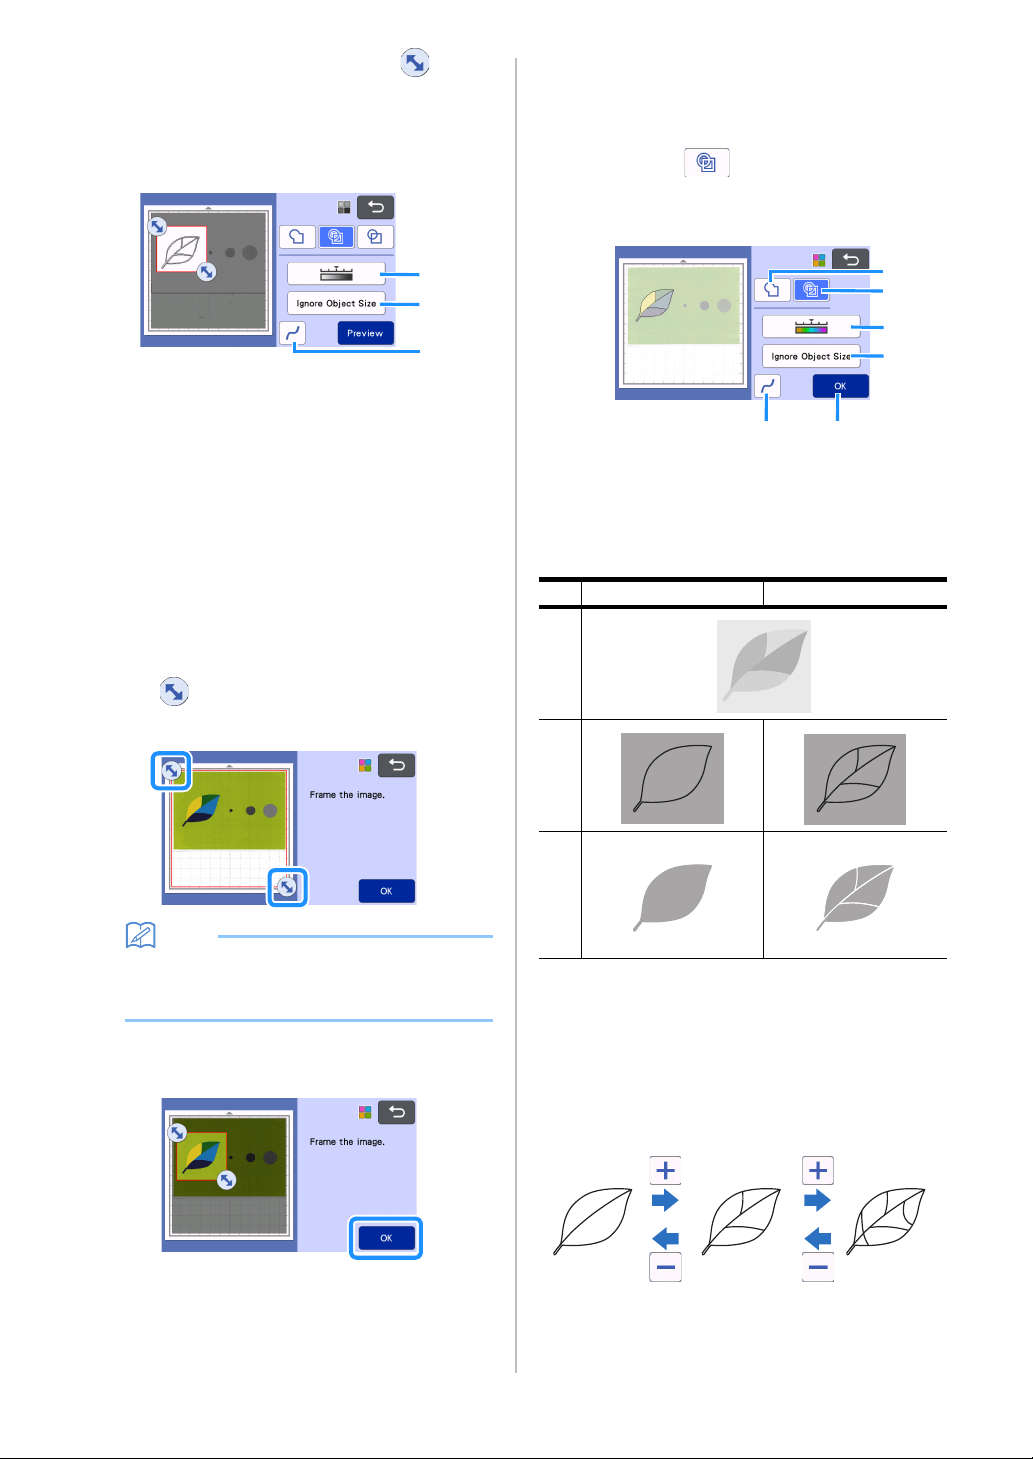
a Outline Detection Key
b Region Detection Key
c Image Detection Level Key
If the cutting lines were not correctly detected,
change the number of colors to be detected. If
a color that appears as a single color is
detected as separate colors, reduce the
number of colors. If adjacent colors with a
similar brightness are detected as a single
color, increase the number of colors.
a
b
c
Difference in cutting lines depending on
detection standard
a Outline detection b Region detection
Original
Cutting
lines
Finished project
after cutting
b
a
c
d
e
f
Loading ...
Loading ...
Loading ...