Loading ...
Loading ...
Loading ...
39
Adding to Amcrest NVR/DVR
Most Amcrest Smart Home devices, excluding Smart Home battery cameras, can connect to both an
Amcrest DVR and Amcrest NVR. This is possible by obtaining the IP address of your device from your
network and adding it directly into your DVR or NVR. The DVR or NVR must be connected to the
same network as the Amcrest Smart Home device for this to work.
The device you are adding must be added to the Amcrest Smart Home app first before adding it to
your device.
Adding to An Amcrest NVR
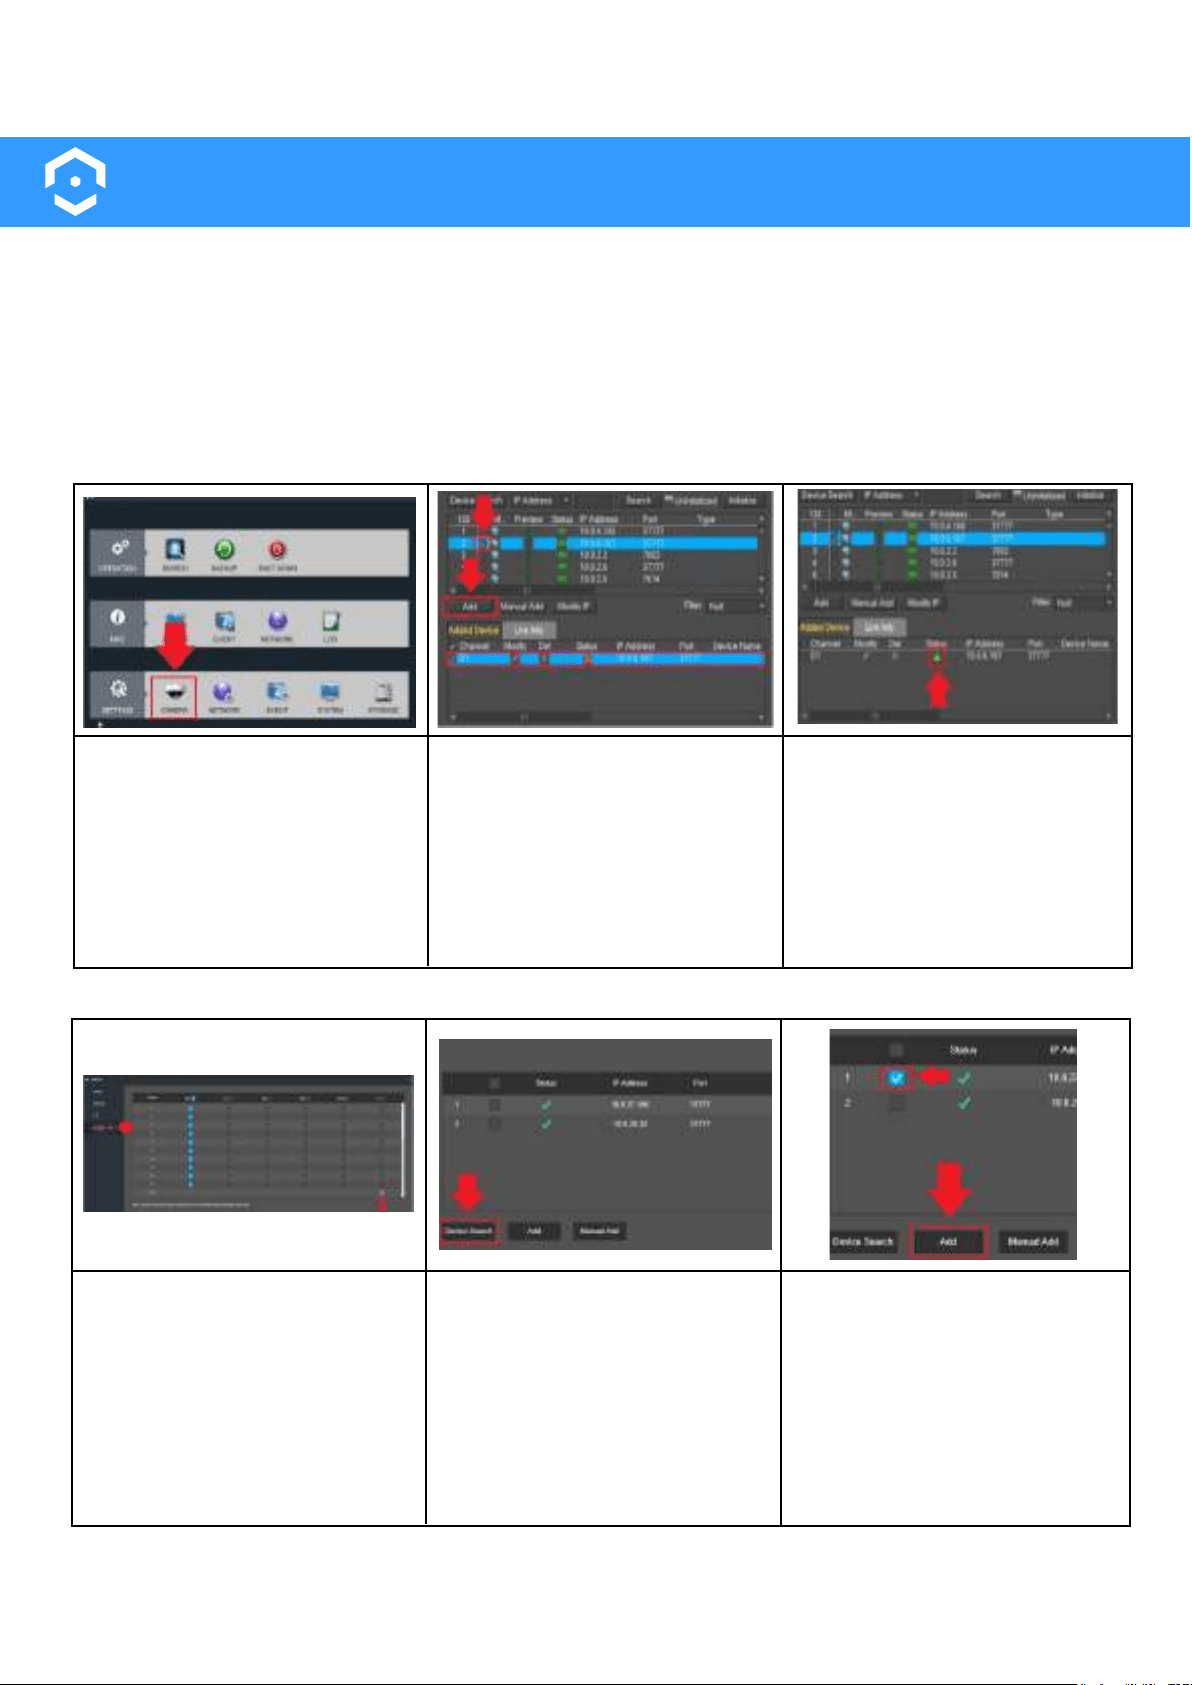
Log into your Amcrest NVR and
click on Camera. Then, click on
Device Search to locate the IP
address for your device that
should be connected to the
same network as your NVR.
A list of all connected devices
will appear. Select the device
from the list by clicking on the
checkbox next to the device.
Click Add to add the device into
the Added Devices menu.
The status of the device should
be green indicating the device
has been successfully added. If
it is red, click on Modify and
ensure the password for the
device is correct. When it has
been added, the device will be
ready to view on your NVR.
Adding to An Amcrest DVR
Log into your Amcrest DVR and
click on Camera located under
Management. Click on Channel
Type in the camera menu and
check the IP field. Please note,
you can mix and match analog
and IP channels if needed. Click
Save and allow the DVR to
reset
Note: You can only select channels from the bottom up in the IP field and can be switched back
to Auto from the top down in the Auto field.
Log back into your DVR and
navigate back to the Camera
menu. Click on Registration to
access the registration menu
and click on Device Search.
Locate and click on the device
you are adding to your DVR.
Click Add to add the device to
the DVR. If the status is red, click
on Edit and ensure the pass-
word for the device is correct.
When it has been added, the
device will be ready to view on
your DVR.
Loading ...
Loading ...
Loading ...