Loading ...
Loading ...
Loading ...
39
Detection Target:
Human: Select it and then alarms will be triggered if someone crosses the pre-defined
alarm lines.
Motor Vehicle: Select it and then alarms will be triggered if a vehicle with four or more
wheels (eg. a car, bus or truck) crosses the pre-defined alarm lines.
Motorcycle/Bicycle: Select it and then alarms will be triggered if a vehicle with two wheels
(eg. a motorcycle or bicycle) crosses the pre-defined alarm lines.
All of the three types of objects can be selected simultaneously. Please select the detection
objects as needed. If no object/target is selected, alarms will not be triggered even if line
crossing detection is enabled.
2. Set the alarm holding time.
3. Set alarm trigger options. The setup steps are the same as motion detection. Please
refer to 5.3.1 Motion Detection for details.
4. Click “Save” button to save the settings.
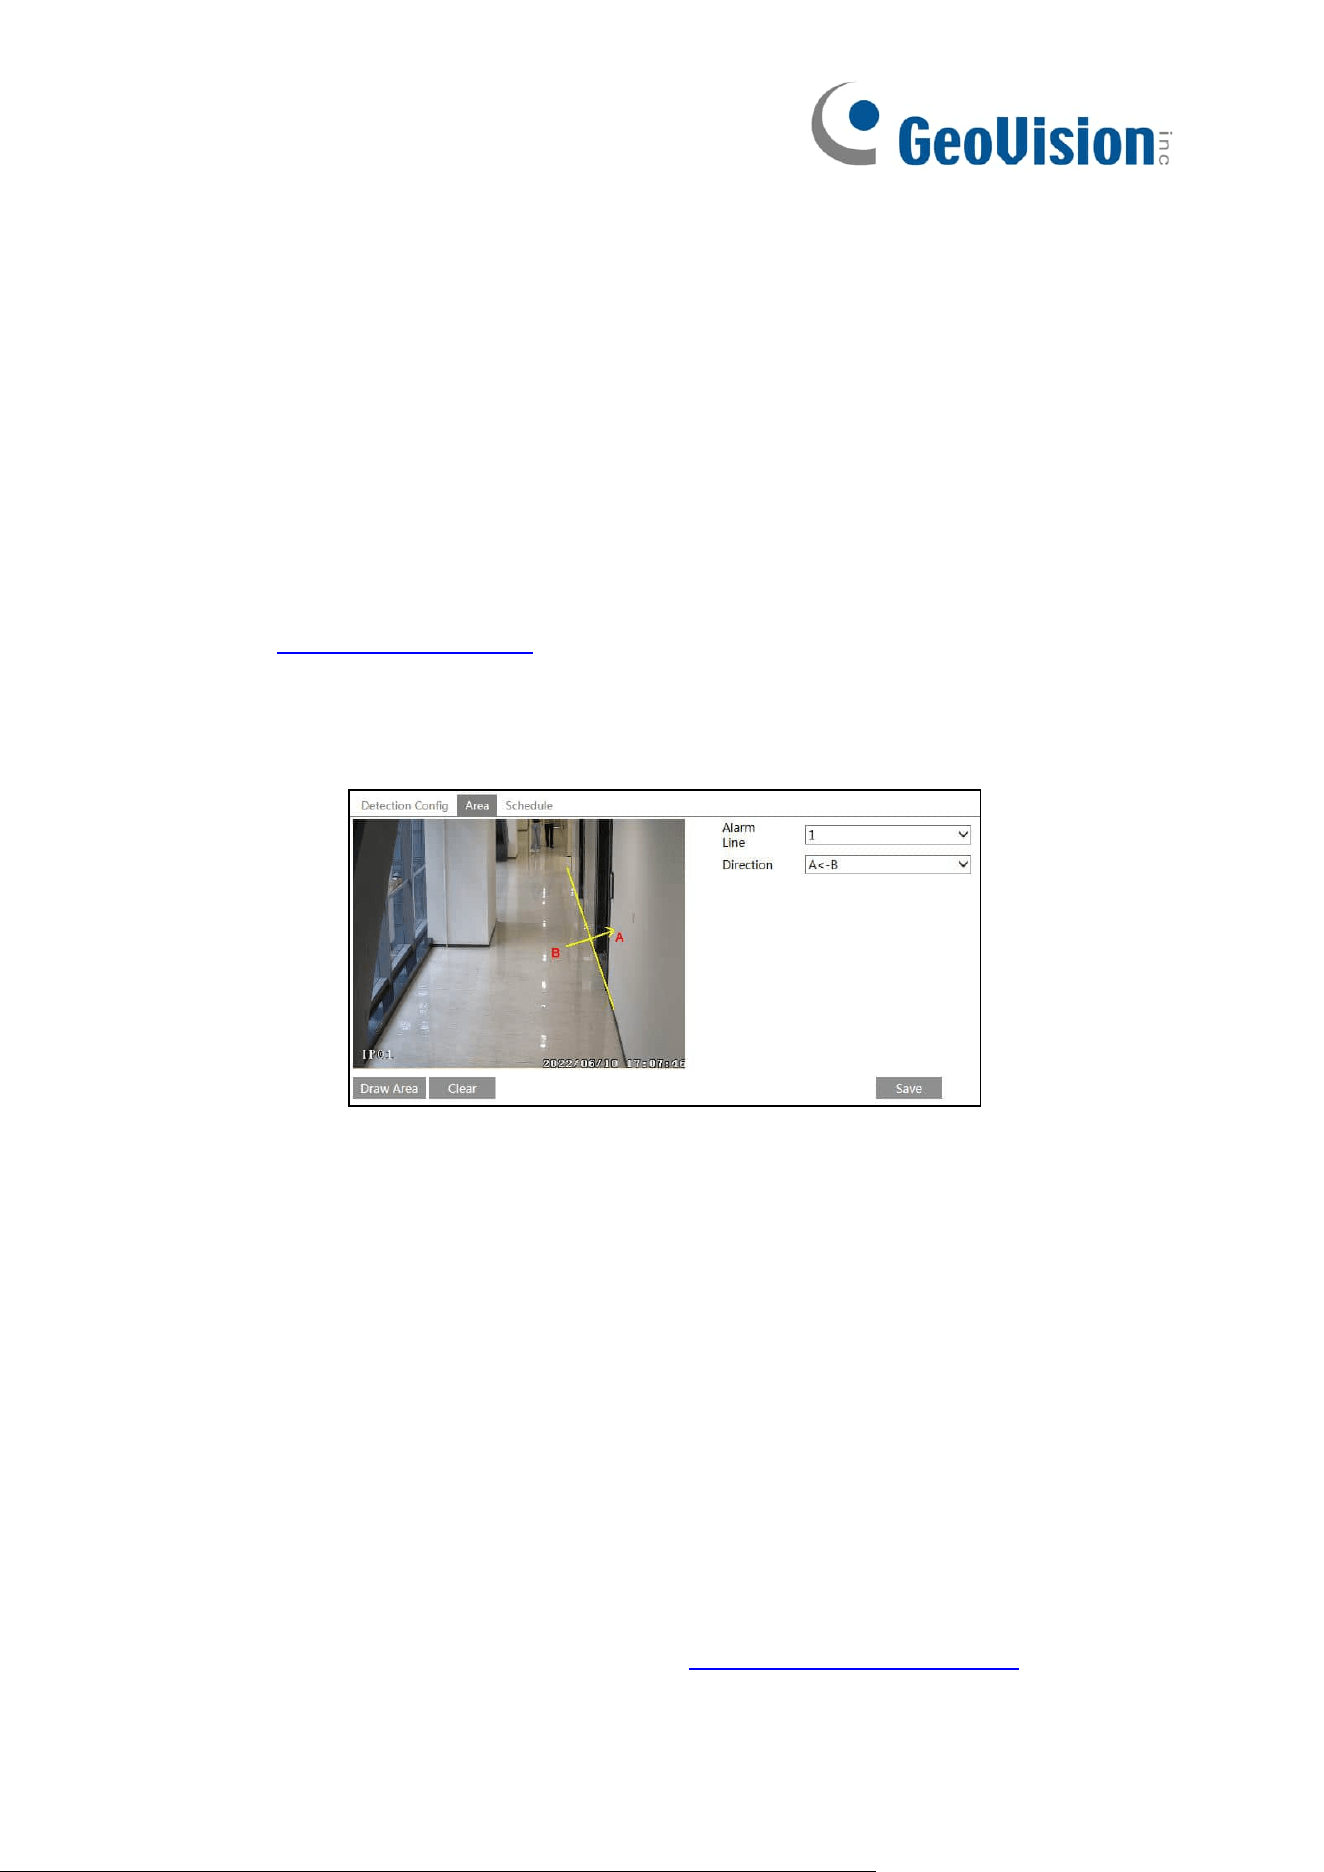
5. Set area of the line crossing alarm. Click the “Area” tab to go to the interface as shown
below.
Set the alarm line number and direction. Up to 4 lines can be added. Multiple lines cannot
be added simultaneously.
Direction: A<->B, A->B and A<-B optional. This indicates the direction of the
intruder/vehicle crosses over the alarm line.
A<->B: The alarm will be triggered when the intruder/vehicle crosses over the alarm line
from B to A or from A to B.
A->B: The alarm will be triggered when the intruder/vehicle crosses over the alarm line
from A to B.
A<-B: The alarm will be triggered when the intruder/vehicle crosses over the alarm line
from B to A.
Click the “Draw Area” button and then drag the mouse to draw a line in the image. Click the
“Stop Draw” button to stop drawing. Click the “Clear” button to delete the lines. Click the
“Save” button to save the settings.
6. Set the schedule of the line crossing alarm. The setup steps of the schedule are the
same as the schedule recording setup (See Schedule Recording Settings).
※ Configuration of camera and surrounding area
1. Auto-focusing function should not be enabled for line crossing detection.
2. Avoid the scenes with many trees or the scenes with various light changes (like many
flashing headlights). The ambient brightness of the scenes shouldn’t be too low.
Loading ...
Loading ...
Loading ...