Loading ...
Loading ...
Loading ...
– 22 –
Chapter 2 Description of Parts — Camera
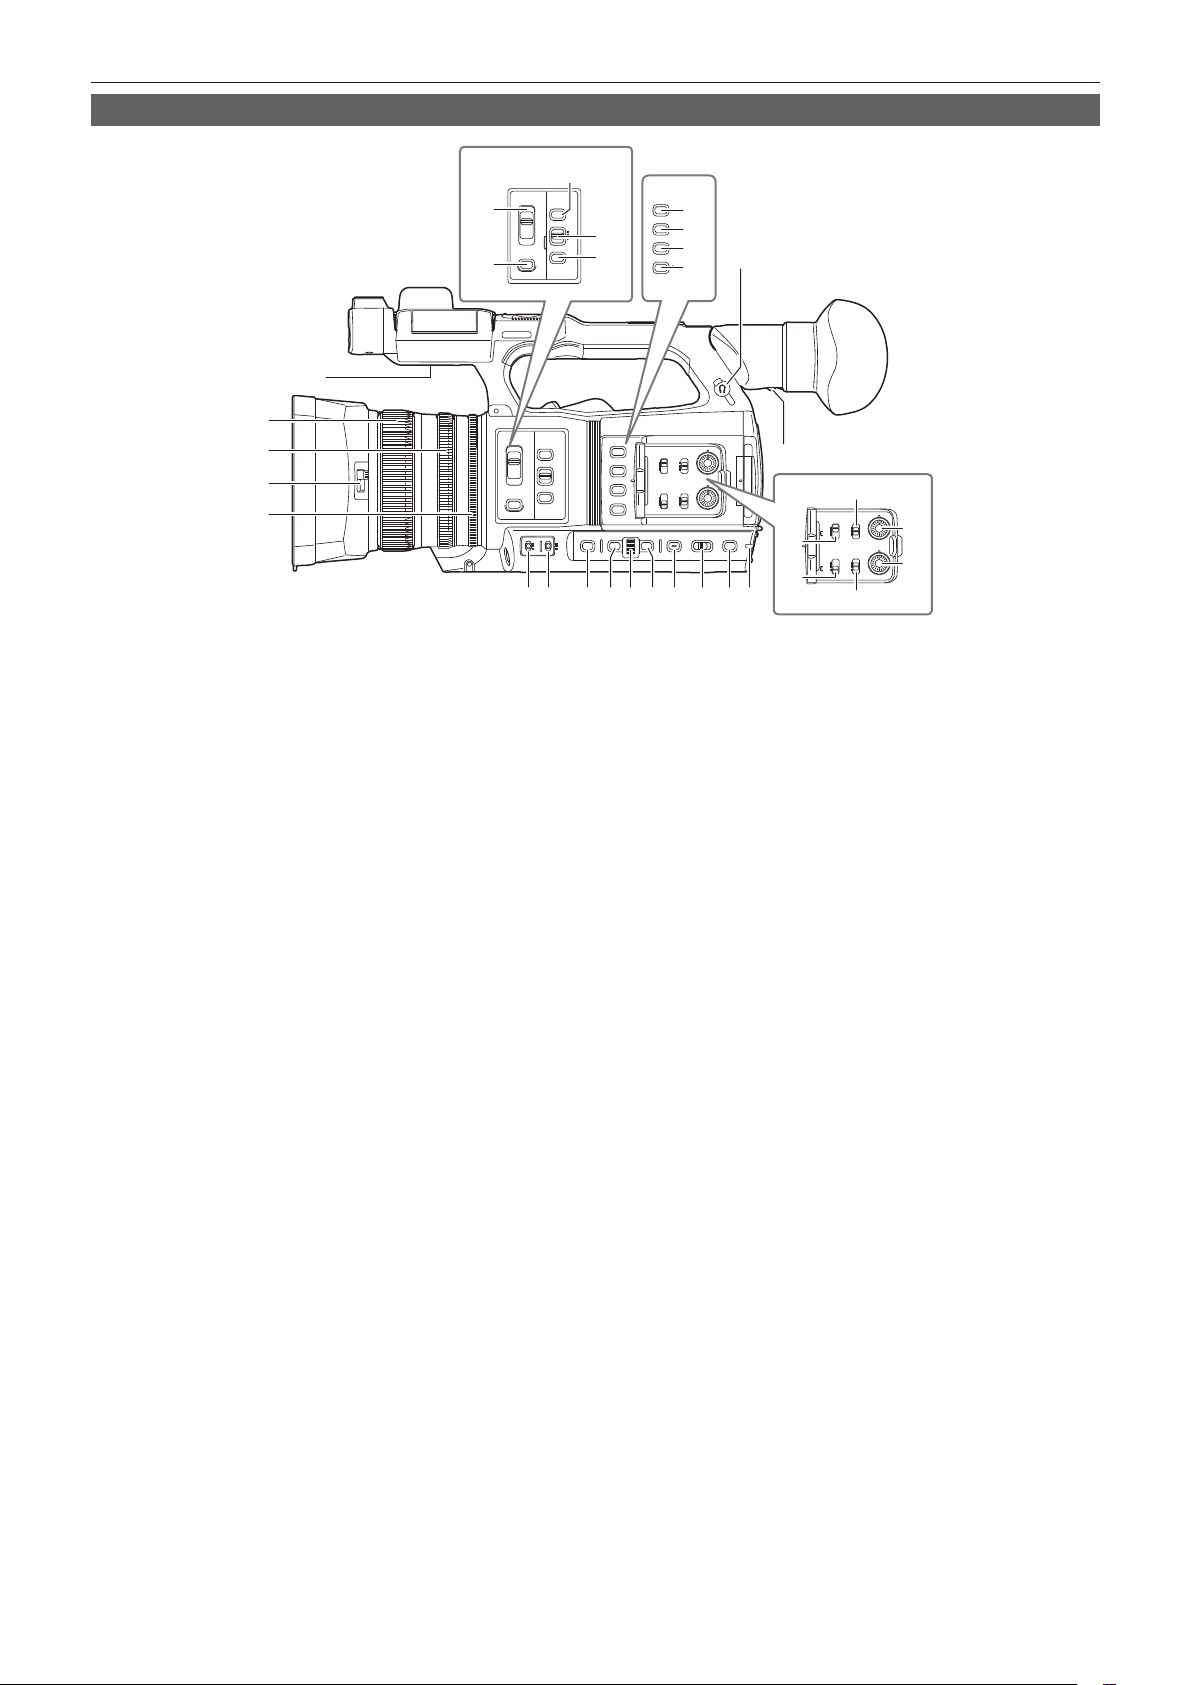
Right side
ND
FILTER
IRIS
FOCUS
FOCUS
ASSIST
1/64
A
M
∞
1/16
1/4
CLR
PUSH AUTO
INPUT 1
LINE
MIC
+48
V
LINE
MIC
+48
V
INT(L)
INPUT1
INPUT2
INT(R)
INPUT1
INPUT2
INPUT 2
CH1 CH 1
CH 2
SELECT
AUDIO
LEVEL
CH2
SELECT
O.I.S.
ZEBRA
1
2
3
4
WFM
A. IRIS LEVEL
6
7
1
2
3
4
22
20
21
18
19
23
24
25
26
8 9 10 12 14 15 16 17
32
5
29
30
27
28
31
11 13
1 Focus ring
Manually focuses when the <FOCUS> switch is set to <M>.
2 Zoom ring
Manually adjusts the zoom lens.
3 Lens cover switching lever
Opens/closes the lens cover.
4 Iris ring
Adjusts the lens iris manually when the manual iris is set with the <IRIS> button.
5 Diopter adjustment lever
Adjusts the diopter scale so that the viewnder screen can be viewed clearly.
6 Built-in speaker
Outputs audio during playback.
Audio is not output from the built-in speaker when headphones are connected to the headphone terminal.
7 Headphones terminal
Connects audio monitoring headphones.
8 <GAIN> switch
Switches the brightness of the screen according to the lighting conditions under which you are shooting.
9 <WHITE BAL> switch
Selects the method for adjustment of the white balance.
f <PRST>: Adjusts the white balance to the preset value. [3200K], [5600K], and [VAR] toggle each time the <AWB> button is pressed.
f <A>/<B>: Selects when using the stored value for the adjustment of the white balance.
10 <SHUTTER> button
Toggles the shutter mode.
11 <MENU> button
Displays the menu. Pressing the <MENU> button while the menu is displayed closes the menu.
Press the button while the thumbnail screen is displayed to display the operation screen of the thumbnail menu, and clips can be deleted.
12 Multidial
Moves, selects, and sets the menu while the menu is displayed.
Use the multidial to also operate thumbnails, select the multi manual function and select/set the various operation icons.
13 <EXIT> button
Returns to one level higher when the menu is displayed. Pressing the <EXIT> button without conrming the setting value will not reect the change
in the setting.
14 <DISP/MODE CHK> button
Displays/hides information other than the time counter, time stamp, zebra pattern, and marker.
Press and hold the button to display information about the settings of the various shooting functions and information such as a list of the functions
assigned to the USER button. Each press of the button toggles the information page in order.
15 <AUTO/MANUAL> switch
Selects the method to adjust the focus, gain, iris, white balance, and shutter speed at shooting. You can set the function to assign to <AUTO> in the
[CAMERA] menu → [AUTO SW].
<AUTO>: Adjusts automatically. (Auto mode)
<MANU>: Adjusts manually. (Manual mode)
16 <SLOT SEL> button/<USER 5> button
Selects the card slot to record to or play back from.
This is also used as the USER button (USER5).
Loading ...
Loading ...
Loading ...