Loading ...
Loading ...
Loading ...
•
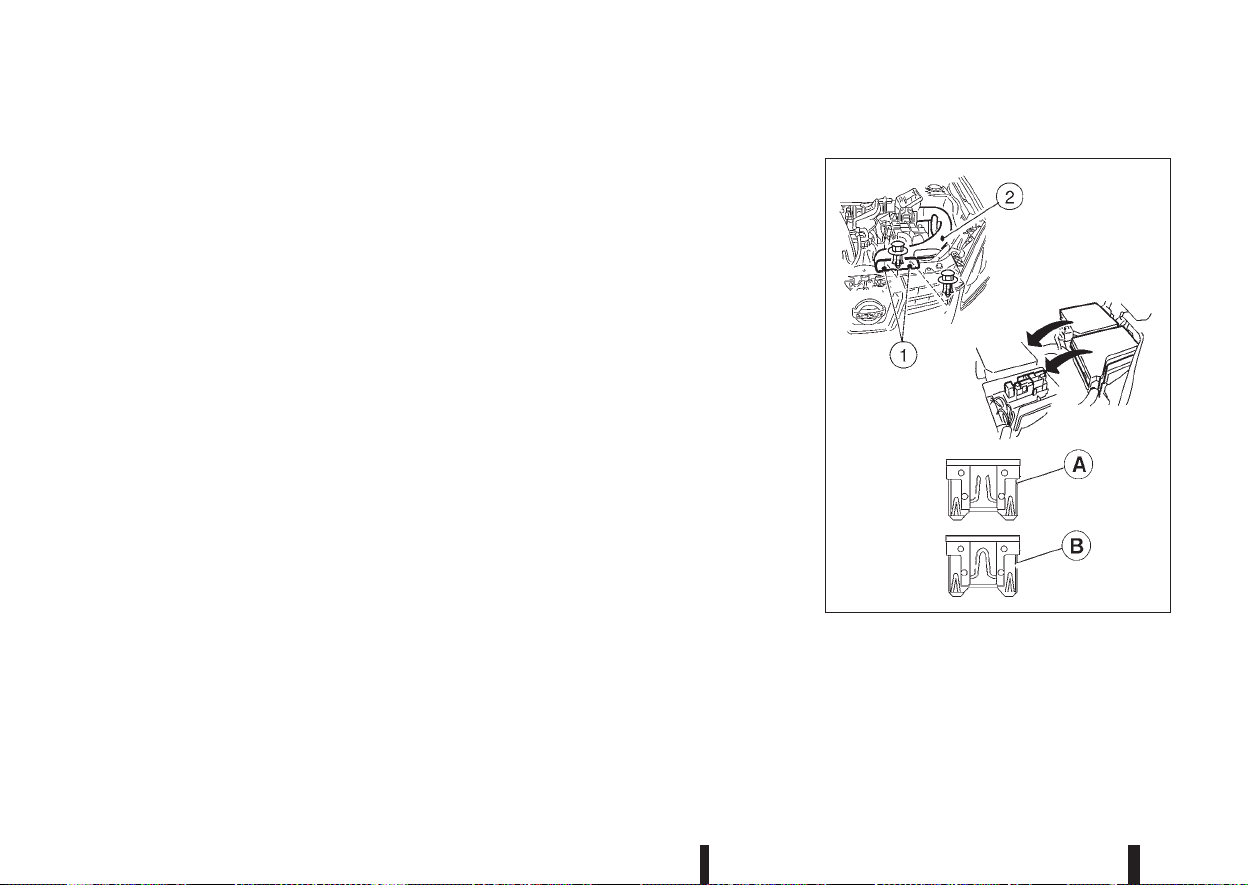
Be careful not to damage the connector sup-
port bracket when disconnecting the connec-
tor.
If any electrical equipment does not operate, check
for an open fuse.
The fuse box is located in the lower part of the
instrument panel at the driver’s side.
The affected circuits
j2 are shown on the inside of
the fuse box lid.
1. Make sure the ignition switch and the headlight
switch are in the “OFF” position.
2. Open the fuse box lid.
3. Locate and remove the fuse with the fuse puller
j1 (where fitted).
NOTE
The fuse puller is stored in the fuse box.
4. If the fuse is open
jA , replace it with a new fuse
jB.
5. Close the fuse box lid.
NOTE
If the new fuse opens again, after installing,
have the electrical system checked and re-
paired by a NISSAN dealer or qualified work-
shop.
Extended storage fuse switch
To reduce battery drain, the extended storage fuse
switch
j3 comes from the factory switched off. Prior
to delivery of your vehicle, the switch is pushed in
(switched on) and should always remain on.
If any electrical equipment does not operate, re-
move the extended storage fuse switch and check
for an open fuse.
NOTE
If the extended storage fuse switch malfunctions
or if the fuse is open, it is not necessary to re-
place the switch. In this case, remove the ex-
tended storage fuse switch and replace it with a
new fuse of the same rating.
How to remove the extended storage fuse
switch:
1. To remove the extended storage fuse switch, be
sure the ignition switch is in the “OFF” or LOCK
position.
2. Be sure the headlight switch is in the “OFF”
position.
3. Remove the fuse box cover.
4. Pinch the locking tabs found on each side of the
extended storage fuse switch
j3.
5. Pull the extended storage fuse switch straight
out from the fuse box.
ENGINE COMPARTMENT
CAUTION
Never use a fuse of higher or lower amperage
rating than that specified on the fuse box cover.
If any electrical equipment does not operate, check
for an open fuse.
NDI1089
8-26 Maintenance and do-it-yourself
Loading ...
Loading ...
Loading ...