Loading ...
Loading ...
Loading ...
33
Using SD Cards
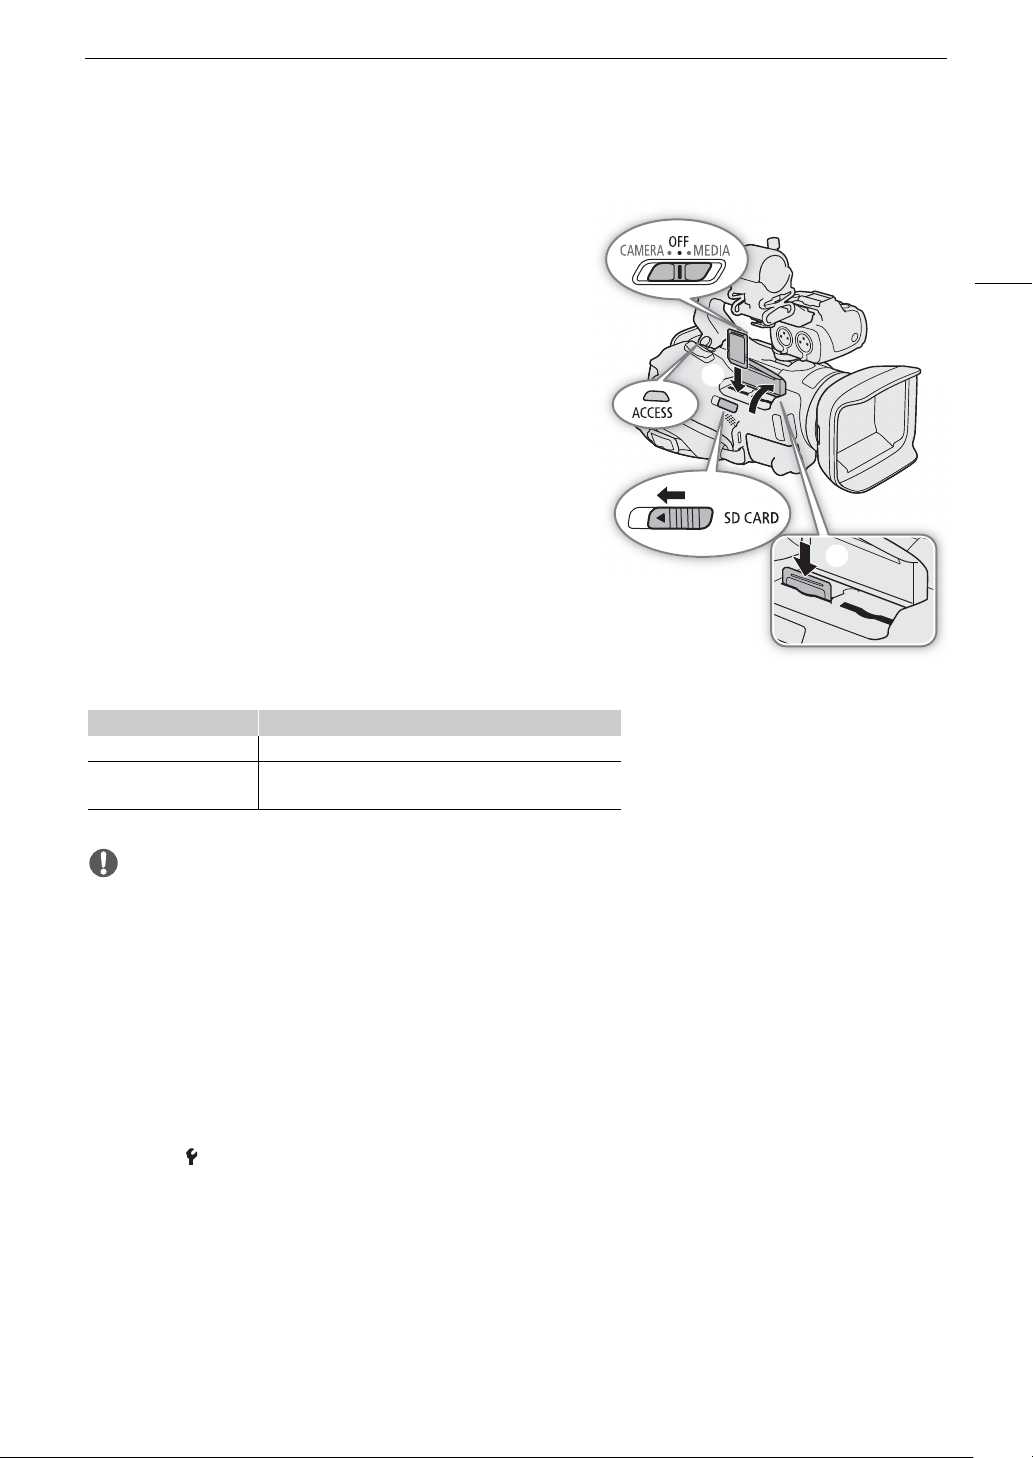
Inserting and Removing an SD Card
1 Turn off the camcorder.
• Make sure the POWER/CHG indicator is off.
2 Open the SD card compartment cover.
• Slide the SD CARD switch all the way in the direction of the
arrow to open the cover.
3Insert the SD card straight, with the label facing away
from the right side of the camcorder (the side with the air
intake vent), all the way into one of the SD card slots until
it clicks.
• You can also use two cards, one in each SD card slot.
• To remove an SD card, make sure the ACCESS indicator is
off and then push the card once to release it. When the SD
card springs out, pull it all the way out.
4 Close the SD card compartment cover.
• Do not force the cover closed if the SD card is not correctly
inserted.
ACCESS (SD card access) indicator
IMPORTANT
• Observe the following precautions while the ACCESS indicator is illuminated in red. Failure to do so may result
in permanent data loss.
- Do not disconnect the power source or turn off the camcorder.
- Do not open the SD card compartment cover.
- Do not change the camcorder’s operating mode.
• Turn off the camcorder before inserting or removing an SD card. Inserting or removing a card with the
camcorder on may result in permanent data loss.
• SD cards have front and back sides that are not interchangeable. Inserting an SD card facing the wrong
direction can cause a malfunction of the camcorder. Be sure to insert the SD card as described in step 3.
• SD cards have a physical switch to prevent writing on the card so as to avoid the accidental erasure of the
card’s content. To write-protect the SD card, set the switch to the LOCK position.
• If you set [ System Setup] > [ACCESS LED] to [j Off], the ACCESS indicator will not illuminate.
SD card access indicator SD card status
Red (on or flashing) Accessing the SD card(s).
Off
Neither SD card is being accessed or no SD cards are
inserted in the camcorder.
햲
햳
햴
Loading ...
Loading ...
Loading ...