Loading ...
Loading ...
Loading ...
Help with parking and manoeuvring
The aerial view is generated by combining
the images fr
om all the camer
as
›
›
›
Fig. 295
. The aerial view can be selected
by pressing the vehicle in the area.
Select the corresponding view by pressing
the different areas
›››
Fig. 295
A
to
D
of the
aerial vie
w or the r
educed aerial vie
w
.
Conditions necessary f
or the use of the
Ar
ea Vie
w system
●
The doors and the rear lid must be closed.
●
The image must be reliable and clear. For
this reason, for example, the camera lens
must be clean.
●
The area around the vehicle must be clear-
ly and totally visible.
●
The area for parking or manoeuvring
should be a flat surface.
●
The vehicle should not be loaded very
heavily at the rear.
●
The driver must be used to the system.
●
There should be no damage to the vehicle
in the camera area. If the position or installa-
tion angle of the cameras have been
changed, e.g. after a rear-end collision, the
system should be checked by a specialised
workshop.
Special characteristics
The images on the area view system cameras
are only two-dimensional. Due to a lack of
spatial depth, it is difficult or impossible to
make out on-screen any holes there may be
on the ground, objects jutting out from the
ground or parts protruding from other vehi-
cles.
Situations in which the objects or other vehi-
cles appear to be further away or closer than
they really are:
●
On moving from a horizontal plane to a
slope.
●
On moving from a slope to a horizontal
plane.
●
If the vehicle is heavily loaded at the rear.
●
If the vehicle approaches protruding ob-
jects. These objects may be outside the cam-
eras' angle of visibility.
Trailer mode
The Area View system conceals, in the rear
camera area, all the auxiliary guiding lines
when the factory-fitted towing bracket is
connected electrically to a trailer
›››
page 332.
Note
In order to become familiar with the system
and its functions, SEAT recommends that
you practice handling the Area View sys-
tem in an area wher
e there is not too much
traffic or in a car park.
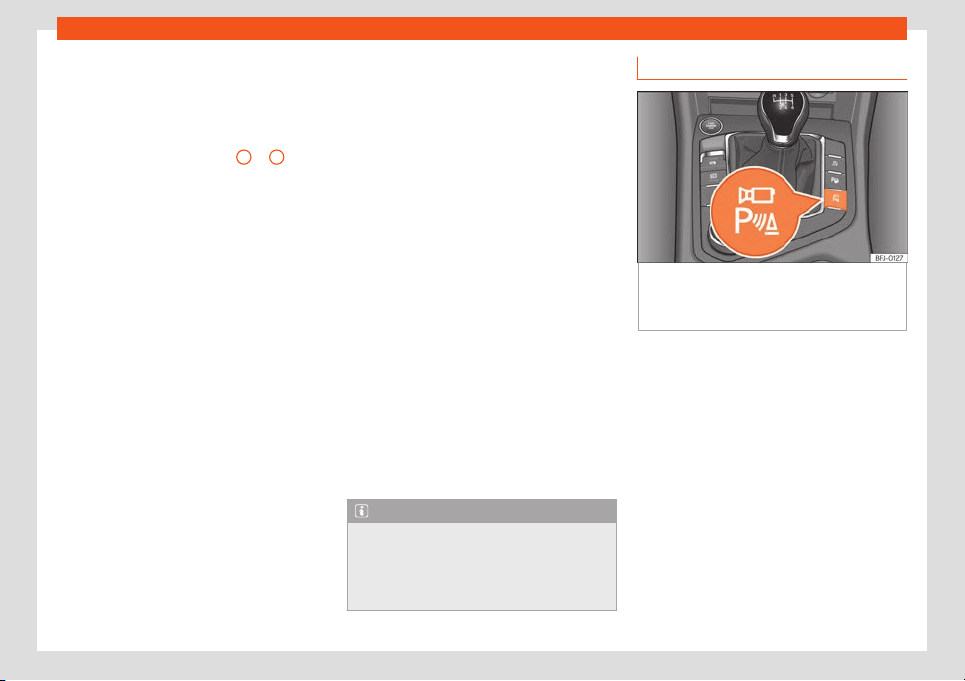
Connecting and disconnecting
Fig. 296
Centre console: button to manually
activ
at
e/deactiv
at
e the peripher
al vision sys-
t
em when combined with the park assist sys-
t
em.
Manual activation
●
Press button once
›
›
›
Fig. 296
.
The inf
ot
ainment syst
em screen displays the
aerial view
›››
Fig. 295. If you press the
button when driving at over 15 km/h (9 mph),
the image will not be displayed.
Automatic activation
●
Select reverse gear.
●
OR: The vehicle moves backwards.
The view of the image of the vehicle's rear
camera is shown in parallel parking mode
with the reduced aerial view.
»
325
Loading ...
Loading ...
Loading ...