Loading ...
Loading ...
Loading ...

Getting Started
Start the Tester
3
3-7
Start the Tester
Note
Before using the Tester for the first time, charge
the battery for at least three hours. For charging
procedure, see Battery.
Before using the Tester, make sure that there is
sufficient battery charge and free memory.
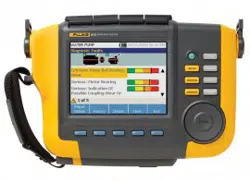
Push to turn on the Tester. At power up, the Tester
displays the remaining memory and the battery status.
The battery status icon and the set date and time
appear at the top of the display.
Push and hold two seconds to turn off the Tester.
Note
The first time you turn the Tester on, it displays
the Settings screen. It is important to enter the
correct information into the setup fields before
you start a test, especially the power line
frequency. For more information, see Instrument
Setup section.
Sensor Setup
The Tester includes a triaxial Sensor with TEDS
technology (Transducer Electronic Data Sheets). With
this technology, your Tester can identify and
automatically read the Sensor configuration. This
technology provides:
• Improved results from detailed calibration information
• Reduced configuration time without manual data
entry
• Sensor calibration tracking with the last calibration
date stored electronically
Compatible Sensors
It is highly recommended to use a Fluke Triaxial Sensor
with the Tester. Using a Sensor other than a Fluke
Triaxial Sensor will result in misleading diagnoses. The
Tester is compatible with single axis Sensors.
Caution
Non-Fluke triaxial Sensors are not
compatible with the Tester.
1.888.610.7664 sales@GlobalTestSupply.com
Fluke-Direct.com
Loading ...
Loading ...
Loading ...