Loading ...
Loading ...
Loading ...
86 GETTING TO KNOW YOUR VEHICLE
5. Using the provided #40 Torx head driver, remove the
four Torx screws located along the interior of the
windshield.
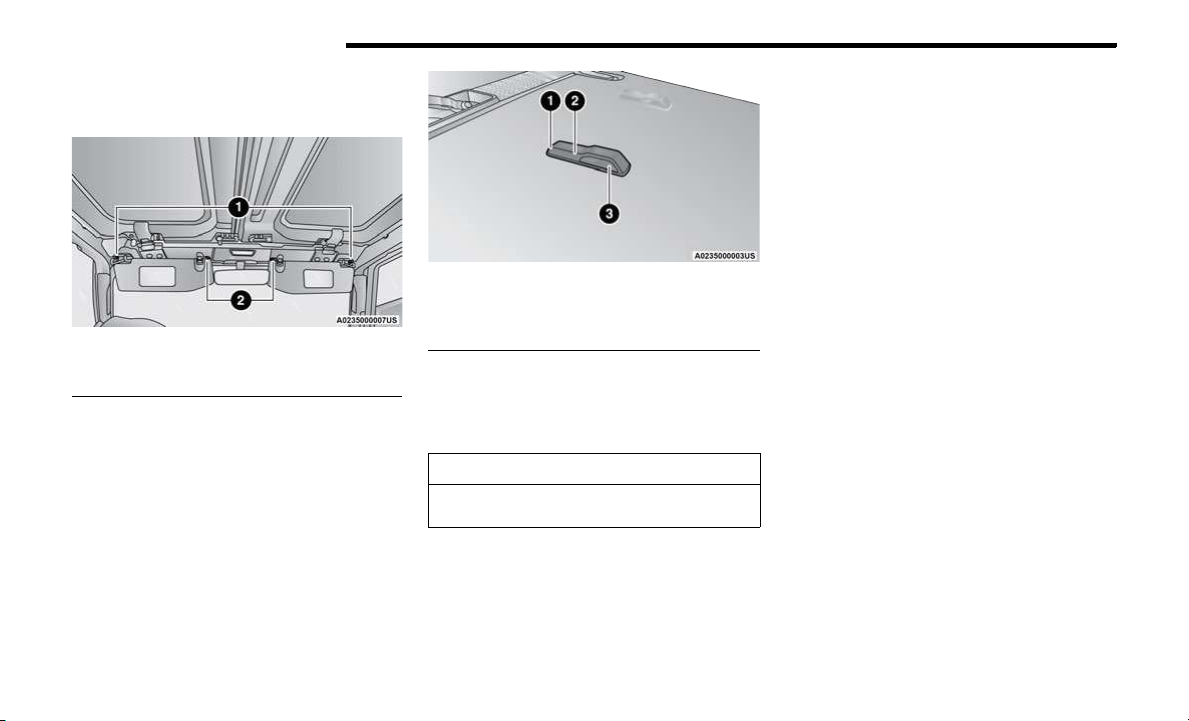
Interior Torx Screw Locations
NOTE:
Store all of the mounting bolts in their original threaded
holes and tighten for safekeeping.
6. Lower the windshield gently until it contacts the
footman loop bumpers (if equipped).
Footman Loop Bumpers
7. Secure the windshield by passing a cinch strap
through the footman loops on either side of the hood
and on the windshield frame. Tighten the strap to
secure the windshield in place.
ACC/FCW Sensor Protective Cover —
If Equipped
Your vehicle may be equipped with a protective cover that
is to be used whenever the windshield is folded down in
order to protect the ACC/FCW sensor. To install the cover,
follow the instructions below:
1. Secure the top part of the cover so that it hinges to
the header.
2. Swing the cover down and push on it so that it covers
the opening.
3. Check to make sure the cover is secured properly.
NOTE:
Be sure to remove the cover before returning the wind-
shield to the normal position. Store the cover in the cargo
area.
Cleaning Instructions
During windshield down applications, dust/dirt can
accumulate in the cover and block the camera lens. Use a
microfiber cloth to clean the camera lens, module, and
inside cover, being careful not to damage or scratch the
module.
1 — Outer Torx Screws
2 — Center Torx Screws
1 — Washer Nozzle
2 — Bumper
3 — Footman Loop
CAUTION!
Do Not Overtighten! Damage to the windshield could
result.
20_JL_OM_EN_USC_t.book Page 86
Loading ...
Loading ...
Loading ...