Loading ...
Loading ...
Loading ...
31
Chapter
78
En
Please note that the image area shown
by the rear view camera may differ
slightly when full-screen images are dis-
played when backing and when checking
the rear of the vehicle while moving
forward.
Rear view camera
(ND-BC6)
(sold separately)
This product
Brown (BC IN)
RCA cable
(supplied with ND-BC6)
Vi
olet/white
(REVERSE-GEAR SIGNAL
INPUT)
To video output
Power cord
Power supply
For more details about the wiring, refer to
Connecting the power cord on page 74.
Notes
This mode is available when the rear view
camera setting is set to “On”.
For details, refer to Setting rear view
camera activation on page 56.
Connect this product to the rear view
camera only. Do not connect to any other
equipment.
Connecting the external video
component
■ Using AV input
To video outputTo audio outputs
External video
component
(sold separately)
This product
Red, white
(AUDIO INPUT)
RCA cables
(sold separately)
Yellow
(VIDEO INPUT)
23 cm (9 in.)
15 cm (5-7/8 in.)
Note
This mode is available when the setting of AV
input is set to “On”.
For details, refer to Setting AV input on
page 55.
■ Using an AUX input
To video output To audio outputs
External video
component
(sold separately)
This product
Red, white
RCA cables
(sold separately)
Yellow
AUX input
Mini-jack AV cable
(CD-RM10)
(sold separately)
Notes
This mode is available when the setting
of AUX input is set to “On”.
For details, refer to Starting procedure on
page 53.
When connecting an external video com-
ponent using a mini-jack AV cable, use a
separately sold AUX extension cable as
necessary.
CAUTION
Be sure to use a mini-jack AV cable (CD-
RM10) (sold separately) for wiring. If you use
other cables, the wiring position might differ
resulting in disturbed images and sounds.
OK
G
V
R
L
G
R
V
L
L : Left audio (White)
R : Right audio (Red)
V : Video (Yellow)
G : Ground
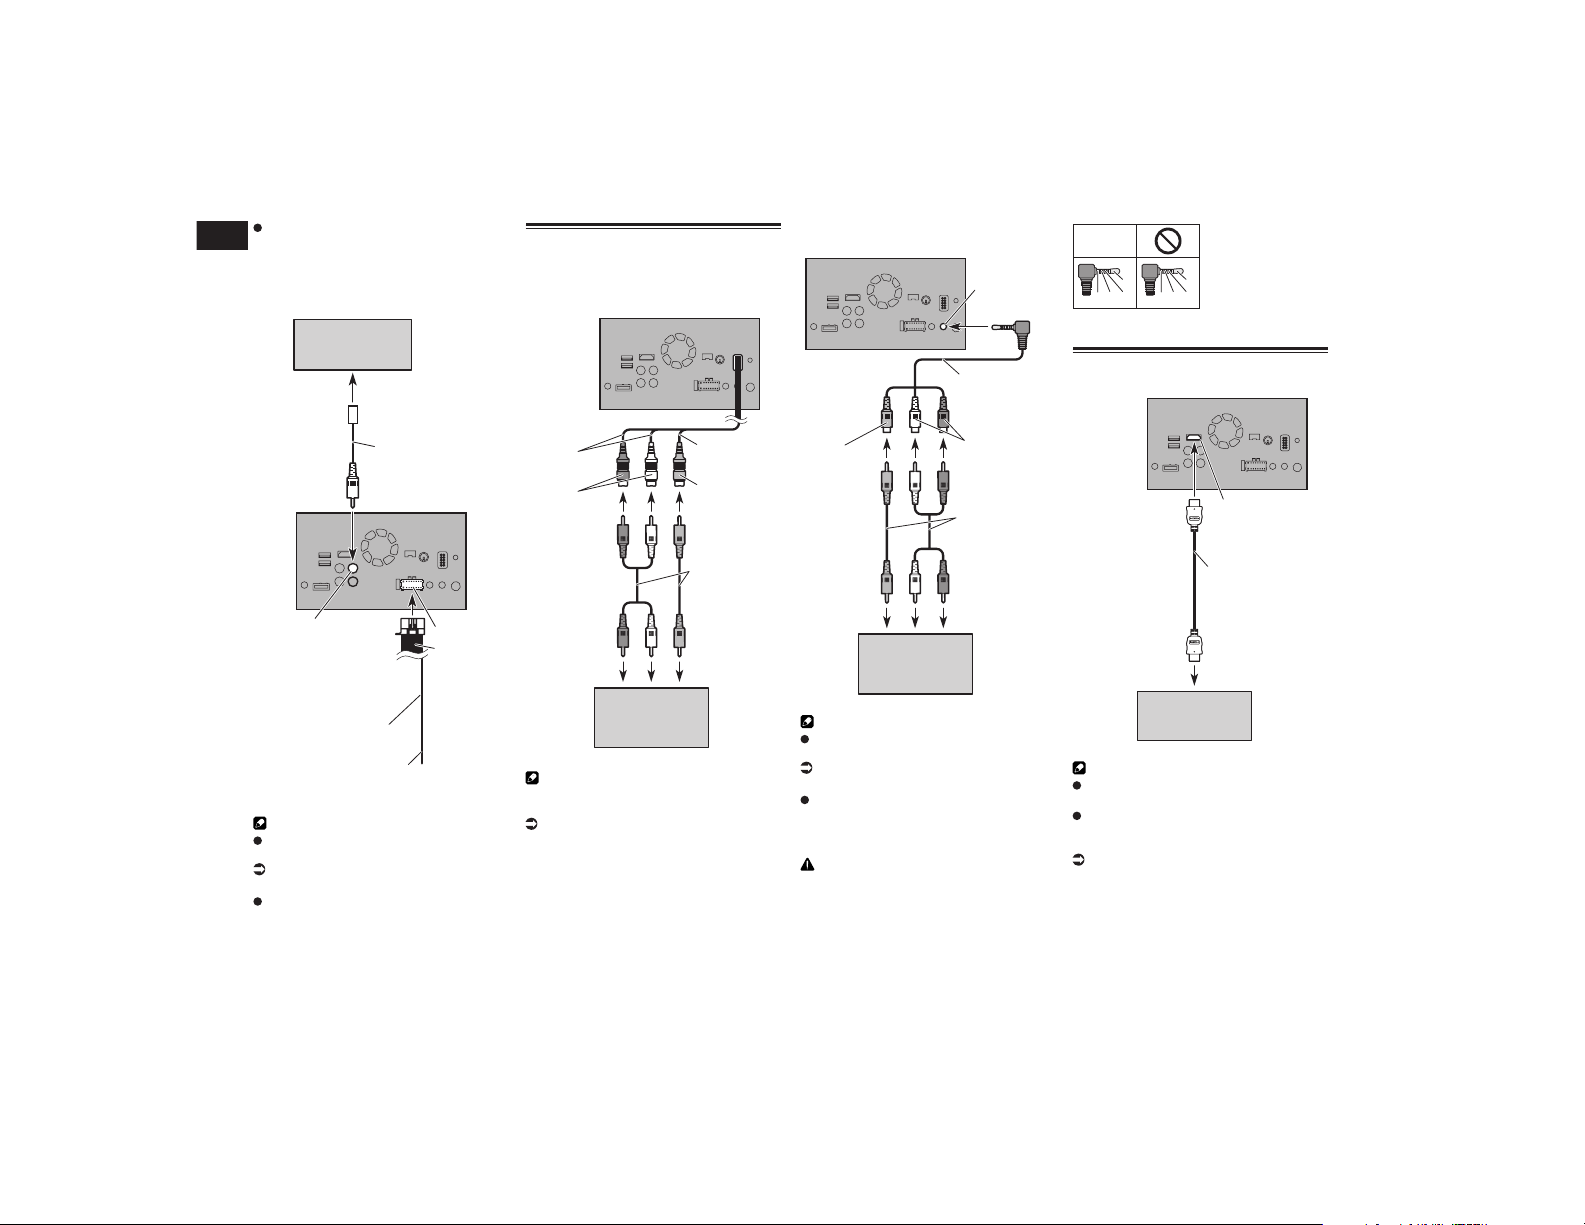
Connecting an HDMI device
HDMI device
(sold separately)
This product
HDMI port
High Speed HDMI
®
Cable
(sold separately)
Notes
For details concerning the operations of
HDMI device, refer to Chapter 19.
When you connect the High Speed
HDMI
®
Cable, use the lock tie to fix it
securely.
For details, refer to Securing the High
Speed HDMI
®
Cable on page 77.
Loading ...
Loading ...
Loading ...