Loading ...
Loading ...
Loading ...
95
SIGNATURE RAILING
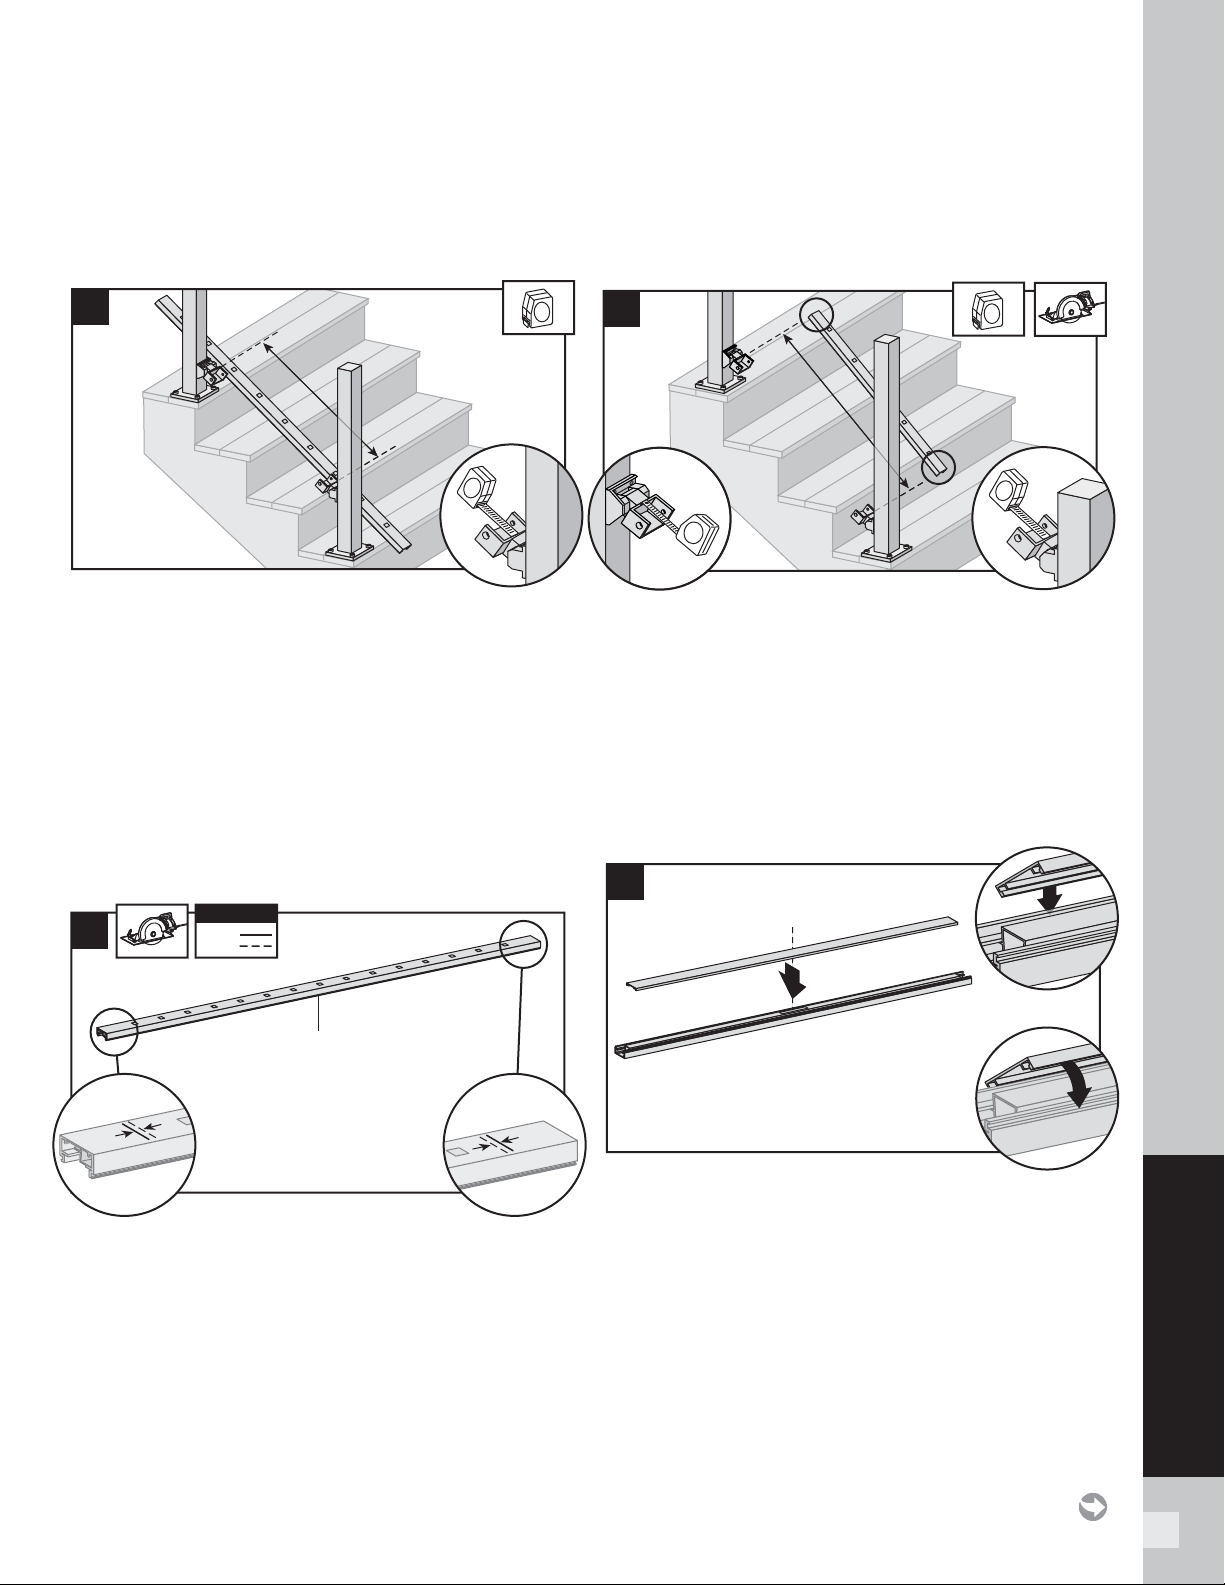
When using Stair Swivel and Compound Swivel
Brackets:
1b. With brackets in correct swivel locations, measure
distance from inside of swivel bracket to inside
of swivel bracket. Ensure that before cutting,
balusters holes are parallel and centered in
between the posts and also allow for clearance for
attachment to brackets. Mark bottom stair rail at
each intersection.
Cutting Bottom Stair Rail, Bottom Stair Rail
Cover, and Attachment of Bottom Stair Rail Cover
When using Fixed Stair Brackets:
2a. Cut each end of the bottom stair rail, rail insert, and
bottom rail cover 1/4" (0.6 cm) shorter than the
mark on each end to allow for fi t into bottom stair
rail brackets.
NOTE: Railing does not need to be cut at angle.
Brackets are designed to allow for railing to be
installed with standard straight cut.
When using Stair Swivel or Compound Swivel
Brackets:
2b. Cut each end of the bottom rail, rail insert, and
bottom rail cover at the mark on each end to allow
for fi t into bottom stair rail brackets.
NOTE: Railing does not need to be cut at angle.
Brackets are designed to allow for railing to be
installed with standard straight cut.
Attachment of Bottom Stair Rail Cover and
Bottom Stair Rail to Brackets
3. Attach “fl at” bottom stair rail cover to bottom stair
rail. Align cover on one side of the bottom rail in slot
on side of rail. Then starting from one end of rail
snap cover onto opposing slot working down the
length of the rail. In some cases, a rubber mallet
may facilitate the fastening using GENTLE tapping.
ATTACHING STAIR BRACKETS (FIXED STAIR, STAIR SWIVEL, AND
COMPOUND SWIVEL) TO SIGNATURE POSTS AND PRESSURE-
TREATED POST AND POST SLEEVES/
CONTINUED
TREX SIGNATURE
2a
1/4"
(0.6 cm)
1/4"
(0.6 cm)
1/4"
(0.6 cm)
1/4"
(0.6 cm)
KEY
Mark
Cut
KEY
Bottom stair rail
1b
2b
1
3
3
2
Loading ...
Loading ...
Loading ...