Loading ...
Loading ...
Loading ...
71
TRANSCEND RAILING
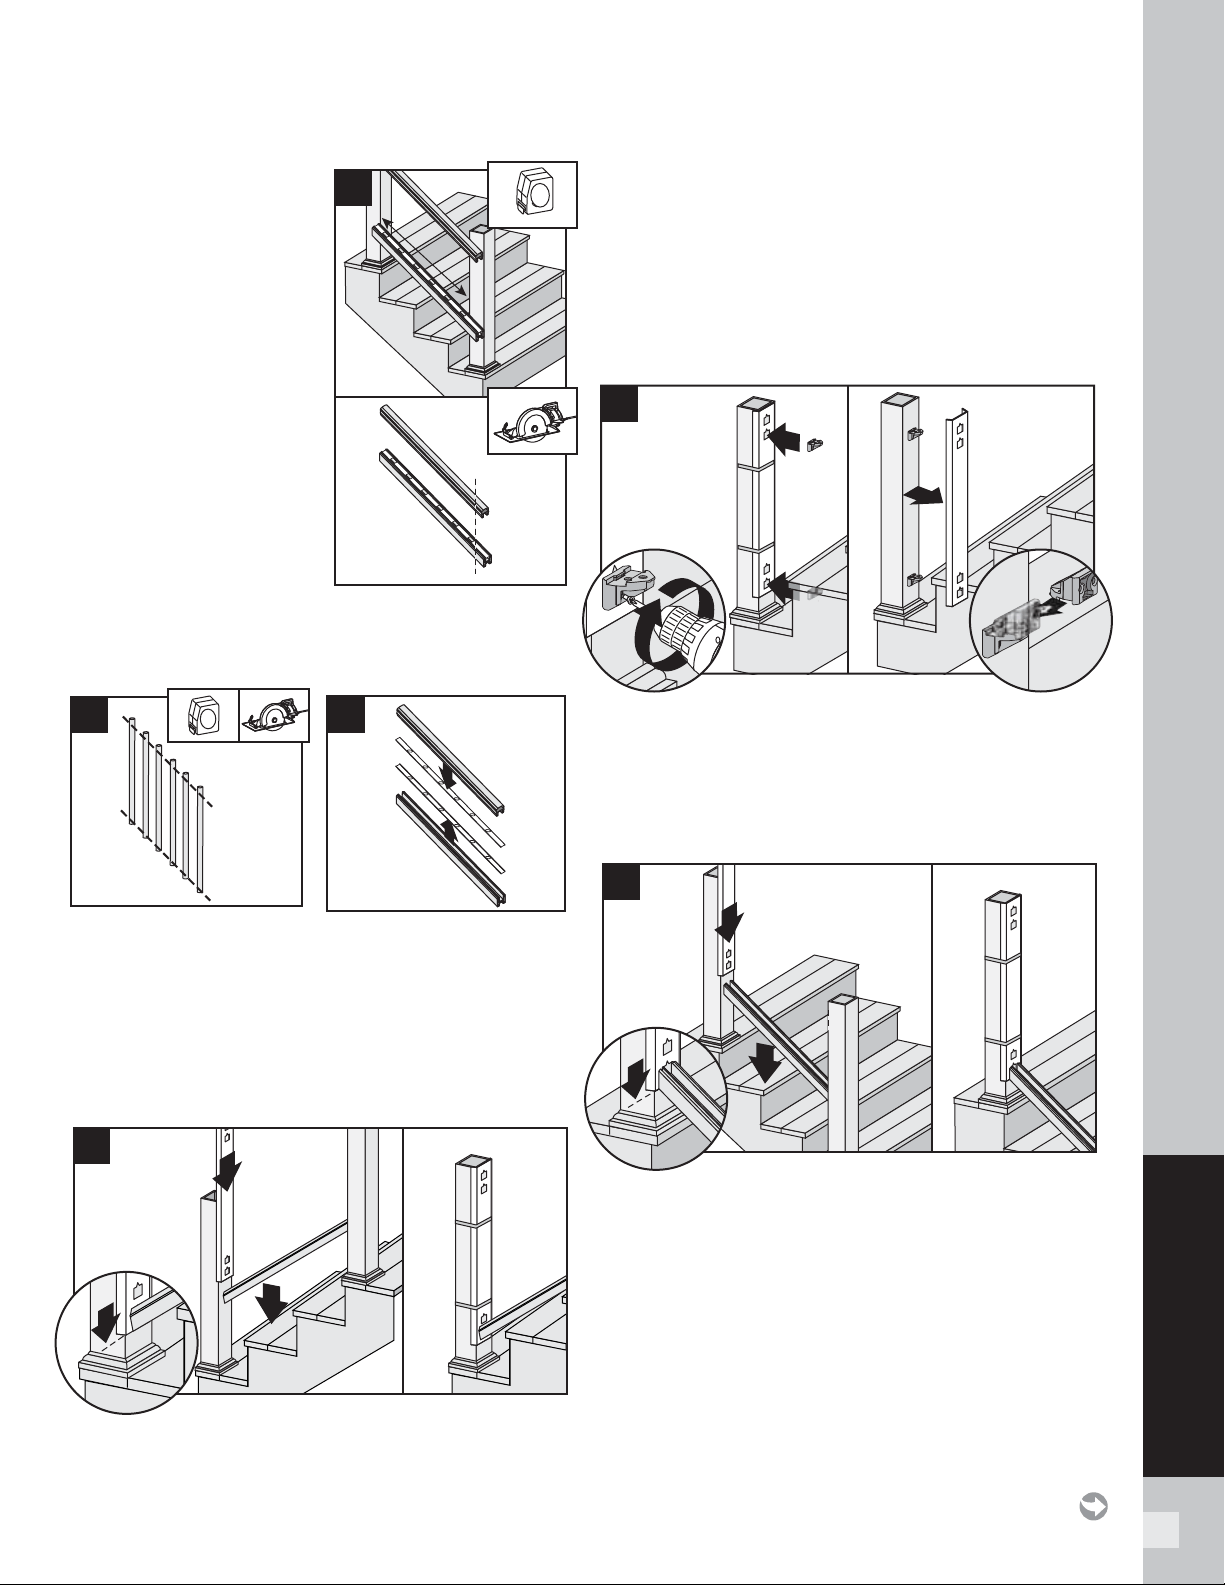
2b. Set bottom and top rail
along the nose of the
stair treads, ensuring
baluster holes are placed
evenly. Also allow for
a minimum of 1 1/2"
at each end of rail for
bracket placement and
baluster clearance. Cut
rails on marks.
NOTES:
» If using railing gaskets,
subtract 1/16" (1.6 mm)
maximum, from each end
and cut.
» CUT VERY CAREFULLY
TO NOT BREAK
BALUSTER SPACERS.
Cutting Balusters on Angle (OPTIONAL)
2c. In order for balusters to seat properly (depending on
the angle of the stair railing), the balusters may need
to be trimmed to match the angle of the bottom and
top railing.
2d. Carefully remove baluster spacers from rails.
Positioning RSBs on BOTTOM Post
3. Position bottom rail between posts and slide
TrexE xpress
™
railing assembly template into position
with bottom rail outline on template aligned with end
of bottom rail. Allow a minimum clearance of 1"
(25 mm) from stair tread. Secure template with
rubber bands. Remove rail.
Attaching RSBs to BOTTOM Post
4. Attach upper and lower RSBs to bottom post,
fl at side UP, with wood screws provided. Remove
template and place a second RSB, turned upside
down, and interlock on each bracket.
Positioning RSBs on UPPER Post
5. Position pre-cut bottom rail between posts. Slide
TrexE xpress
™
railing assembly template into position,
aligning bottom rail outline on template with end of
bottom rail. Use rubber bands to hold template in
place. Remove rail.
2c
2b
HOW TO INSTALL CROWN AND UNIVERSAL STAIR RAILING/CONTINUED
TREX TRANSCEND
2d
1
2
1
3
3
3
1
1
4
2
2
1
5
3
Loading ...
Loading ...
Loading ...