Loading ...
Loading ...
Loading ...
43
HOW TO INSTALL DECKING
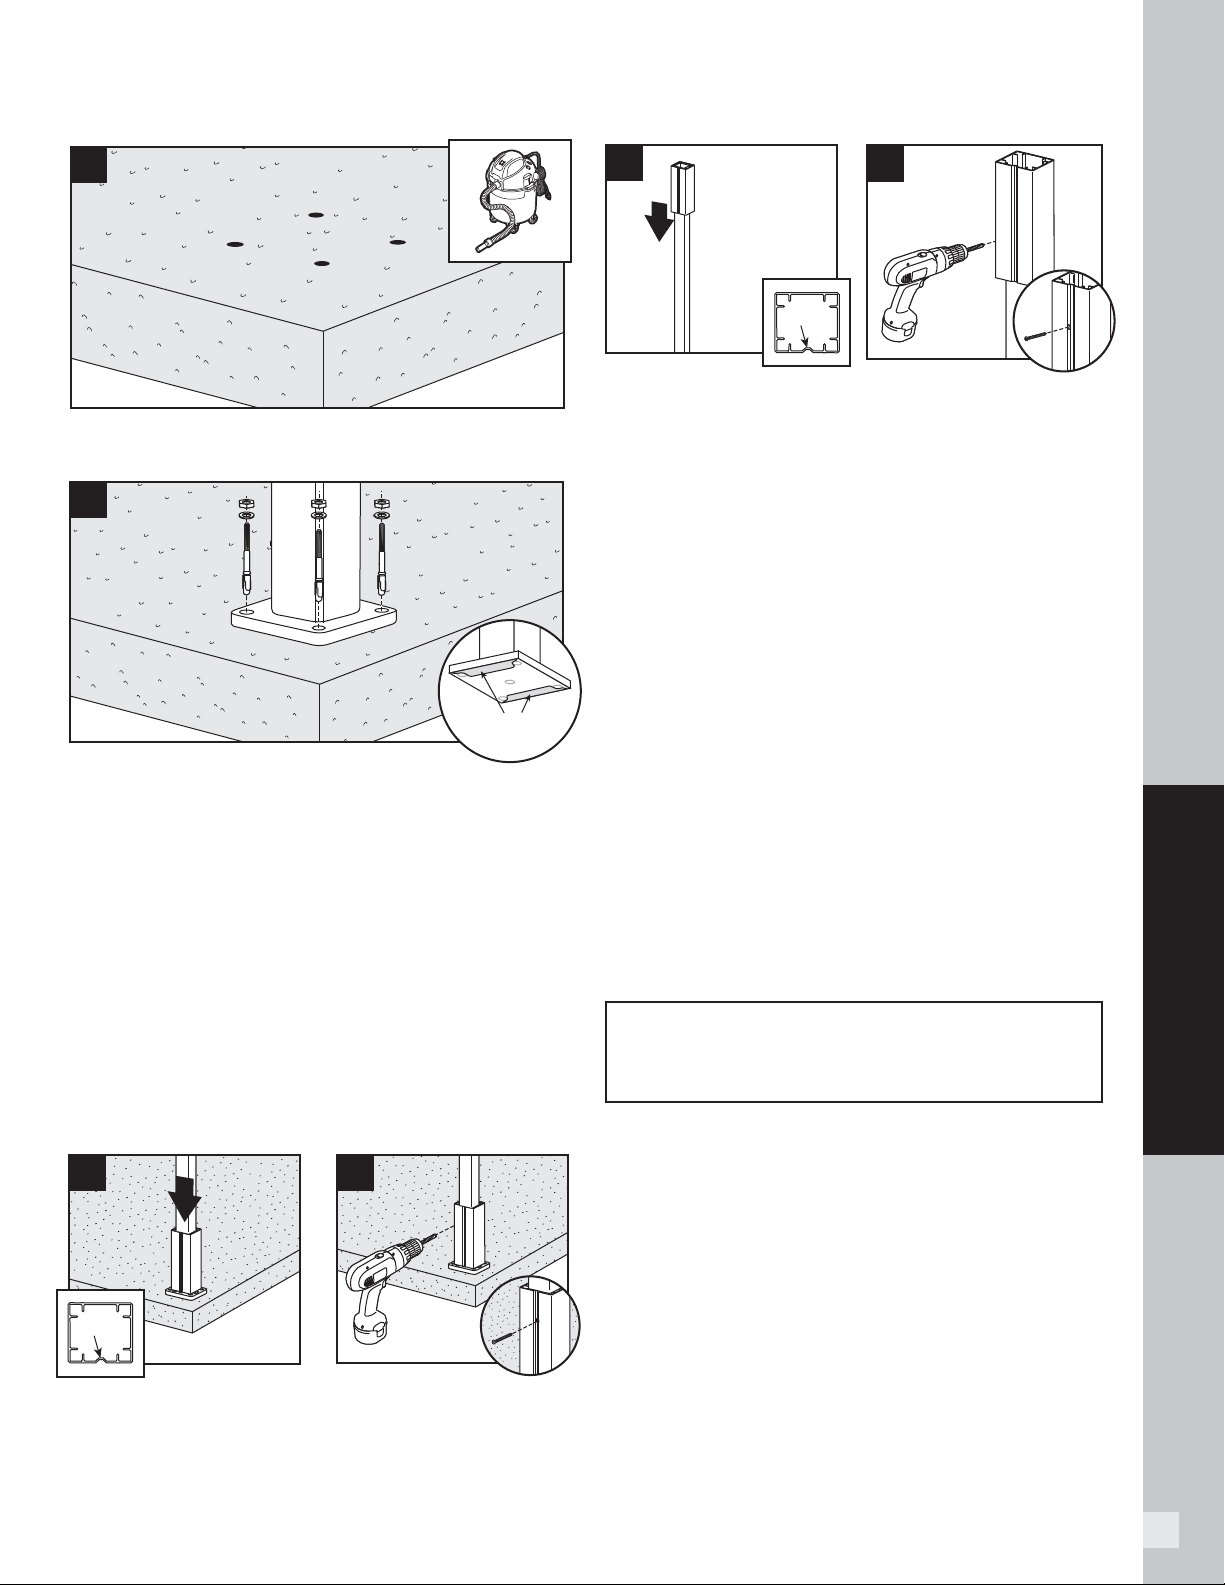
2. Clean out holes to remove all concrete dust.
3. Insert the (2) stainless steel barrier stripes under
the mounting bolt holes. Use appropriate shims if
posts are not plumb. Secure post mount with the
four expansion anchors, washers and nuts.
NOTE: When using hammer to tap anchors in place,
keep the threaded nut at the top of the anchor in order to
not damage the threads.
NOTE: Recommended torque for anchors is 20 ft-lbs.
Install Guide Blocks
NOTE: Pre-drilling is not required but is optional for
attachment of guide blocks to post. Use a drill bit slightly
smaller in size than that of screw being installed.
4. Place or rest bottom aluminum guide block on
bottom of post. Place guide on post so that notch is
on a side that does not require railing to be attached.
5. Attach bottom guide block using one 10 x 1" (25 mm)
self-tapping screw (provided) in notch to lock guide
block onto post.
6. Location of top guide block will vary slightly based
on type and height of railing being installed.
Determine this measurement and place top guide
block in location where top bracket for desired
railing would be approximately on center of the top
railing bracket location.
7. Attach top guide block using one 10 x 1" (25 mm)
self-tapping screw (provided) in notch to lock guide
block onto post.
Install Railing System of Choice
IMPORTANT NOTES:
» Quantity of 18 self-tapping screws are provided to
cover all types of Trex railing bracket installations
(Transcend, Signature [formerly Reveal], and Select).
Thus depending on the type railing being installed, you
may have screws that are not used.
» Pre-drilling IS REQUIRED when attaching brackets to
designated posts. Use a 9/64" (3.6 mm) drill bit to pre-
drill at specifi ed locations according to instructions
provided with railing kits.
» If using 6x6 post sleeves, attach designated railing
brackets using #8-15 x 1-3/4” (44 mm) 316 stainless
steel self-tapping screws (
not provided
).
NOTE: If installing Trex lighting on the posts,
drill hole through support blocks to allow wiring for
lights to be below the surface of the decking.
2
3
BarrierBarrier
LOCATION AND INSTALLATION OF POST MOUNTS – CONCRETE/CONTINUED
6
notch
7
5
4
notch
Loading ...
Loading ...
Loading ...