Loading ...
Loading ...
Loading ...
86
SIGNATURE RAILING
INSTALLATION OF HORIZONTAL SWIVEL RAILING/CONTINUED
TREX SIGNATURE
STANDARD
Cutting Top Rail
Option 1:
For Post-to-Post Configuration
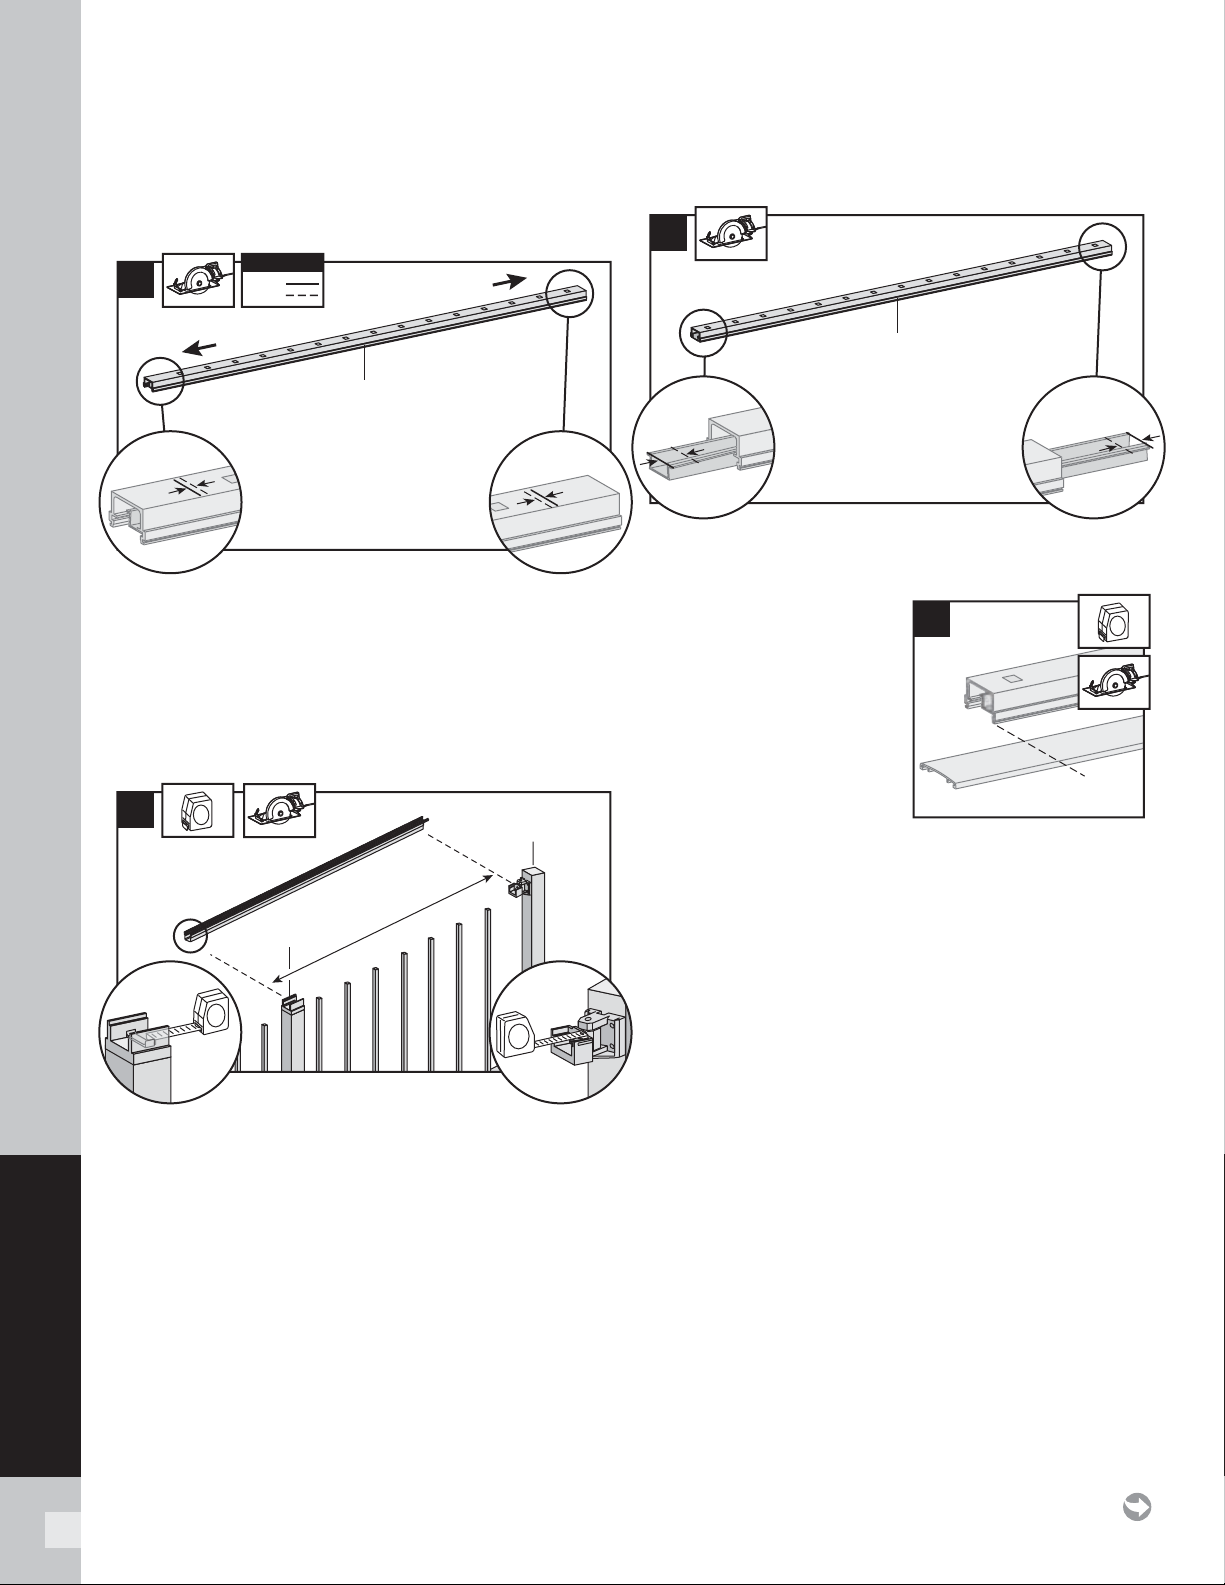
5a. Cut top rail to the measurement between the top
swivel brackets. For standard-post-to-standard-
post confi gurations this would be same dimensions
as that of the bottom rail.
Cutting Top Rail
Option 2:
For Post-to-Crossover-Post Configuration
5b. When going from standard-post-to-crossover-post,
measurement must be taken from inside of top
horizontal swivel bracket to inside lip of crossover
bracket (which is attached to top of crossover
post).
Cutting Top Rail Insert and Cover
6. Slide rail insert out and cut 3/4" (1.9 cm) FROM
EACH SIDE of insert, then slide back inside rail
and center.
7. Mark and cut top rail
cover same length as
top rail for all top rail
confi gurations.
8.
Attaching Center
Baluster to Bottom Rail
See instructions on page 81.
9.
Attaching Bottom Rail Cover and Bottom
Rail to Brackets
See instructions on page 81.
10.
Installing Remaining Balusters into
Bottom Rail
See instructions on page 81.
11.
Attach Upper Railings
See instructions on page 82.
12.
Attachment of Bracket Covers, Skirts, and
Caps
See instructions on page 83.
13.
Attachment of Foot Block (Required ONLY for
All Clear Span Applications Over 6
'
[1.83 m])
See instructions on page 89.
5a
1/4"
(0.6 cm)
1/4"
(0.6 cm)
1/4"
(0.6 cm)
1/4"
(0.6 cm)
KEY
Mark
Cut
KEY
Top rail
Standard post
Standard post
5b
Crossover
post
Standard
post
6
3/4"
(1.9 cm)
3/4"
(1.9 cm)
3/4"
(1.9 cm)
3/4"
(1.9 cm)
Top rail
7
Loading ...
Loading ...
Loading ...