Loading ...
Loading ...
Loading ...
123
RAILING
123
SELECT RAILING
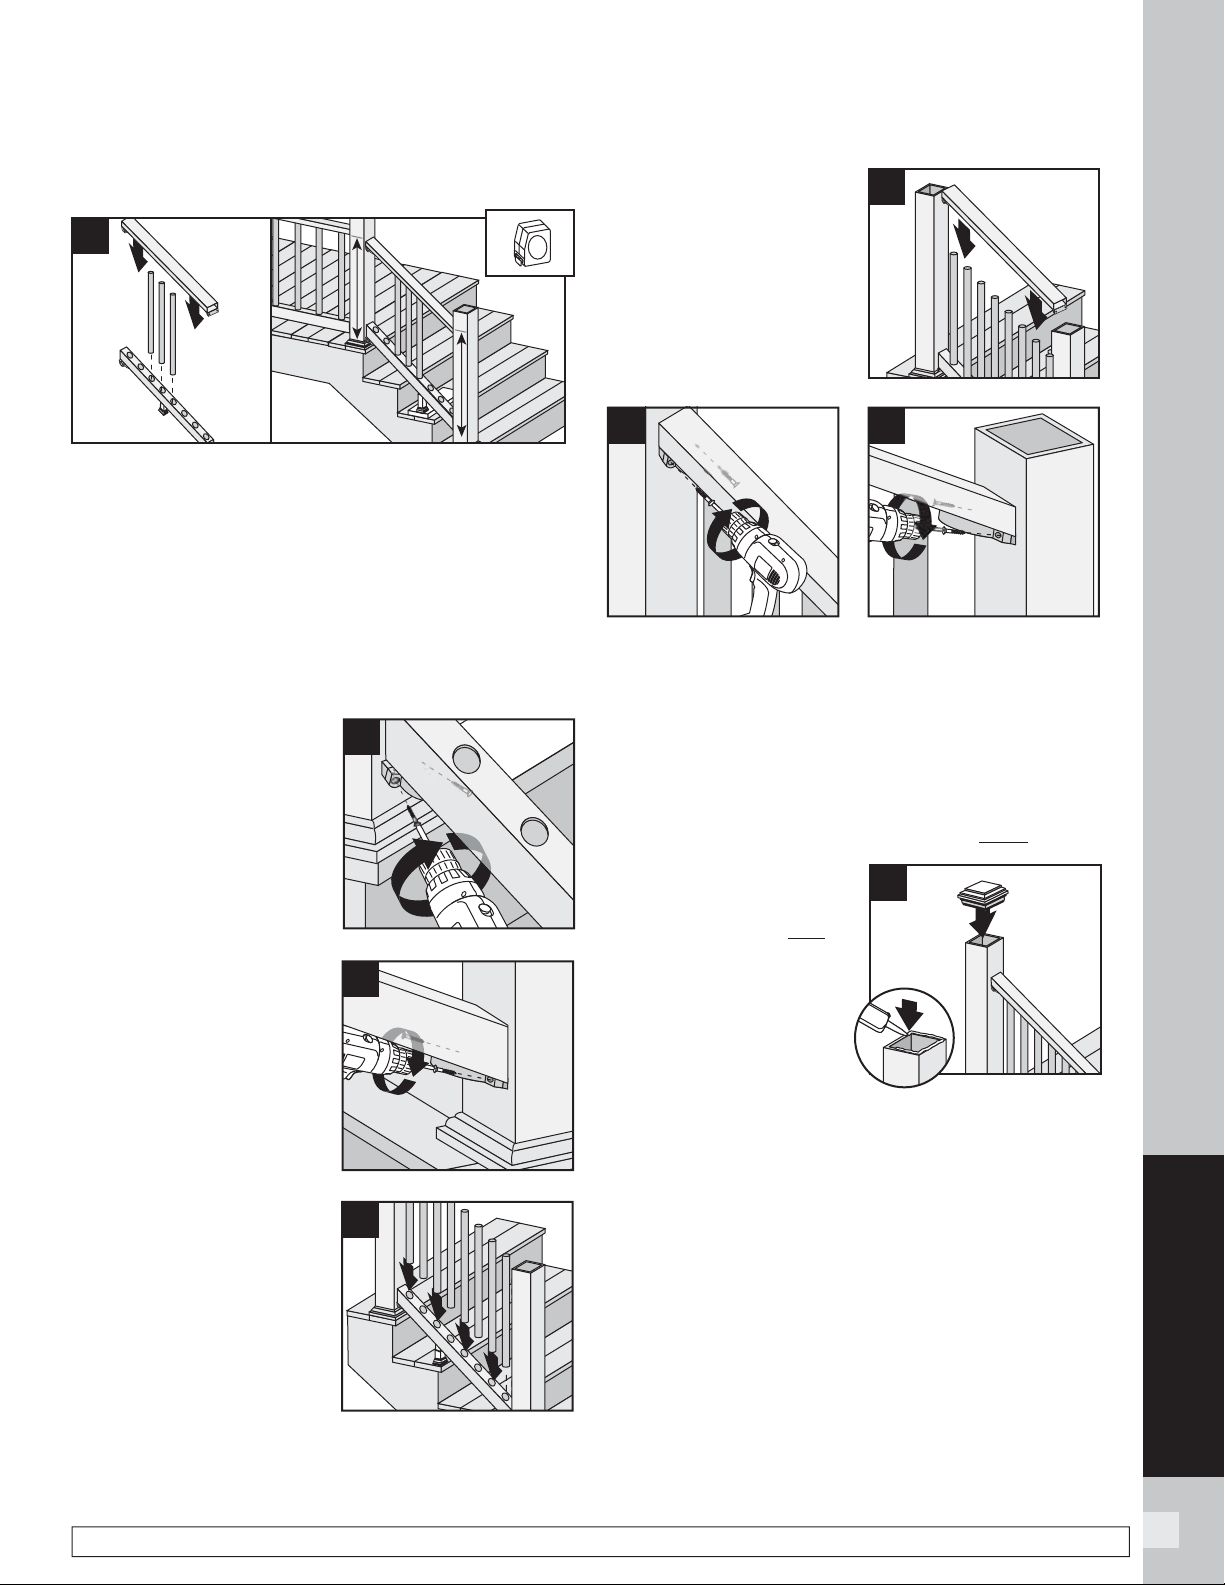
HOW TO INSTALL TREX SELECT STAIR RAILING/CONTINUED
TREX SELECT
NOTE: Construction methods are always improving. Please refer to www.trex.com for the most up-to-date installation requirements.
Attachment of Bottom Rail to Post
6a. Assemble a few of the balusters into the bottom
and top railings (make sure balusters are setting
at 90º) and set this on scrap material clearing the
stair treads to determine where bracket locations
need to be. Measure to make sure that the bottom
railing will clear the stair treads and the top railing
will be aligned with horizontal railing (remember
in most cases, a longer post and post sleeve will
be needed on the lower section of stair rail to
accommodate stair angle).
6b. After locating
appropriate position for
bottom rail remove top
rail and balusters and
attach bottom rail stair
bracket to upper post
using two
#8-10 x 3" wood screws
(provided).
6c. Attach bottom stair
rail stair bracket to
lower post using two
#8-10 x 3" wood screws
(provided). For best
results set drill to low
speed when installing
these screws.
Install Balusters
7. Slide balusters into
bottom rail until
balusters are fully
seated.
Attachment of Top
Rail to Post
8a. Place top rail onto
balusters, allowing the
top rail to rest on the
surface of the balusters.
8b. Attach top stair rail bracket to upper post using two
#8-10 x 3" screws (provided). For best results set
drill to low speed when installing these screws.
8c. Attach top stair rail bracket to lower post using two
#8-10 x 3" screws (provided). For best results set
drill to low speed when installing these screws.
Attaching Post Caps and Installing New Foot
Block
9. Secure post caps
with silicone or PVC
adhesive. Attach new
foot block per foot
block instructions.
NOTE: Clean-up any
excess adhesive before
drying.
6a
6b
6c
8a
7
8b
8c
2
9
1
Loading ...
Loading ...
Loading ...