Loading ...
Loading ...
Loading ...
21
LIGHTING
NOTE: Construction methods are always improving. Please refer to www.trex.com for the most up-to-date installation requirements.
HOW TO INSTALL TREX SIGNATURE CAP LIGHT
PARTS
A
Post Cap Light
(includes 5ft male-to-male wire)
9/16" x 6" or Longer
(14 mm x 152 mm)
TOOLS NEEDED
» 5ft, 10ft, 20ft, 40ft, and 60ft connection/extension
wires sold separately (these are male-to-male
connection wires).
HELPFUL TIPS
» Leave slack in wire to make fi xture terminations.
» Post lamps work well at changes in levels of a
deck—at the top or the bottom of the stairs, or in
conjunction with post cap lights.
» Splitters should be used at each post that has
lights and depending on spacing in between each
riser and recessed light.
» Cap all unused female connections with caps
provided or weather-resistant silicone to prevent
water damage or corrosion.
» The splitter is cross-linked so there is no specified
plug for lights versus lead wires.
» Leads attached to each light are approx.
5.5' (1.67 m) in length and have male terminals
to plug into splitter.
» Use a separate dimmer control for each light type
for maximum control.
» It is recommended to have power source on when
installing lights to ensure all components work.
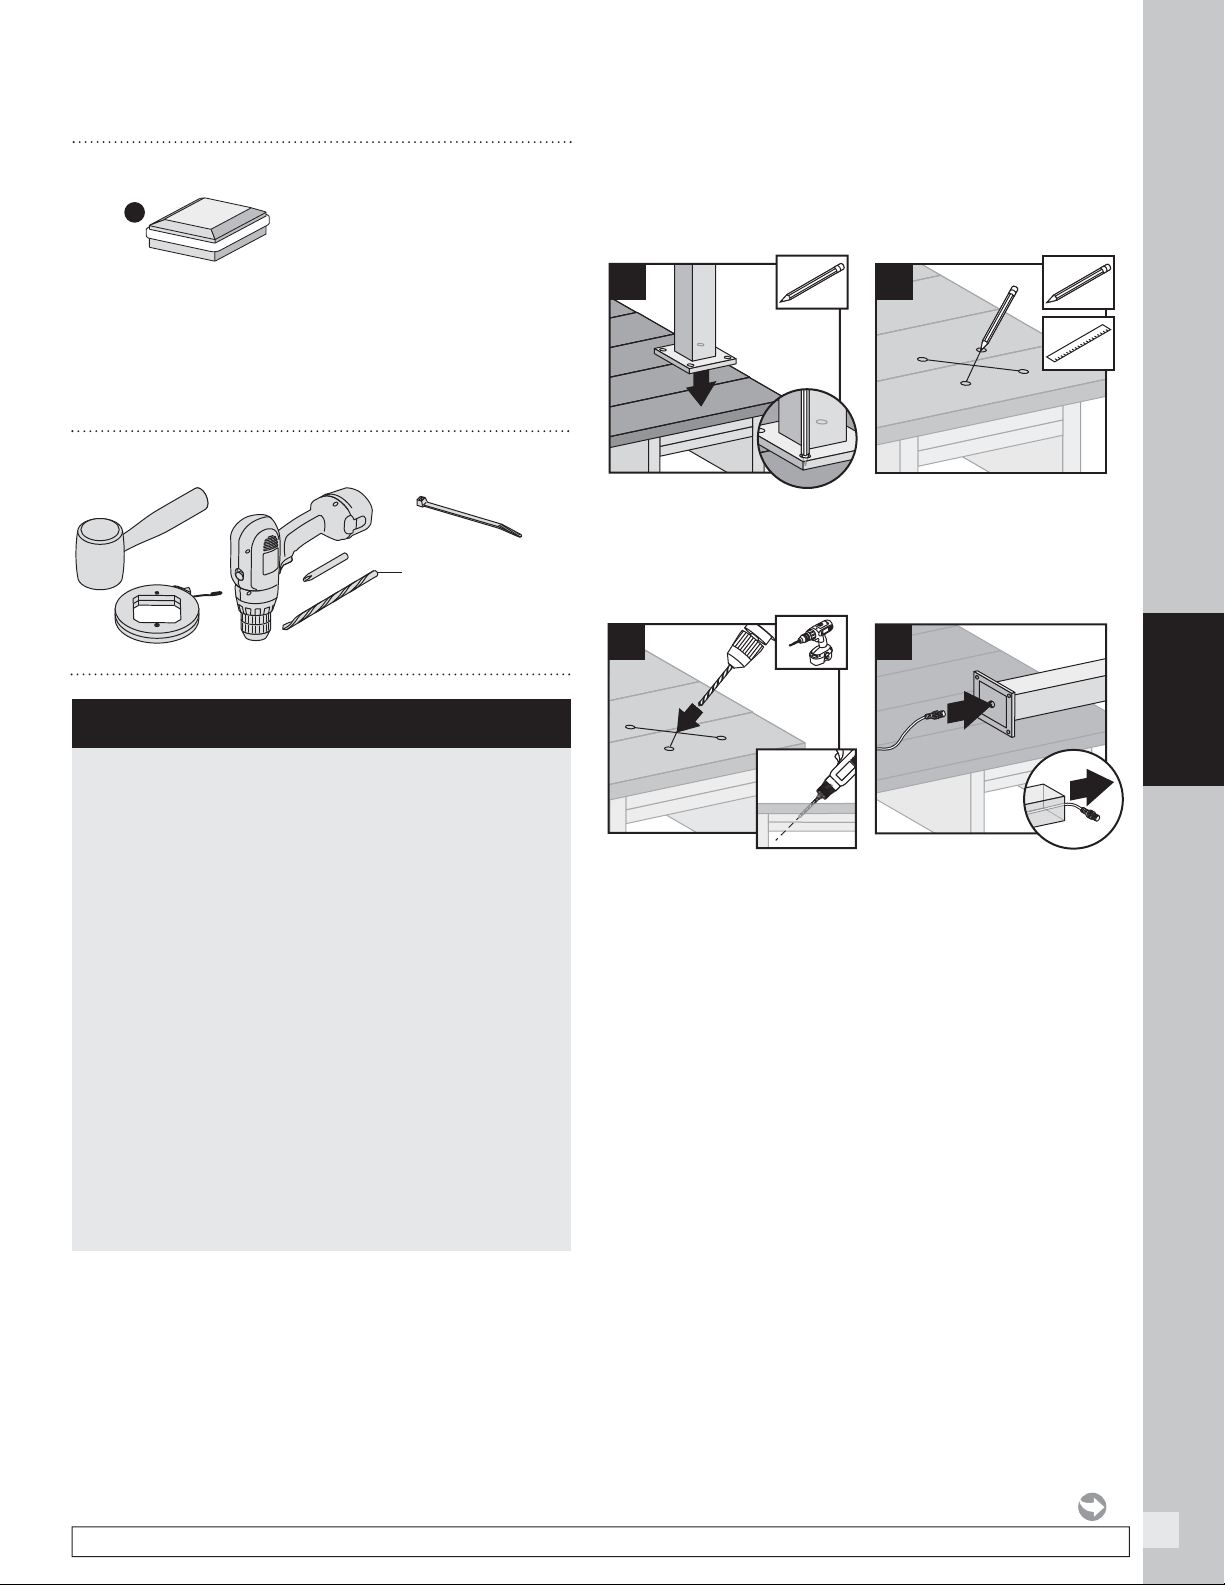
Installing Post Cap Lights
NOTE: Instructions shown below are for new deck
installation and are shown BEFORE railing system has
been installed.
1. Before attaching post to deck, locate placement of
post and mark desired bolt locations.
2. Using a straight edge, mark an “X” between the four
bolt locations.
3. Using a 9/16" (14 mm) x 6" (152 mm [or longer]) drill
bit, drill a diagonal hole through the decking and
blocking. Ensure that the angle will allow wire to not
be pinched by support plate under blocking (if using
Trex ALPOSTHWDECK mounting kit). (See Making
Connections section for details.)
4. Turn post upside down and fi sh 5' male-to-male wire
(provided) through hole in baseplate.
1
3
2
4
Loading ...
Loading ...
Loading ...