Loading ...
Loading ...
Loading ...
93
SIGNATURE RAILING
ATTACHING STAIR BRACKETS (FIXED STAIR, STAIR SWIVEL, AND
COMPOUND SWIVEL) TO SIGNATURE POSTS AND PRESSURE-
TREATED POST AND POST SLEEVES
TREX SIGNATURE
NOTES:
» All Signature fi xed stair brackets work ONLY with
stair slopes of 32°-37°.
» Illustrations shown are representations when
using Signature post, but same rules apply if using
pressure-treated posts and post sleeves.
» Use a clamp to help hold stair brackets in place
while fastening with screws.
» IMPORTANT NOTE: BEFORE ATTACHING ANY
UPPER BRACKETS MAKE SURE PROPER RAILING
HEIGHTS ARE ACHIEVED. RAILING HEIGHTS AND
UPPER BRACKET HEIGHTS MAY NEED TO BE
ADJUSTED, HOWEVER, DO NOT REDUCE HEIGHTS
BASED ON YOUR RAILING CODE REQUIREMENTS.
MEASURE CAREFULLY as dimension heights may
need to be adjusted!
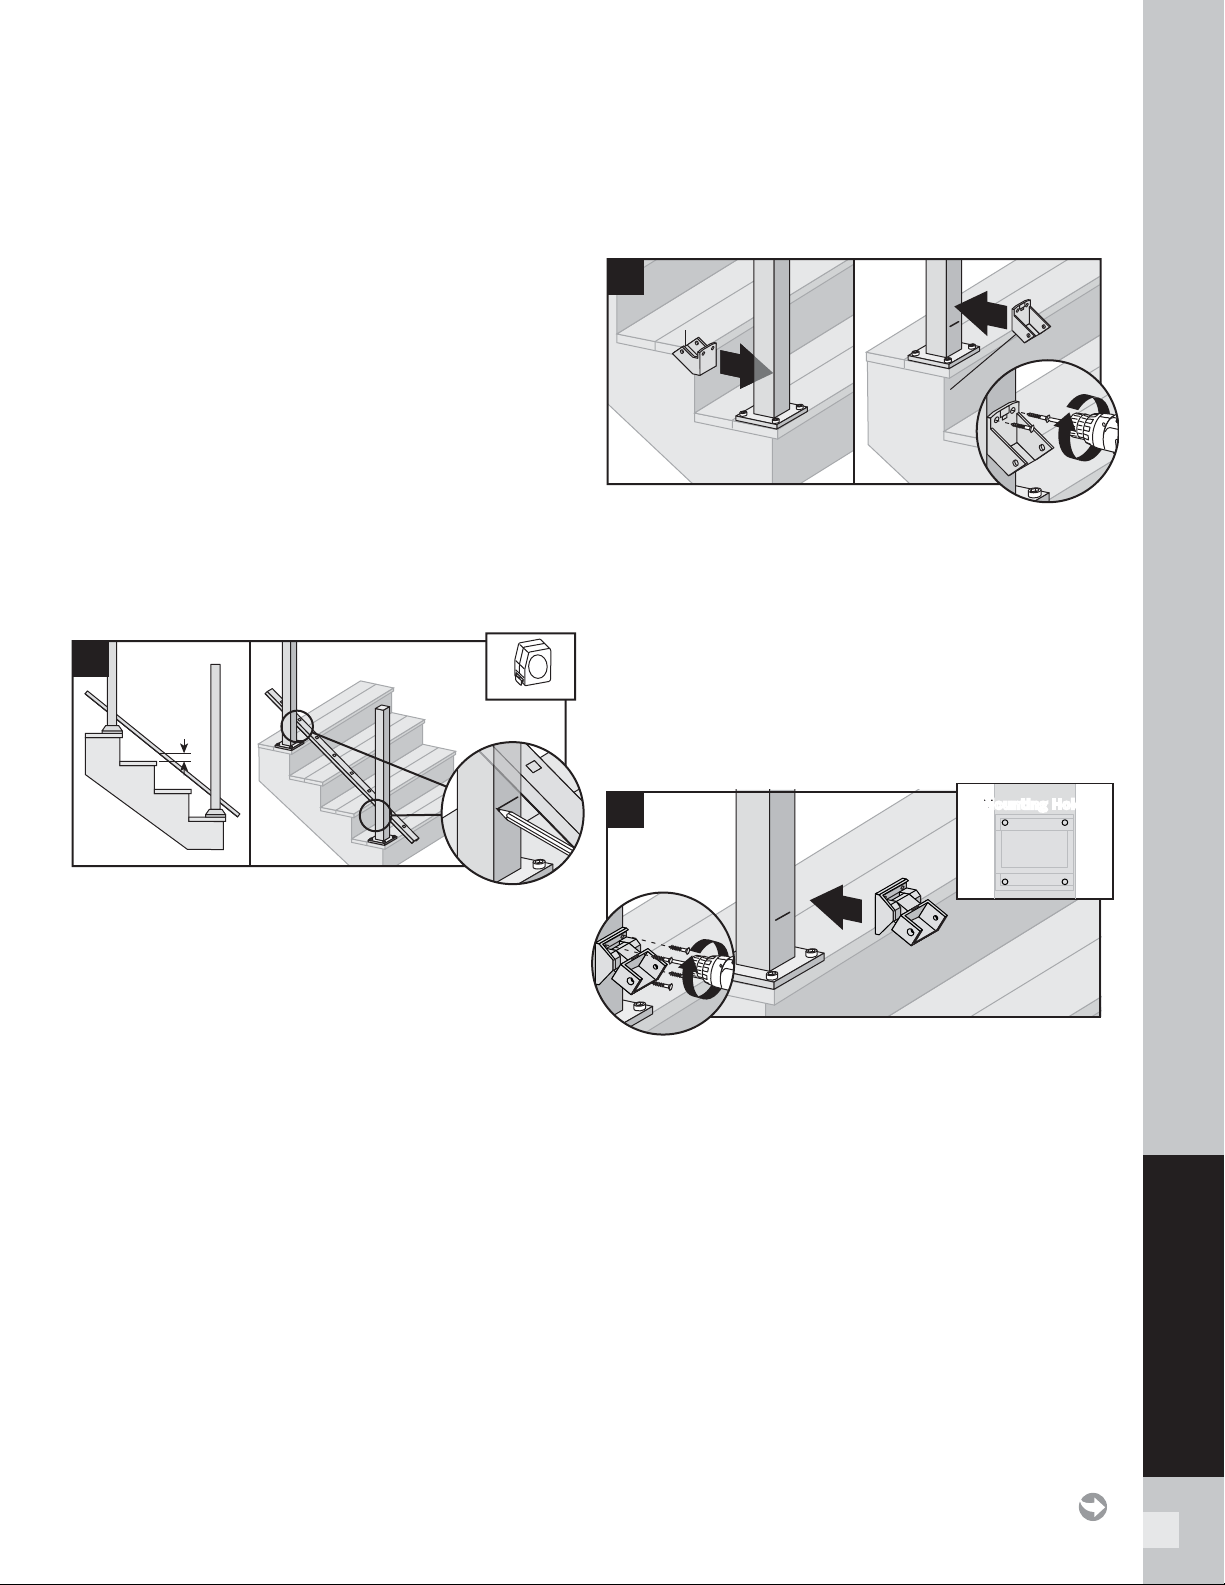
1. Lay bottom stair rail on steps beside posts. Position
bottom rail at least 1" (2.5 cm) above nose of stair
tread.
TIP: Use a 1" (2.5 cm) deck board as a spacer board
and clamp rails to post. Mark where lower brackets
are to be attached to both posts. Mark at underside of
railing location.
Installing Lower Fixed Stair Brackets
2. Center lower stair bracket on post above the
marked line and attach using two self-tapping
screws (provided). In some cases it may be diffi cult
to attach the stair bracket on the lower stair post.
Recommend using a 90º cordless drill in this area if
possible to attach screws.
Installing Lower Stair Swivel and Compound
Swivel Brackets
NOTE: Picture refl ects lower stair swivel bracket.
3. Center lower stair swivel bracket on post above
the marked line and attach using four self-tapping
screws (provided). In some cases it may be diffi cult
to attach the stair bracket on the lower stair post.
Recommend using a 90º cordless drill in this area if
possible to attach screws.
1"
(2.5 cm)
1
2
Bottom stair
bracket –
bottom rail
Top stair
bracket –
bottom rail
1
1
2
1
3
Mounting HolesMounting Holes
2
Loading ...
Loading ...
Loading ...