Loading ...
Loading ...
Loading ...
111
SIGNATURE RAILING
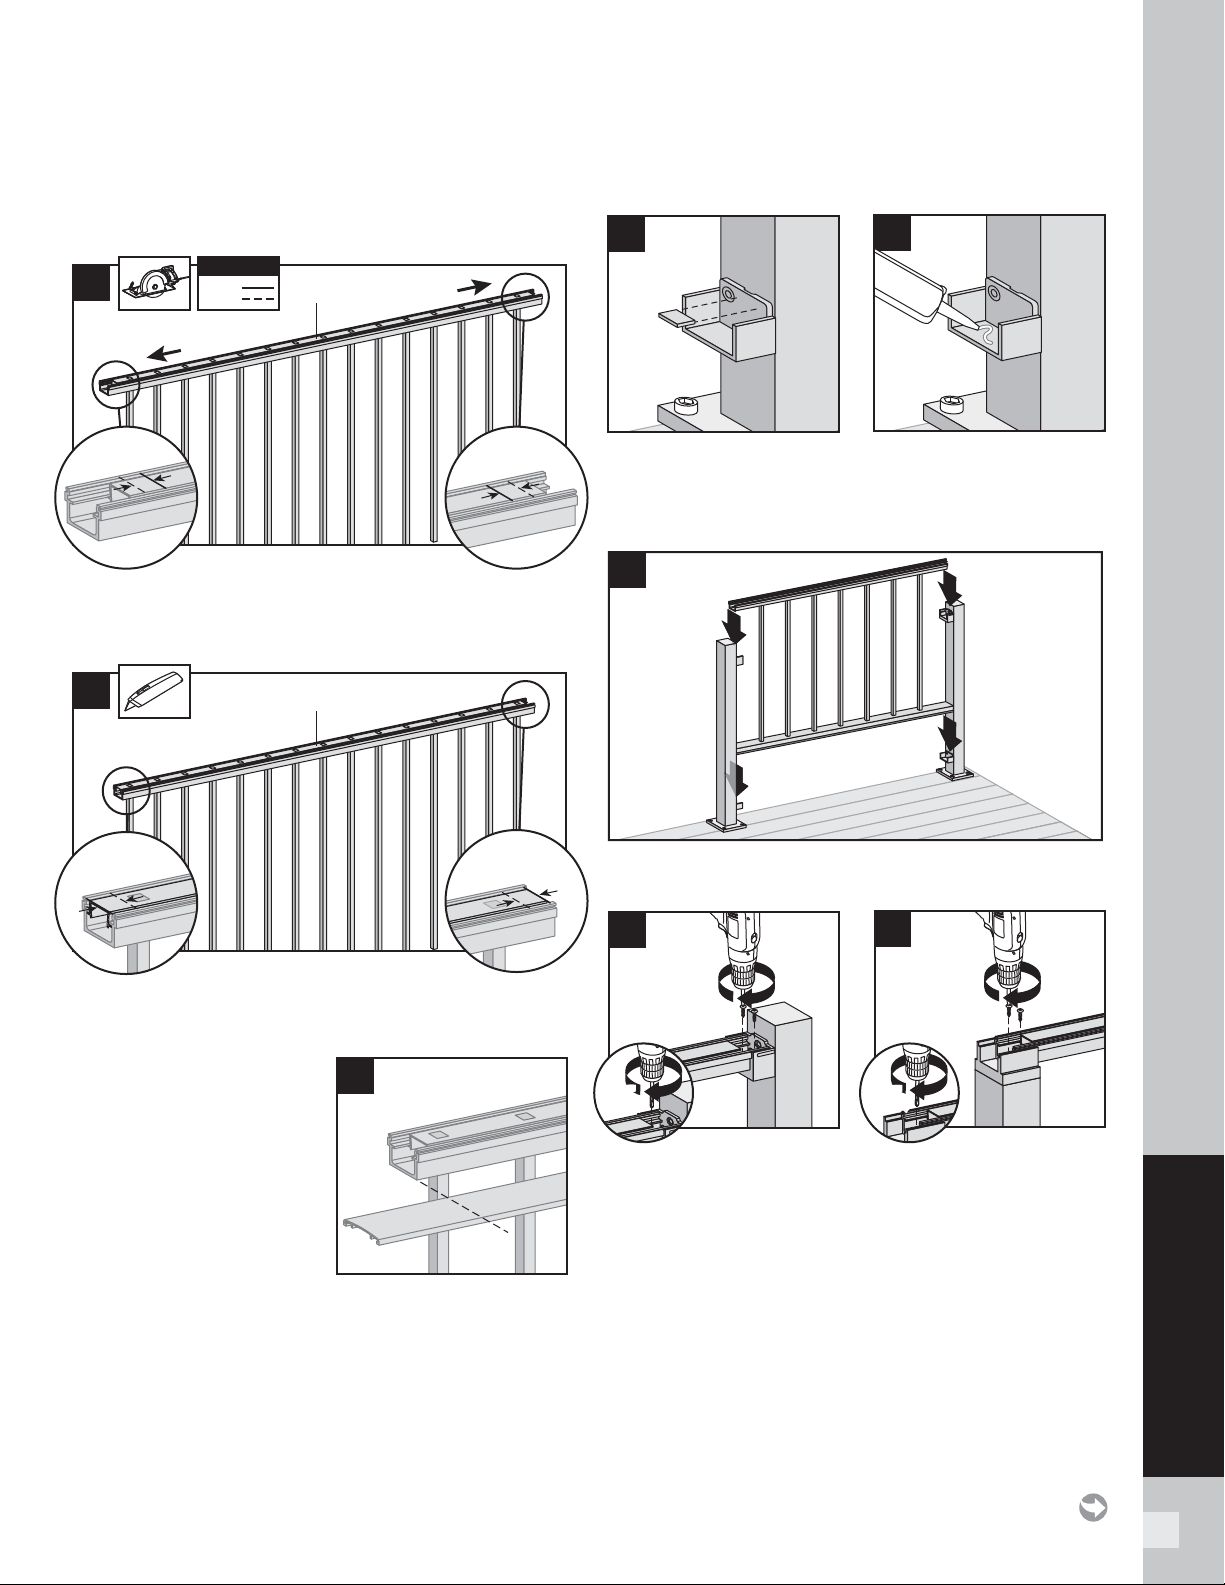
Cutting Top Rail
Option 3:
For Crossover Post-to-Crossover Post Configuration
3c. Cut each end of top rail 3/4" (19 mm) LONGER
than the mark to allow for fit into the crossover post
bracket on each side.
4. Using razor knife or other cutting tool, cut rail insert
3/4" (19 mm) FROM EACH SIDE.
5. Mark and cut top rail
cover same length as
top rail for all top rail
confi gurations.
Install Signature Panel
6. Break or cut the bottom tab off the bottom brackets.
7. Put a dab of silicone in the basket of the bottom
bracket to prevent rattle.
8. Place panel in bottom and top brackets.
9. For post-to-post confi guration, fasten upper rail to
each bracket by installing screws diagonally through
upper rail into bracket using two self-tapping screws
each side (provided with bracket kit).
10. For crossover post confi guration, fasten upper rail
to crossover post by installing screws diagonally
through upper rail into post using two self-tapping
screws each side (provided with bracket kit).
NOTE: Pre-drilling is recommended (7/64" [2.8 mm]
drill bit) for attachment of railing to bracket.
3c
3/4"
(19 mm)
3/4"
(19 mm)
3/4"
(19 mm)
3/4"
(19 mm)
KEY
Mark
Cut
KEY
Top rail
Crossover post
Crossover post
4
3/4"
(19 mm)
3/4"
(19 mm)
3/4"
(19 mm)
3/4"
(19 mm)
Top rail
8
5
6
7
HOW TO INSTALL PANELS/CONTINUED
TREX SIGNATURE
2
10
1
7/64"
(2.8 mm)
7/64"
(2.8 mm)
2
9
1
7/64"
(2.8 mm)
7/64"
(2.8 mm)
Loading ...
Loading ...
Loading ...