Loading ...
Loading ...
Loading ...
106
SIGNATURE RAILING
NOTE: Construction methods are always improving. Please refer to www.trex.com for the most up-to-date installation requirements.
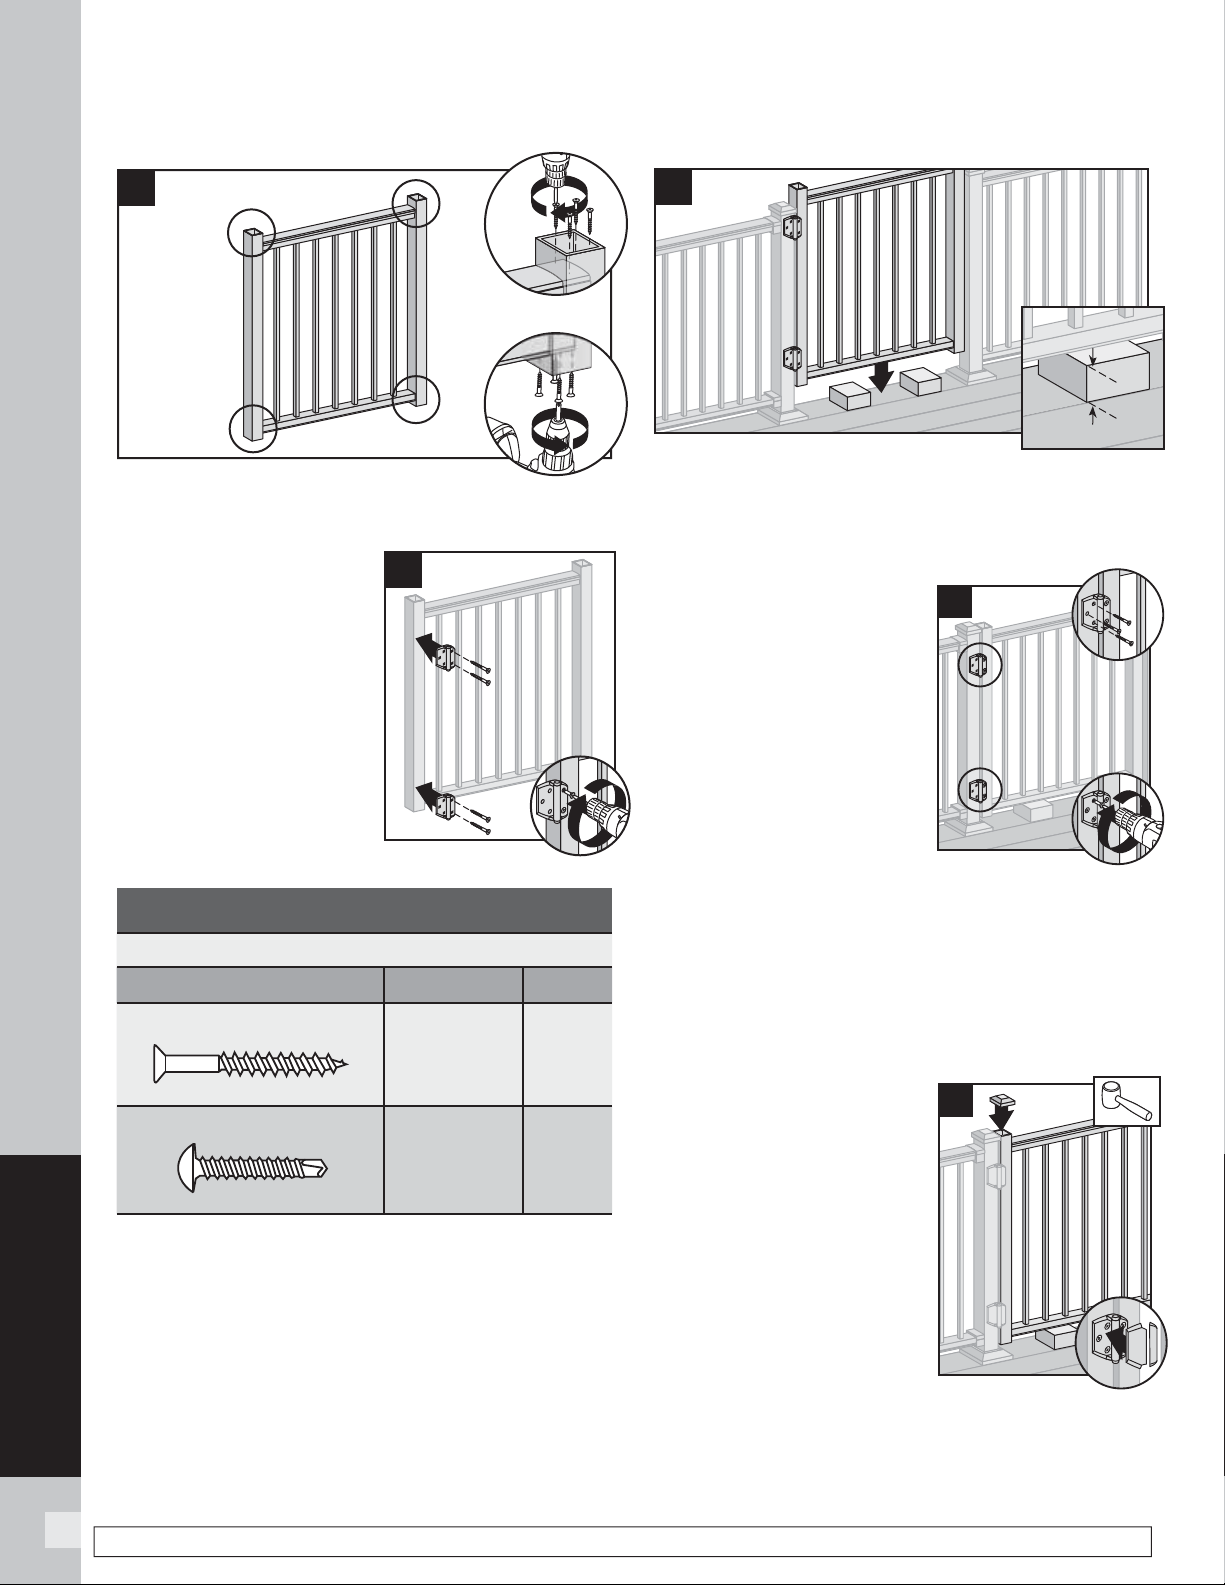
8. Secure posts to panel with four #8-18 short
self-tapping screws (provided) in each location.
9. Attach shorter side of
hinge to the gate.
NOTE: Refer to
instructions included
in hardware package.
Be sure to use correct
fasteners for aluminum.
See chart below.
NOTE: Use of non-Trex hardware is not
recommended and could result in serious
injury or death.
10. Place gate in opening on blocks. Sweep between
bottom of gate and top of deck cannot exceed
4" (102 mm) per IRC/IBC code regulations. Ensure
bottom gate posts will be high enough to clear skirts
on bottom of deck posts.
11. Make sure posts are plumb
and gate is level. Attach
longer side of hinges to
post using appropriate
hardware for type of post
installed. Install hinge
cover.
NOTES:
» Both wood and
aluminum screws are
included in hardware kit.
(Refer to chart under
Step 9.)
» If using Trex Post Mounts with Post Sleeves,
pre-drilling is required using 1/8" (3 mm) drill
bit, as you must go through both aluminum
sleeve and internal post.
12. After determining location and height of hinge
and hasp, install per
instructions included with
hardware kit.
13. Ensure proper operation
of gate. Hinge tension is
adjustable (check hardware
kit instructions for more
detail).
14. After gate installation,
place blocks under gate
for support. Use a rubber
mallet to install cap onto
gate post. Repeat for other
gate post cap. Snap all
hinge covers into place.
INSTALLING ALUMINUM GATE/CONTINUED
8
1
1
9
2
10
4" max
(102 mm)
4" max
(102 mm)
MINIMUM FASTENER SIZE
SCREWS
Type Length No.
Wood Screw
2-1/2" (64 mm) #9
Metal Screw
2" (51 mm) #8-18
11
2
1
1
14
2
Loading ...
Loading ...
Loading ...