Loading ...
Loading ...
Loading ...
117
SELECT RAILING
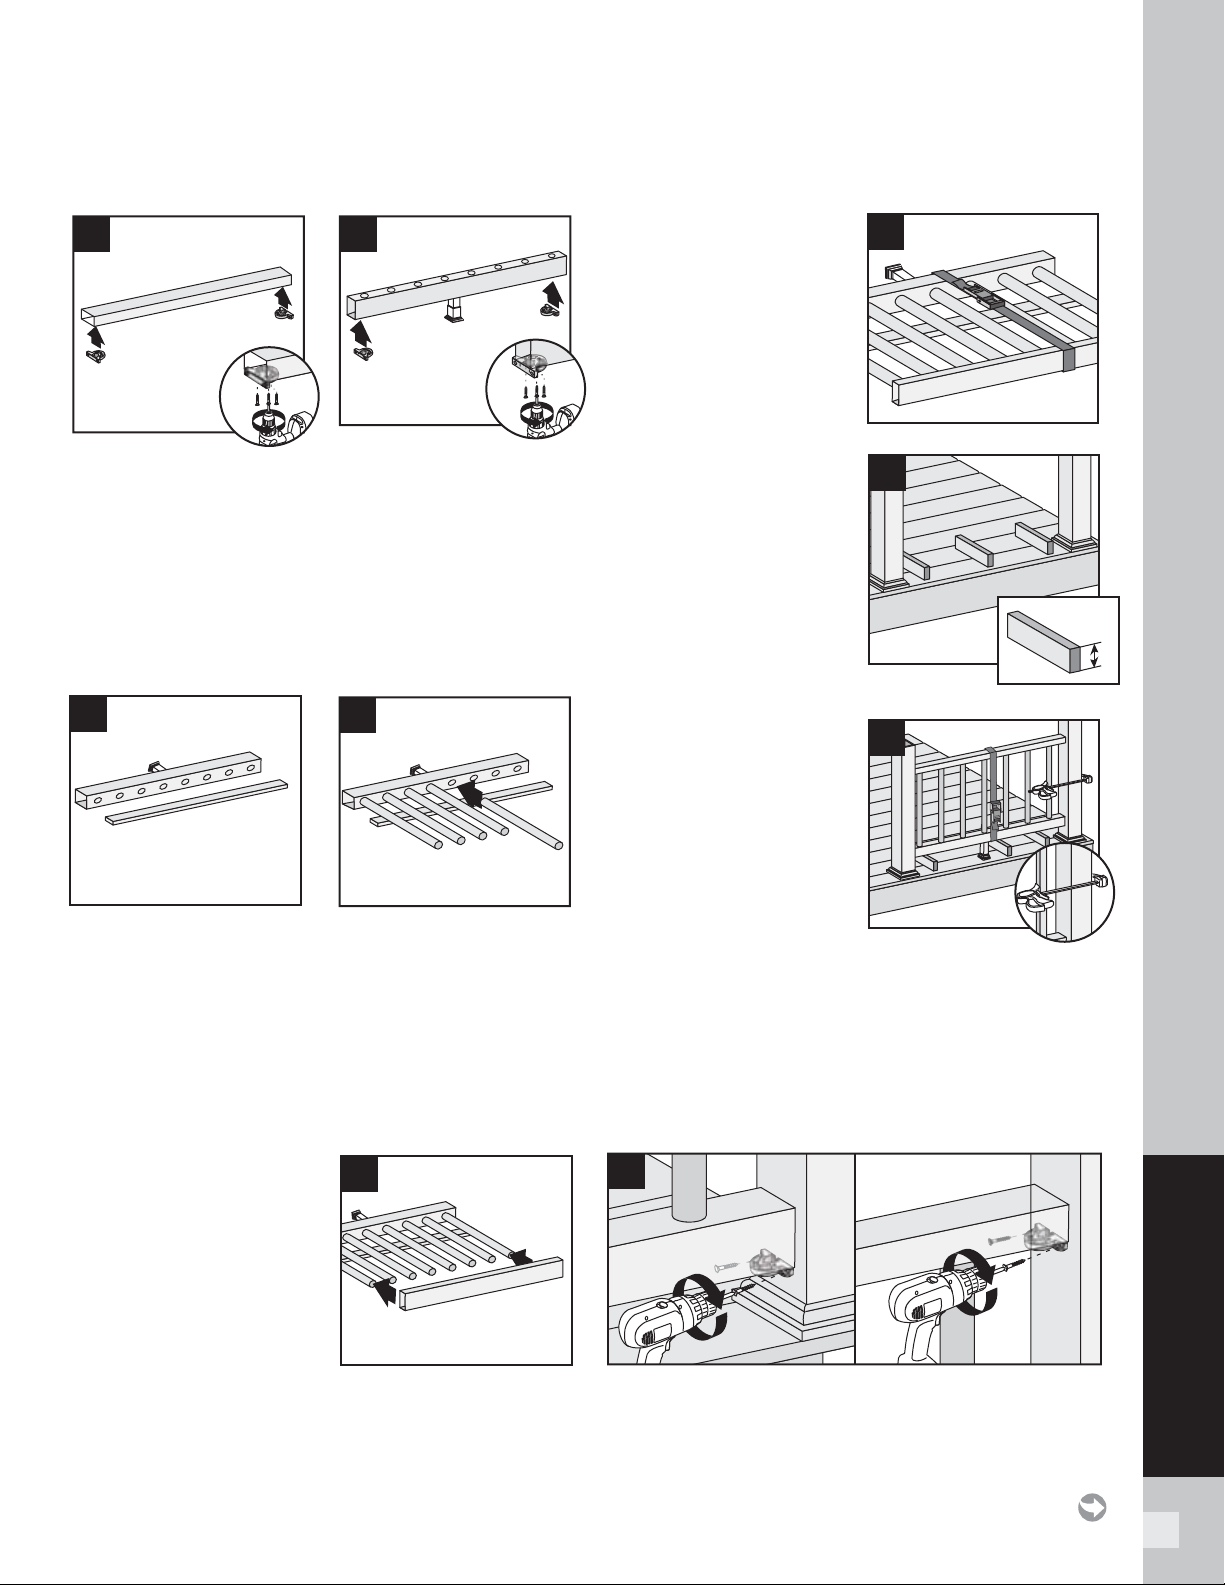
Attaching Brackets to Rails
5a. Position brackets on each end of TOP RAIL on the
same side as baluster holes. Attach brackets using
three #8-18 x 1" self-drilling
screws (provided).
5b. Position brackets on each end of BOTTOM RAIL on
the OPPOSITE SIDE of the baluster holes. Attach
brackets using three #8-18 x 1" self-drilling screws
(provided).
Assembling Railing Section
6a. On a clean fl at surface lay bottom railing on its side.
Make sure to allow enough room for installation
of balusters and top rail. Place a scrap piece of
1" decking board running parallel to bottom rail for
support when installing balusters.
6b. Insert balusters into bottom rail slots until balusters
are fully seated.
6c. Attach top rail to
balusters, feeding each
baluster into required
slots. Start on one end
and work towards the
other.
6d. To help temporarily
secure the railing
section together, place a
ratchet strap around the
top and bottom rail and
tighten until snug. DO
NOT OVERTIGHTEN
AS YOU CAN BEND
THE RAILING.
Installing Railing
Section to Posts
7a. Using scrap material (i.e.
2 x 4s, decking boards,
etc.) cut at least three
support blocks at 3-3/4"
in height. Place one
each on decking surface
beside each post and
one near center of span.
7b. Lift secured railing
section up, and
CENTER this section in
between the spanned
posts on pre-positioned
support blocks.
NOTE: To help stabilize
railing section use a quick-
grip clamp (or other type of
clamp) and clamp the fi rst baluster to post sleeve.
(DO NOT OVERTIGHTEN CLAMP.)
7c. Install both bottom and top brackets on each
side to post using two #8-10 x 2" wood screws
(provided). For best results, set drill to low speed
when installing these screws.
7a
3-3/4"
7b
6c
6d
6a
6b
5b
Bottom Rail
7c
5a
Top Rail
HOW TO INSTALL TREX SELECT RAILING/CONTINUED
TREX SELECT
Loading ...
Loading ...
Loading ...